Unity Face AR SDK Getting Started
Unity Face AR SDK allows developers to create cross-platform face tracking apps in Unity3D with custom Snapchat-like lenses, animated effects, face filters and 3D masks.
note
If you have any issues when running the Banuba Face AR plugin, please refer to the troubleshooting section or contact our support.
Requirements#
- Latest Unity Hub with latest installed Unity
- Installed Unity platform plugins for each required platform: Android, iOS or Web
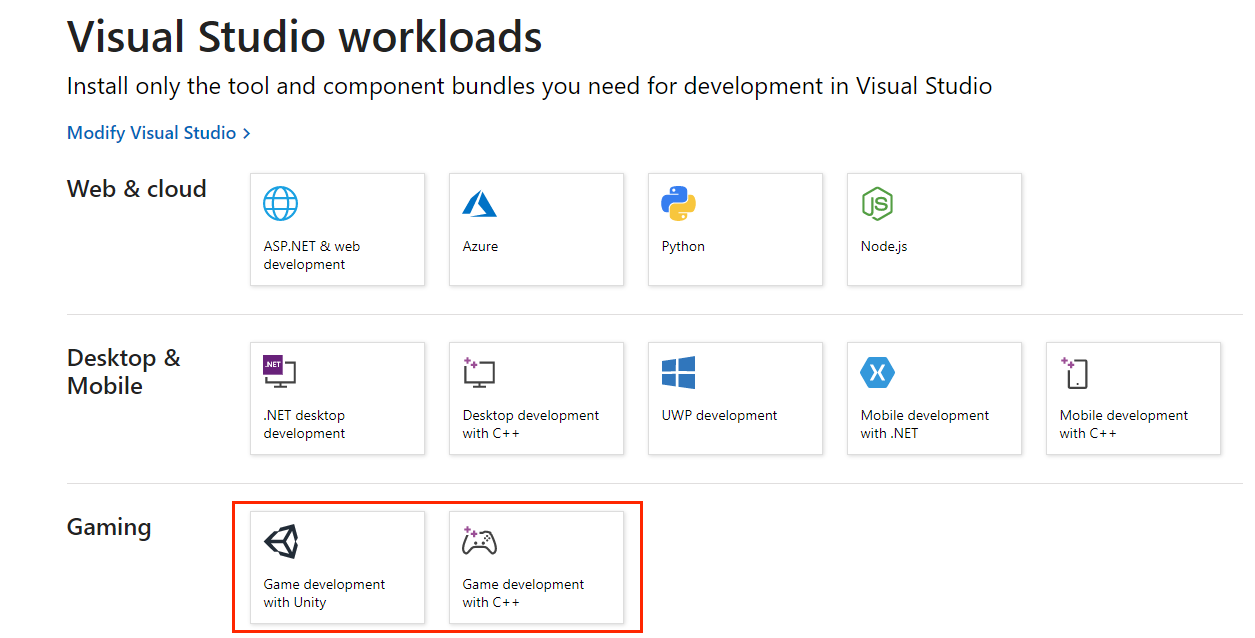
- Windows: Before launching Unity you should check presence of the following tools in Microsoft VS2019:
1. Banuba Face AR plugin for Unity#
Get the client token
To start working with the Face AR Business plugin for Unity, you need to have the client token. To receive the client token please fill in our form on banuba.com website, or contact us via info@banuba.com.
Before opening and building the Demo project, place your client token inside appropriate file in the following location: Assets/BanubaFaceAR/Resources/BanubaClientToken.txt.
2. Preparation#
Run Unity Hub and add the BanubaSDK Unity project which comes with SDK Archive.

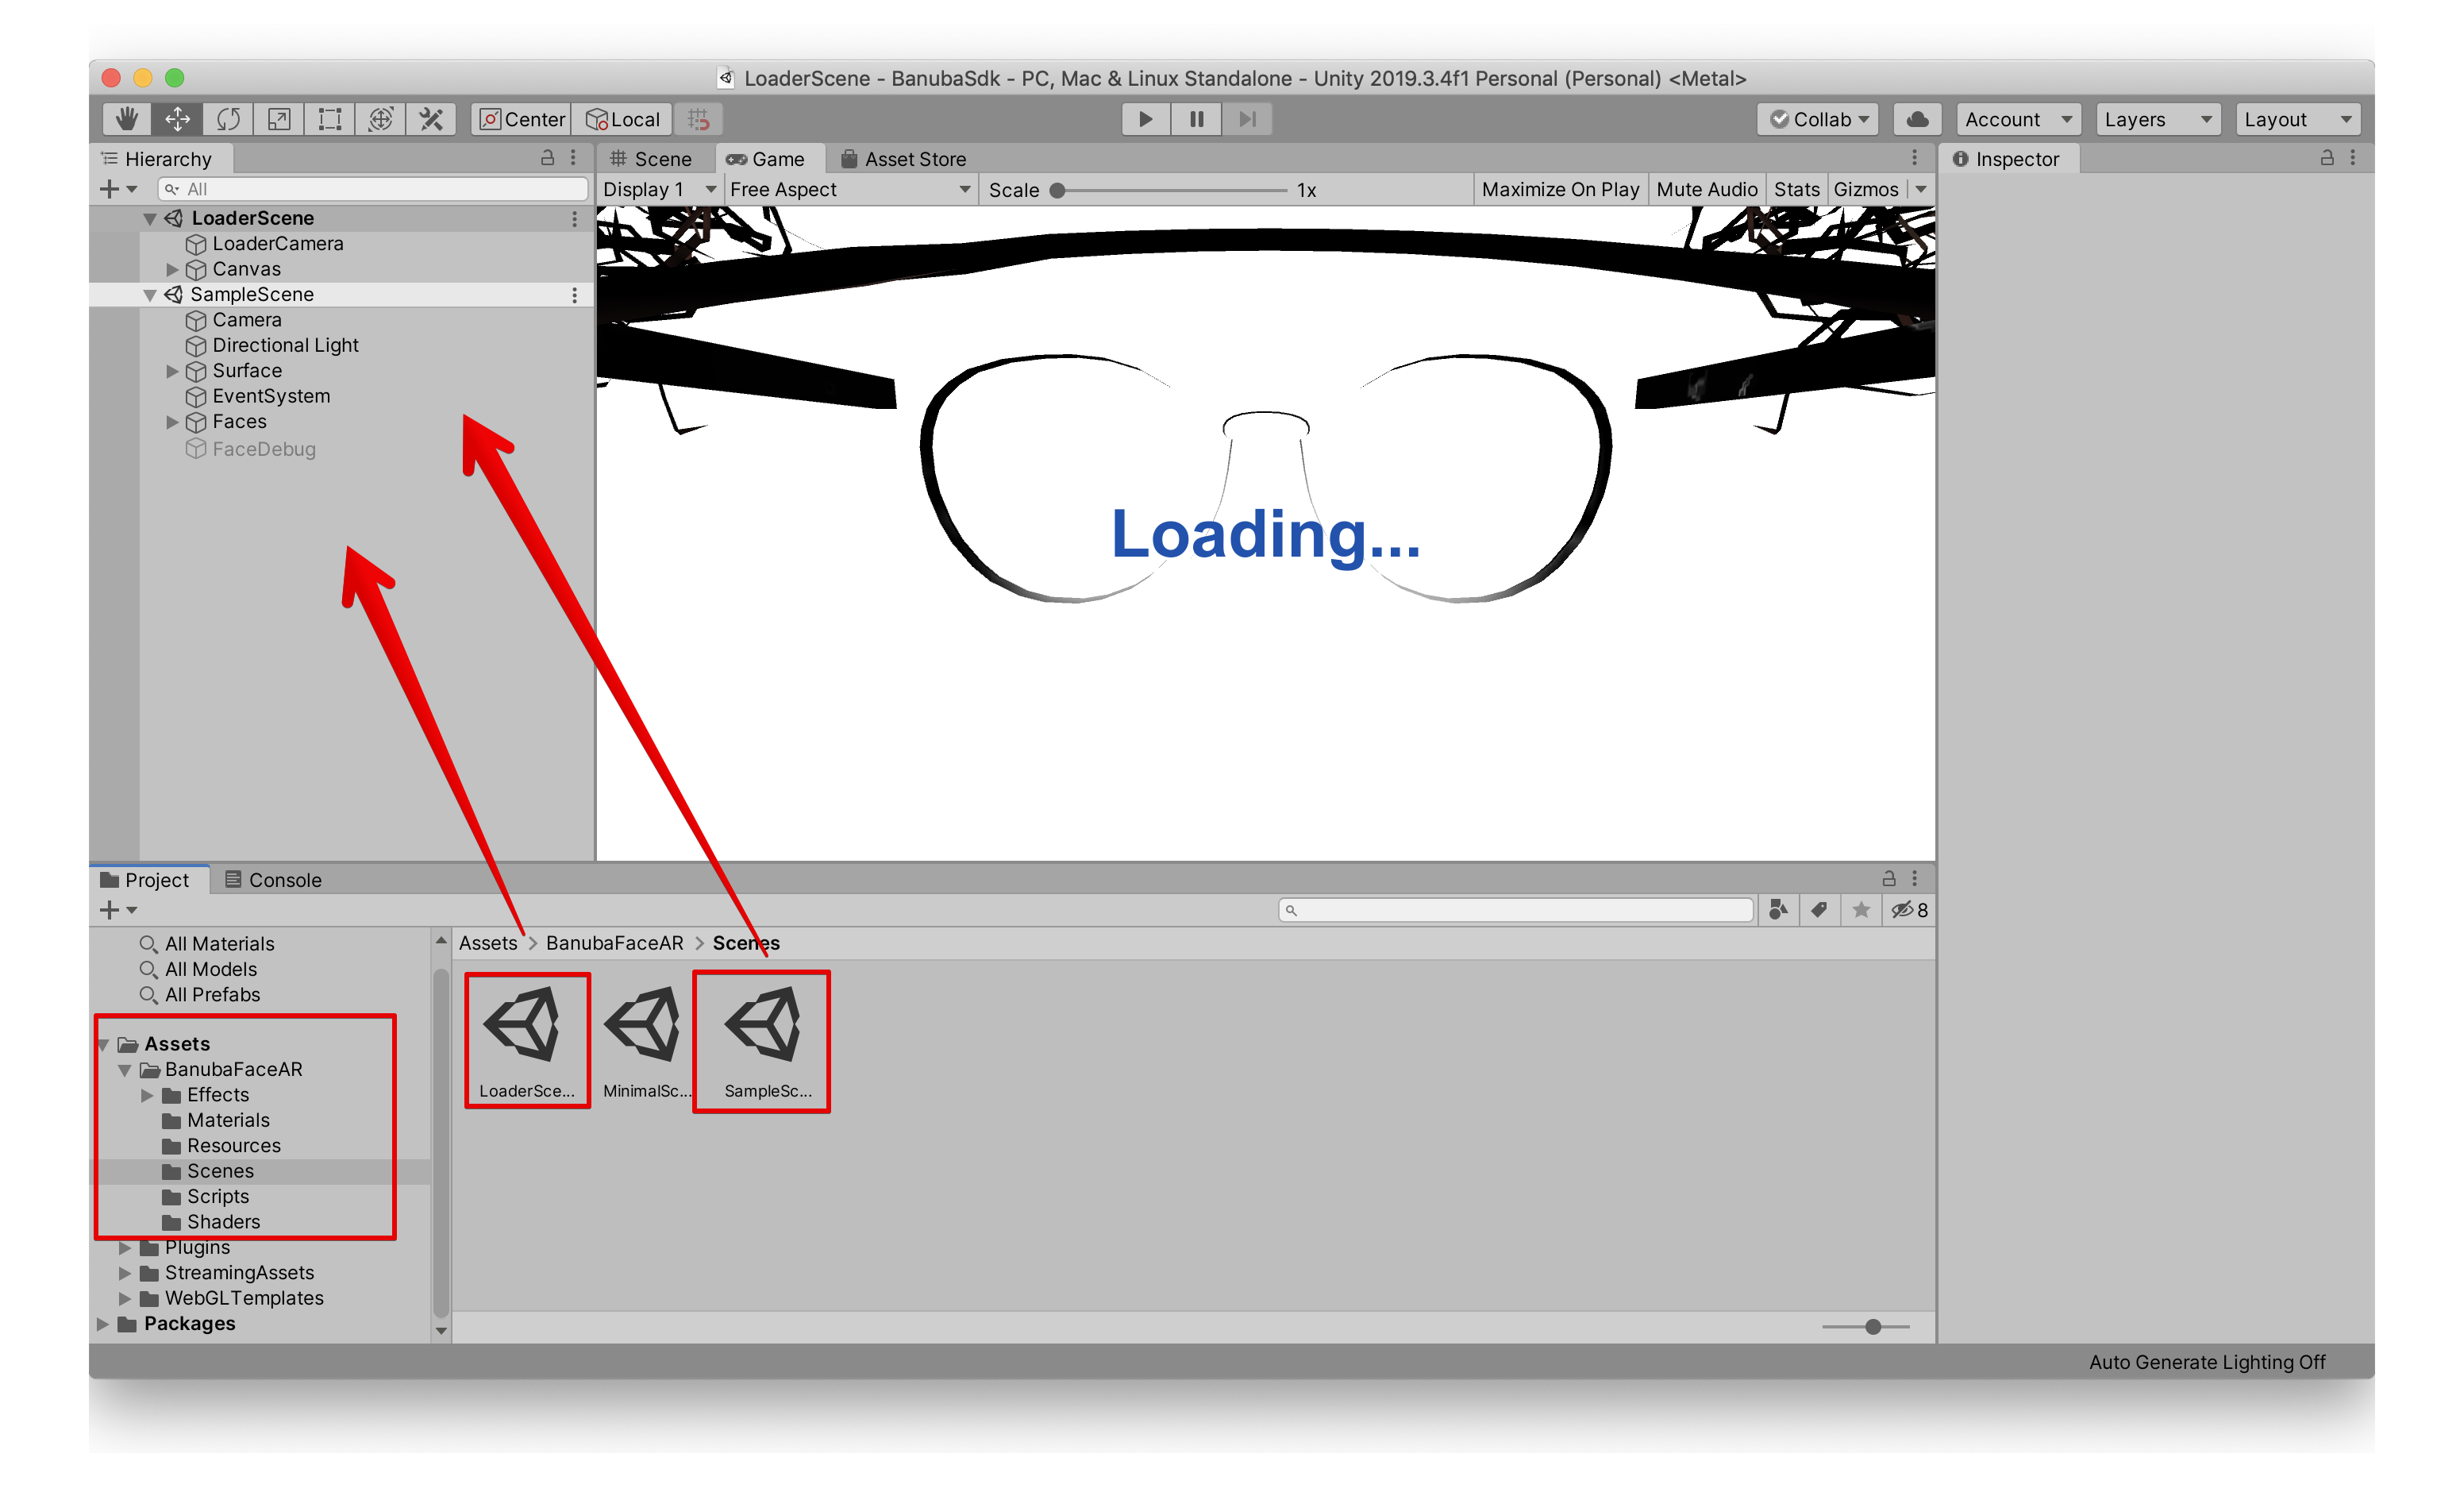
In the project files tree find LoaderScene and SampleScene under Assets -> Scenes. Drop first LoaderScene then SampleScene to the active scenes section and make it active. Now you should see a sample scene active in the Unity Scene section.
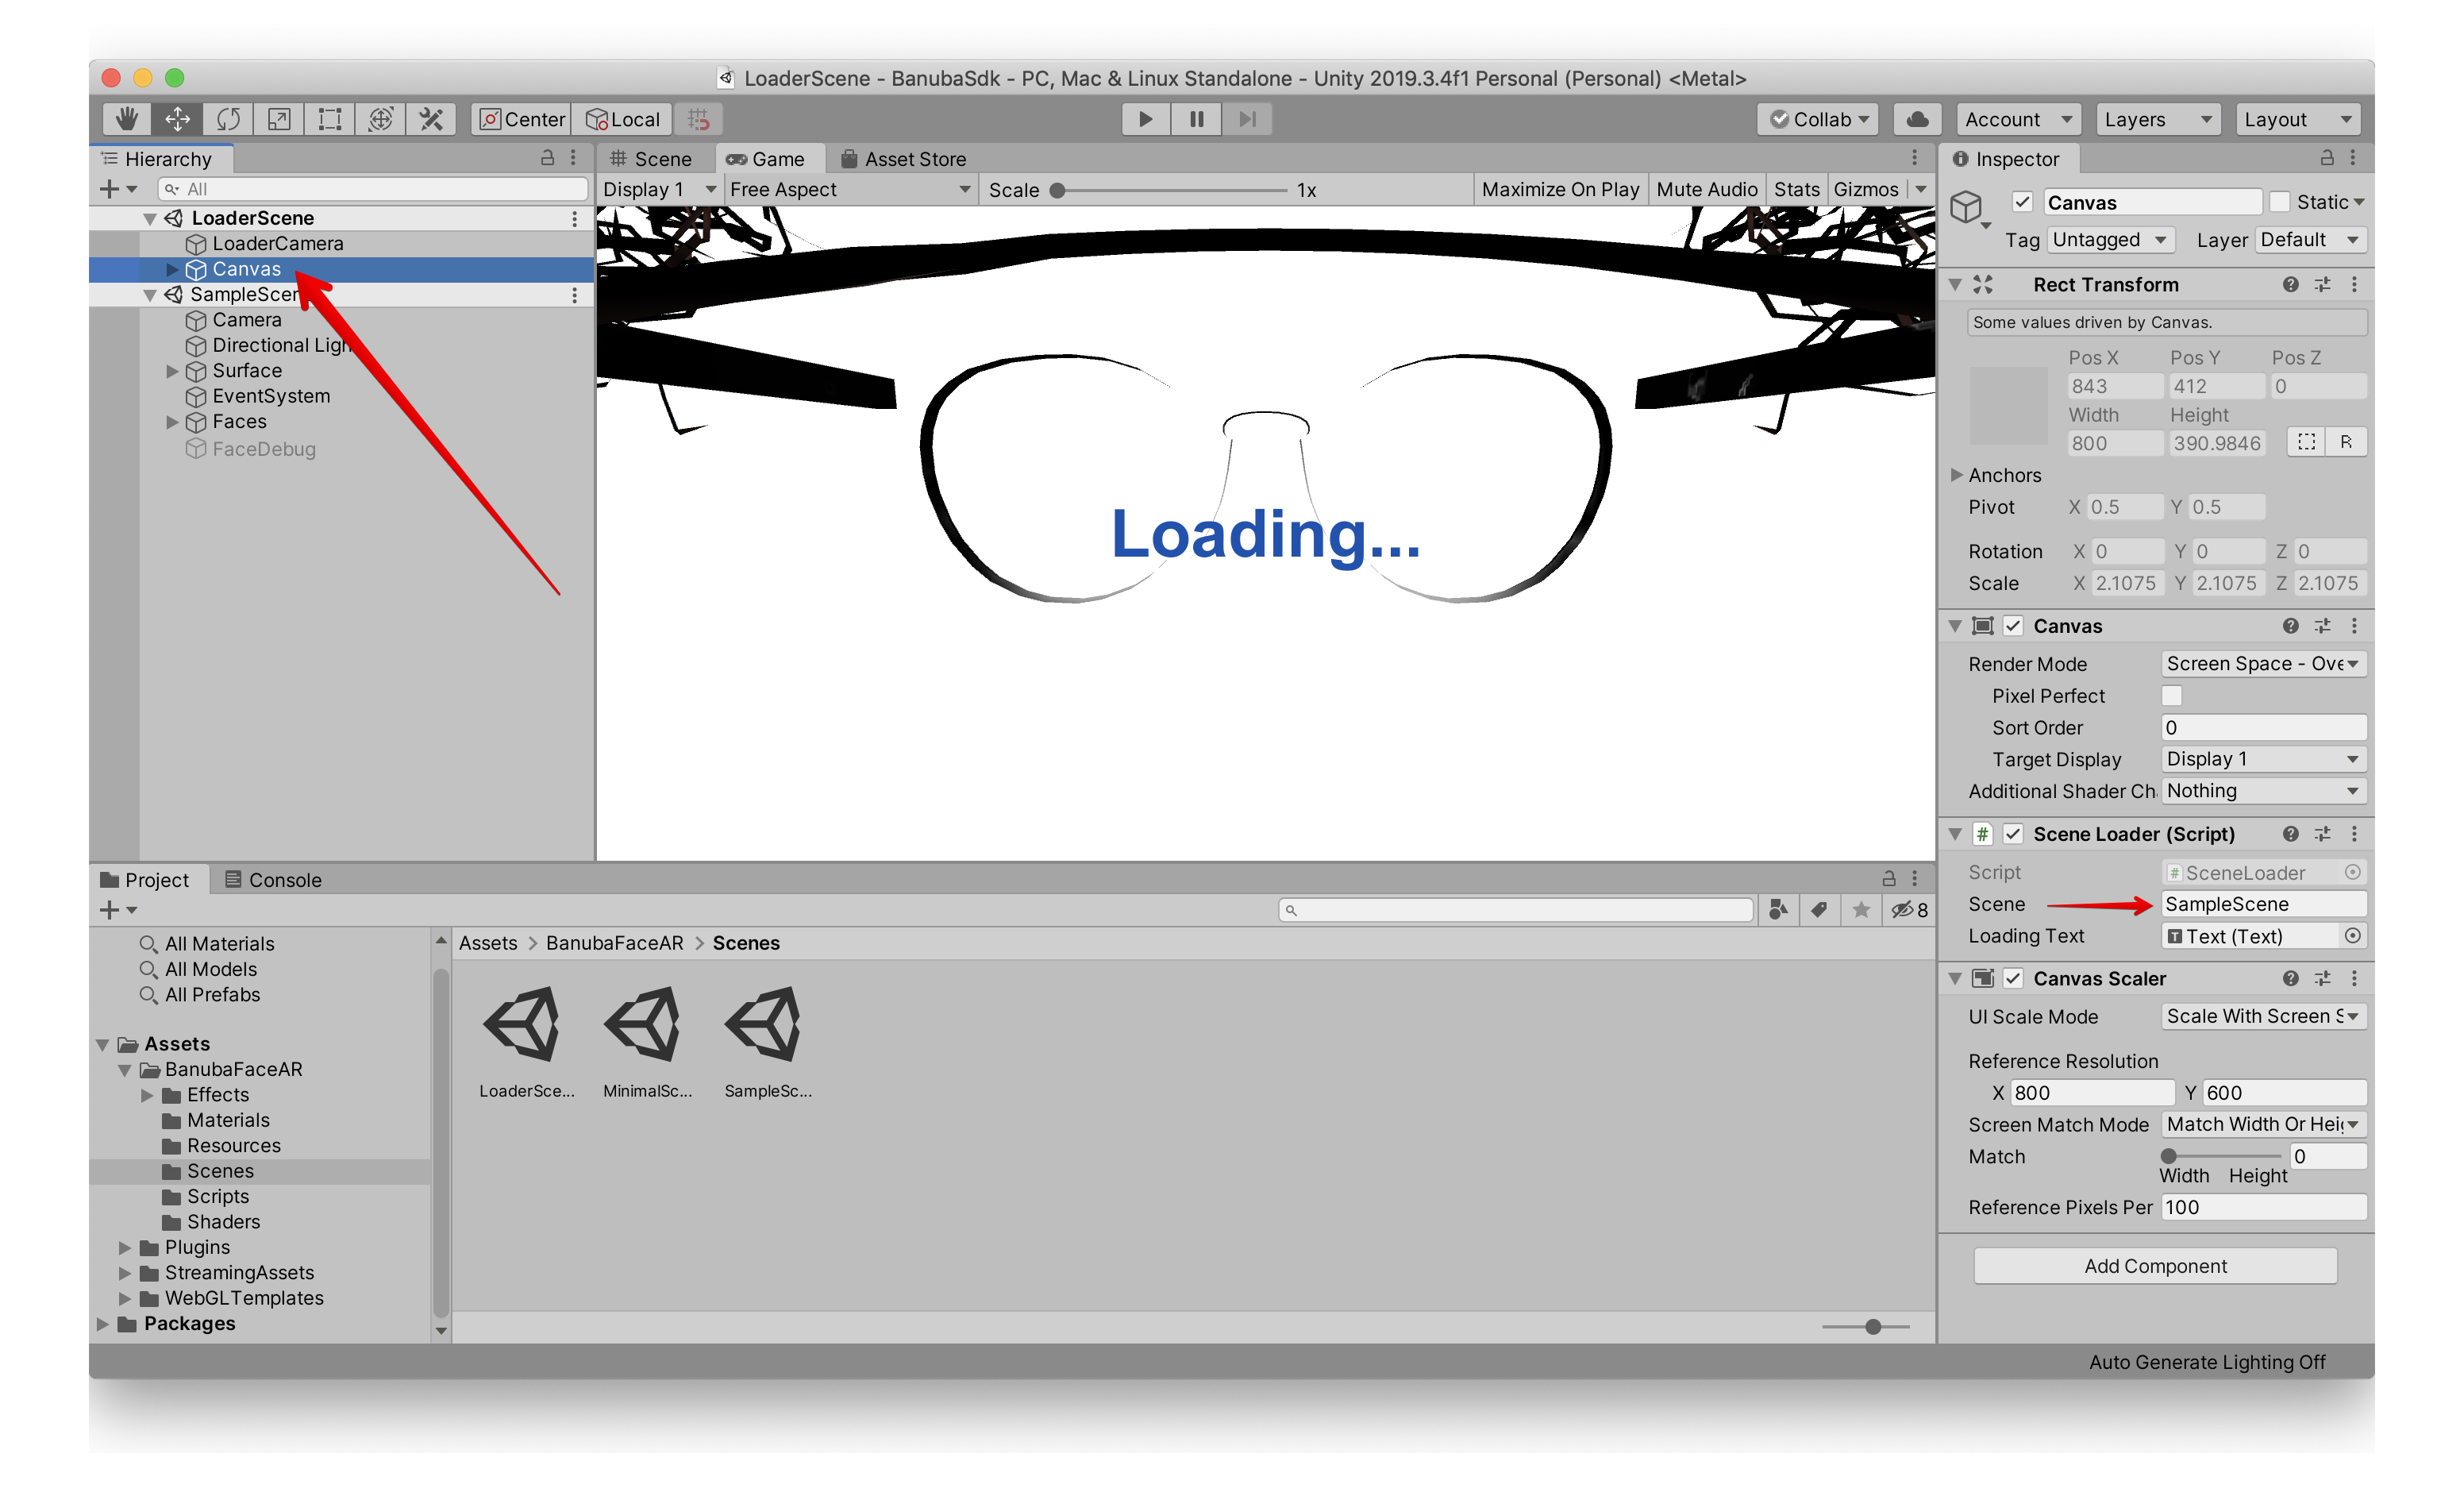
Add SampleScene to LoaderScene Script.
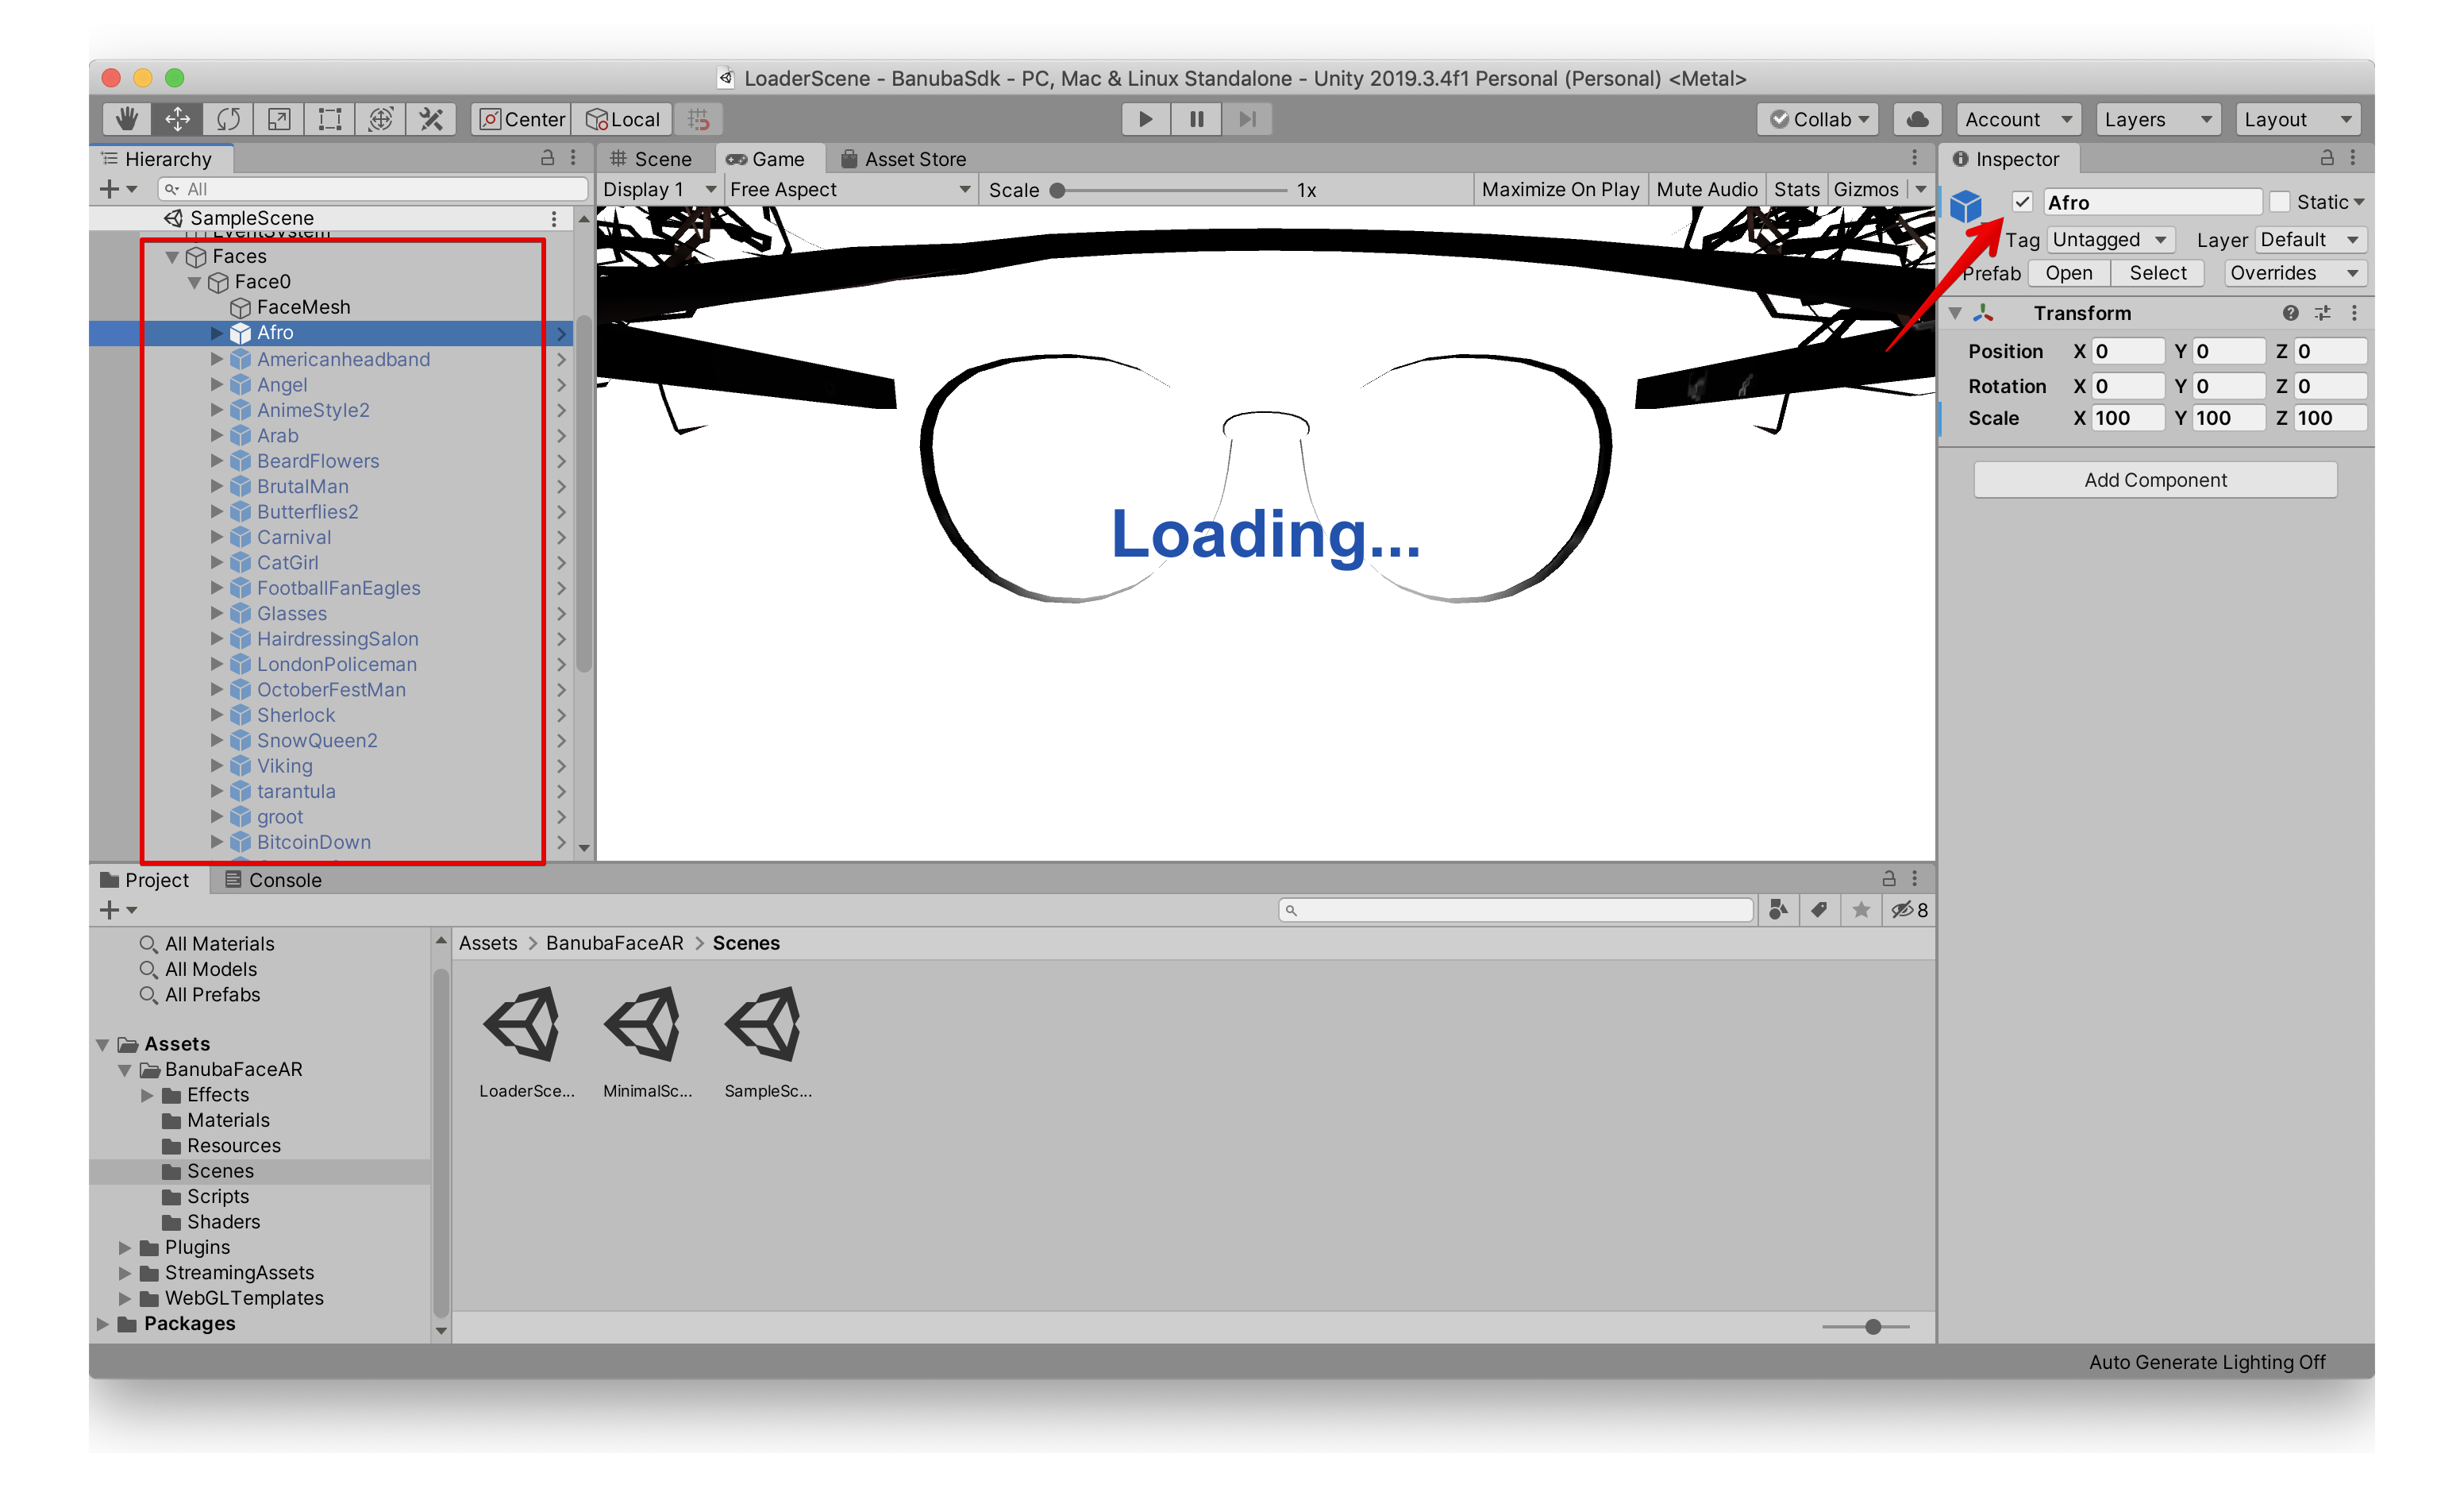
To select mask enable checkbox in the Inspector for the required object. The list of the masks can be found in Unity scene Faces list.
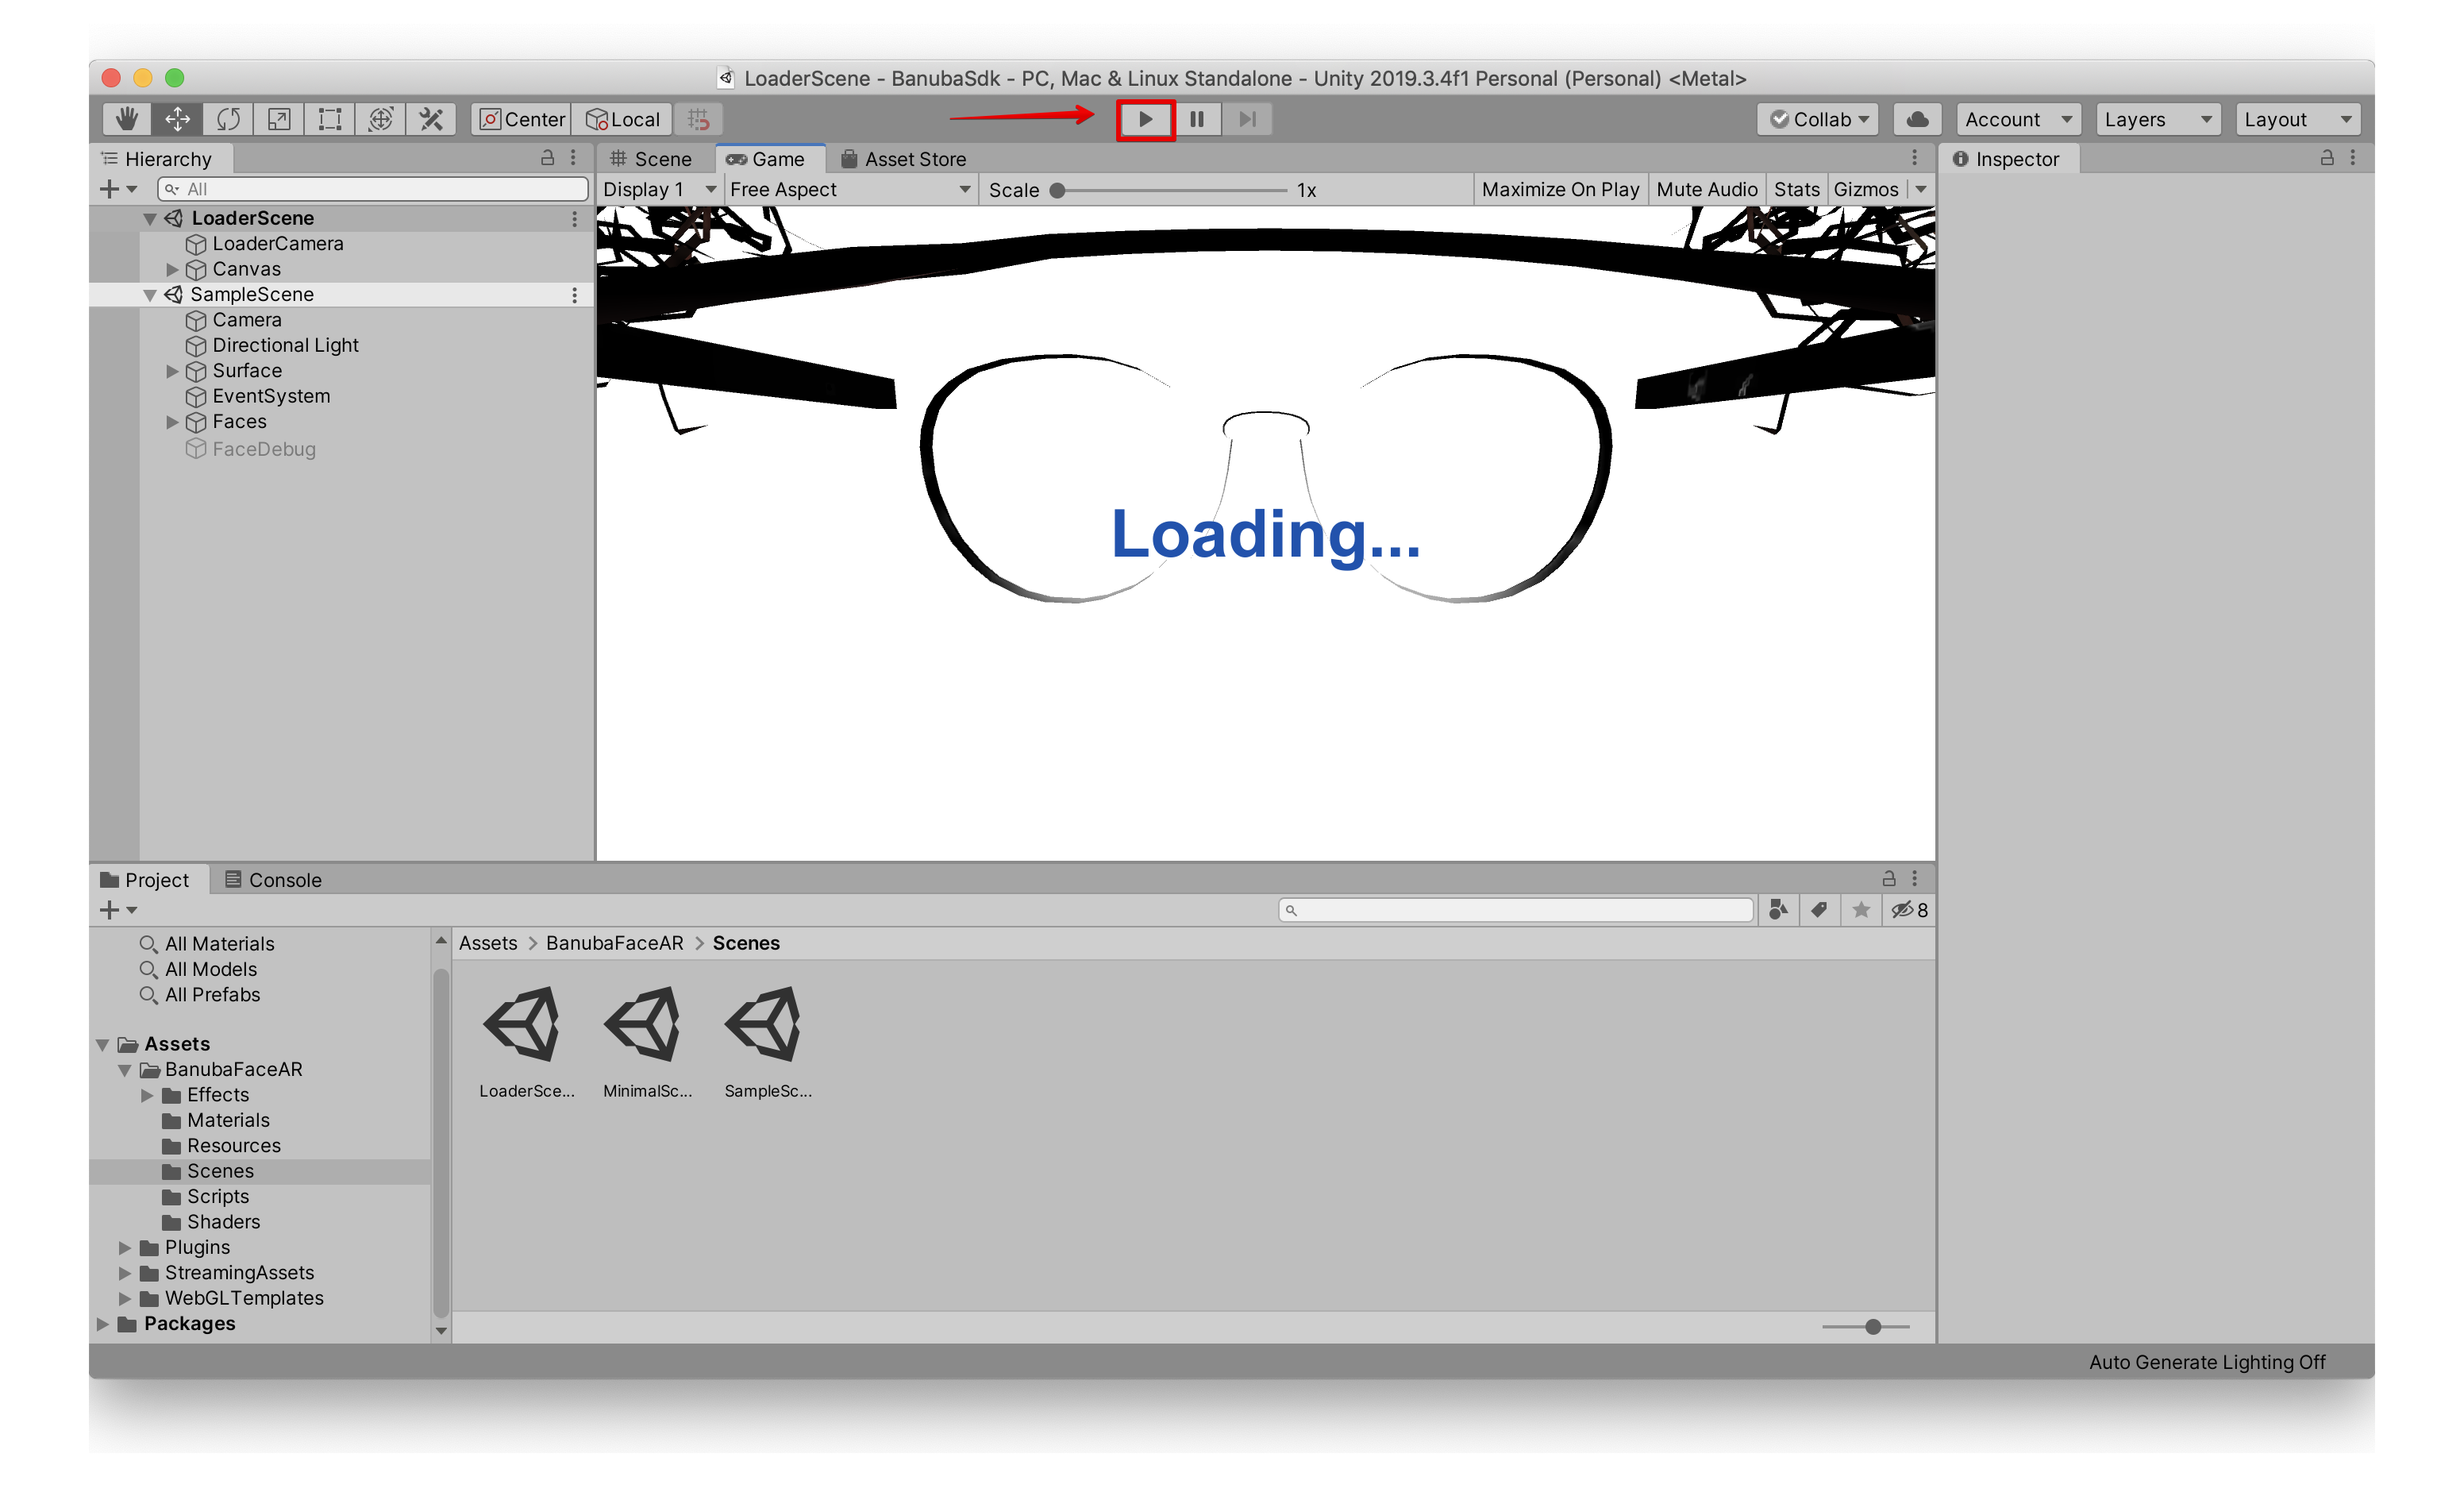
Click the "Play" button in Unity to check how the demo scene works on the PC.
3. Launching on platforms#
iOS#
note
iOS plugin for Unity is required
- In Unity open File -> Build Settings
- Check that both LoaderScene and SampleScene checkboxes are marked with ticks
- Select iOS platform in the platforms list in the left column
- Click the "Switch Platform" button
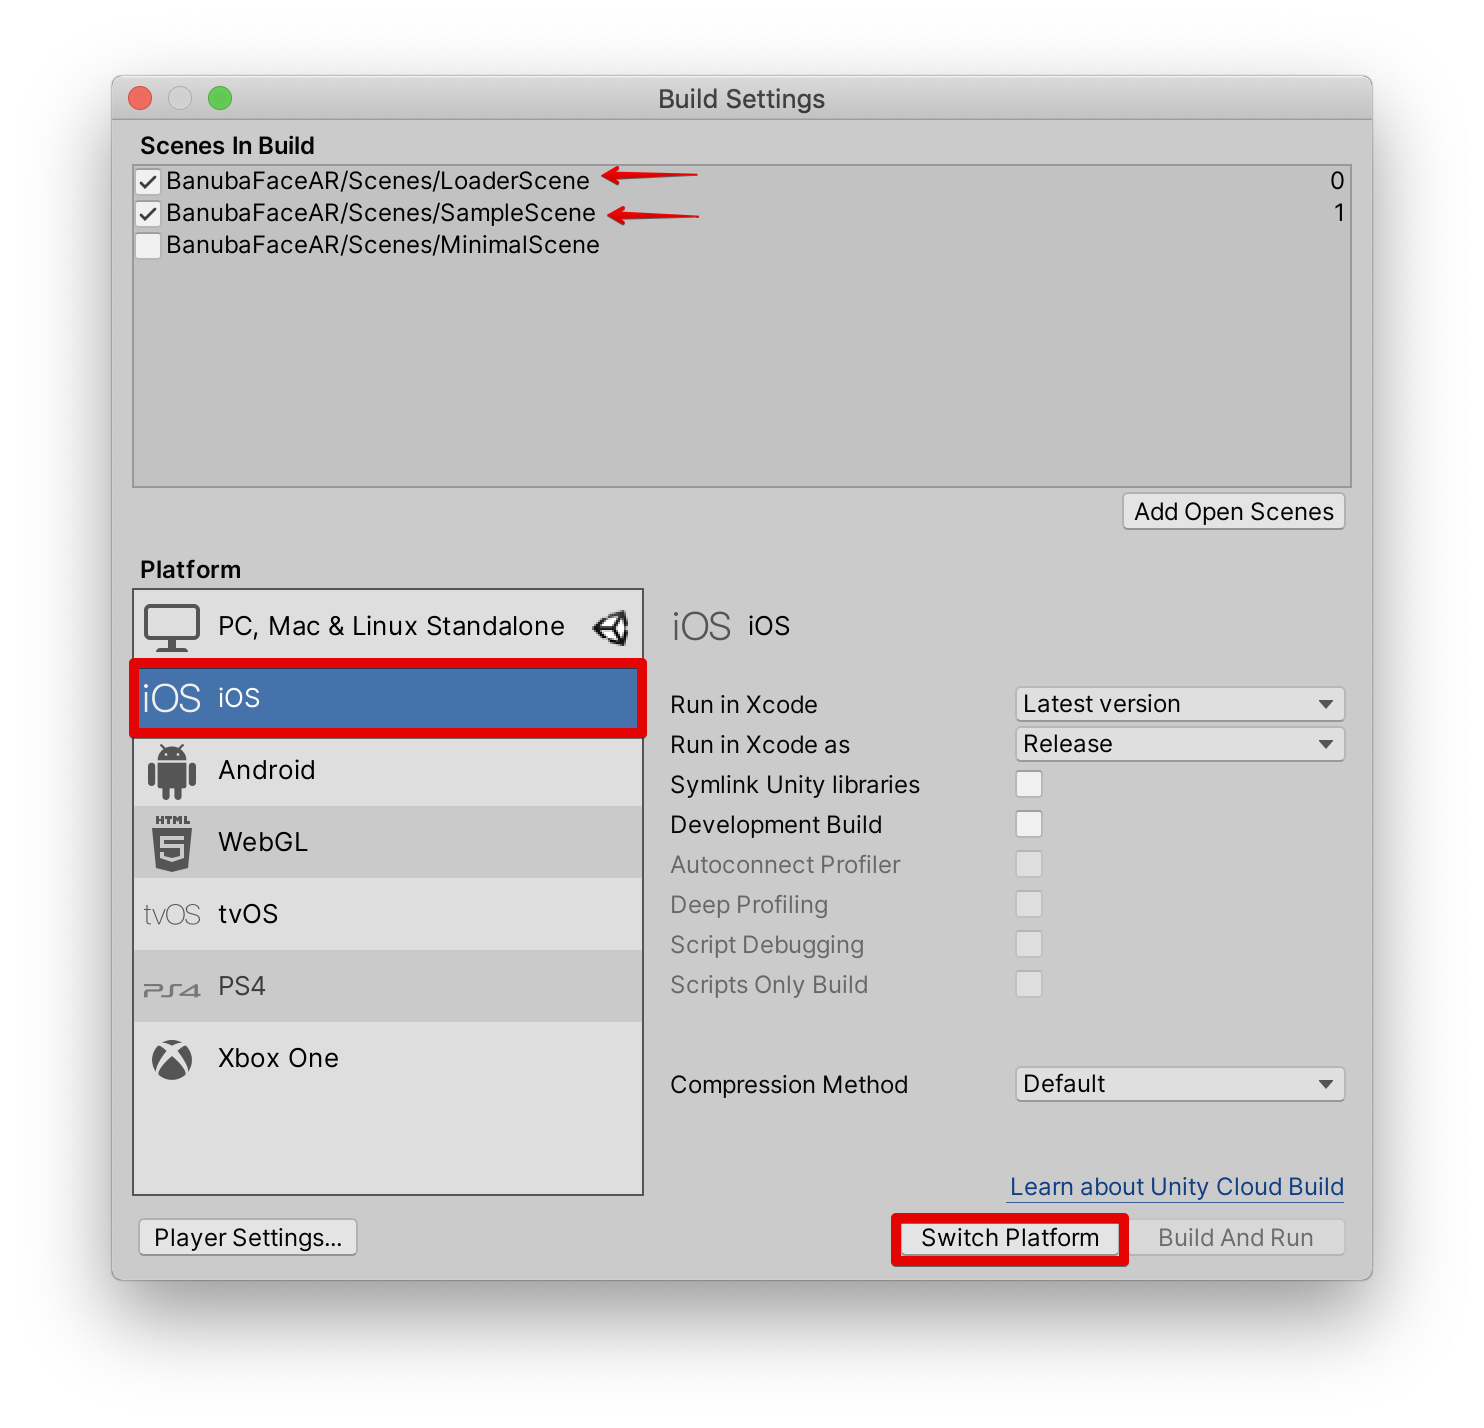
- Once the platform is switched, click "Build And Run" button in the same window
- Specify the location and the name for Unity xCode project
- The project will run automatically if build succeeded OR you can open Unity-iPhone.xcodeproj file from the folder with the generated xCode project
- Sign the project in xCode and launch the app
MacOS, Windows#
- In Unity open File -> Build Settings
- Select MacOS platform in the platforms list in the left column
- Click "Switch Platform" button
- Once the platform is switched, click "Build" button in the same window
- Specify the location and the name for MacOS executable
Android#
note
Android plugin for Unity is required
- In Unity open File -> Build Settings
- Check that both LoaderScene and SampleScene checkboxes are marked with ticks
- Select Android platform in the platforms list in the left column
- Click "Switch Platform" button
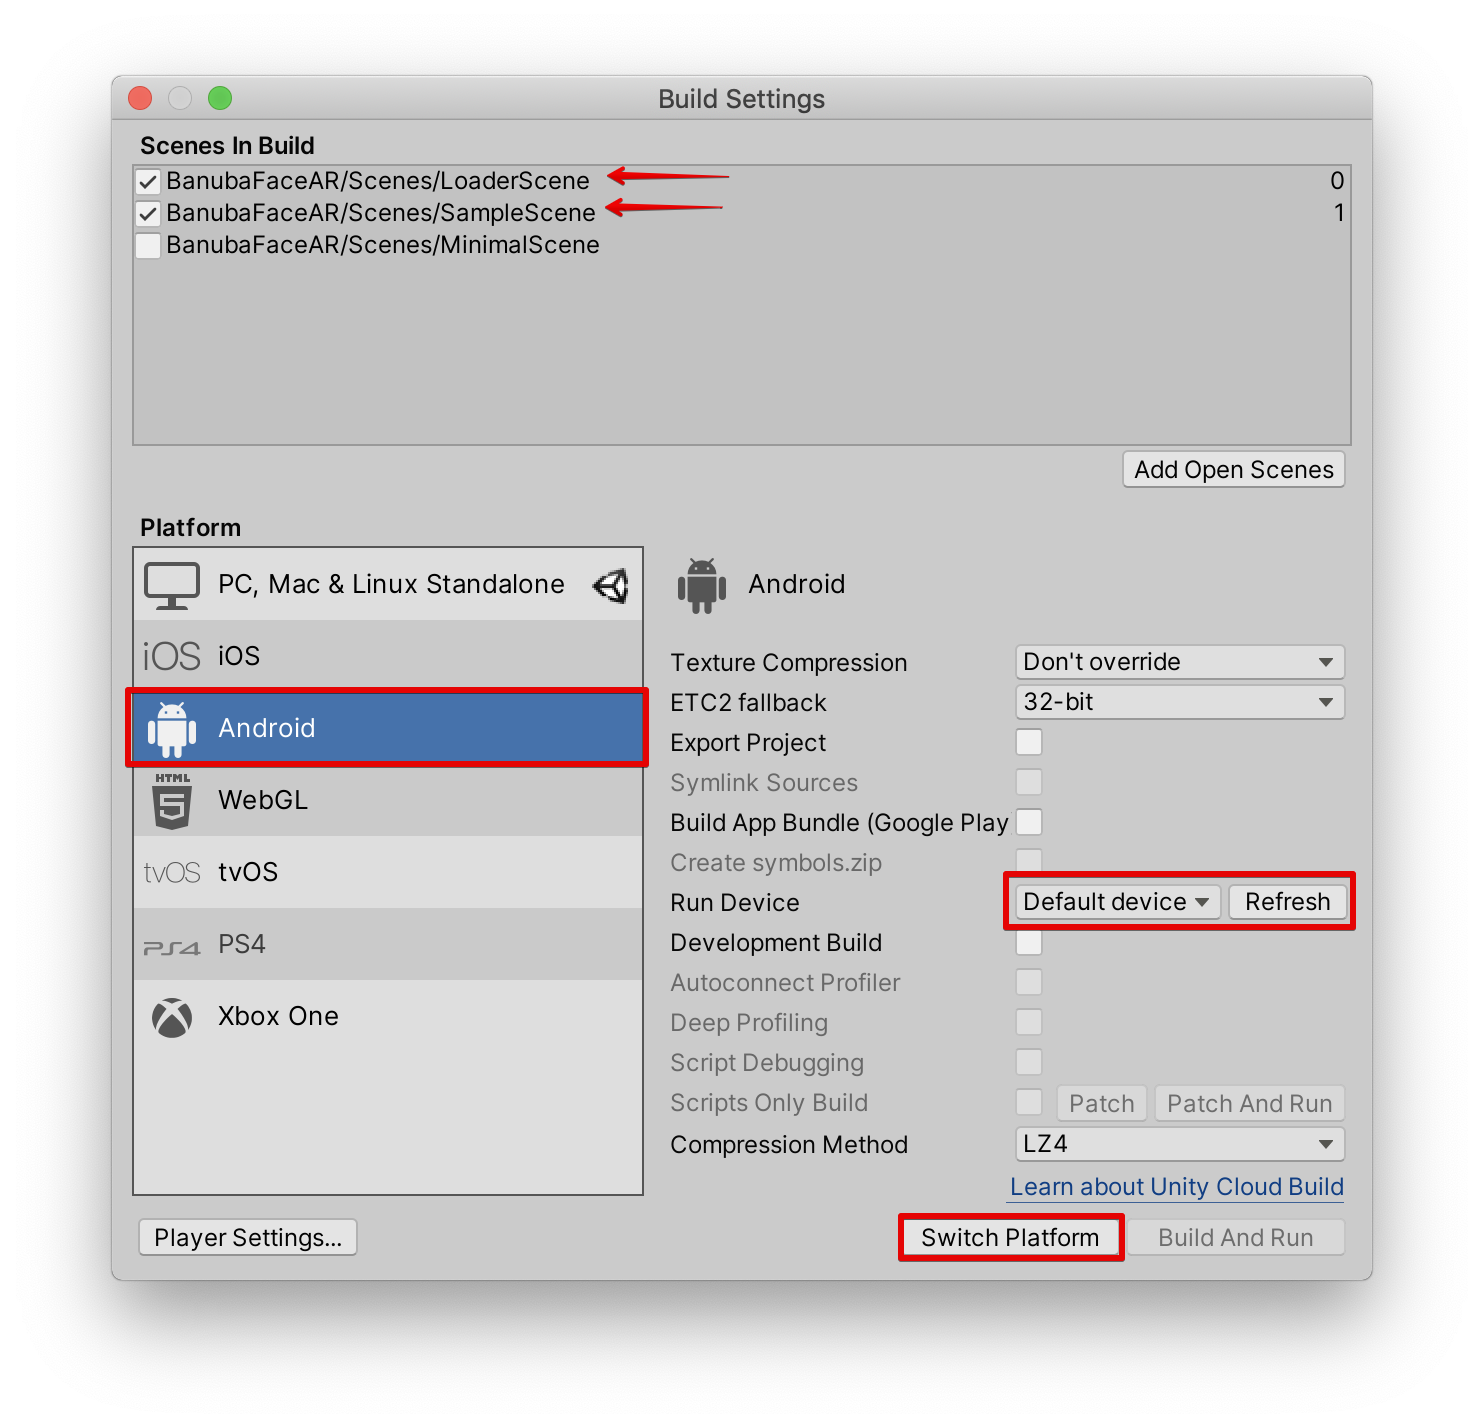
- Check that device is updated or click "Refresh" button
- Once the platform is switched, click "Build And Run" button in the same window
- Specify the location and the name for Android .apk file
- The .apk will run automatically if build succeeded OR you can install the generated .apk with adb or directly from your device