How to combine several AR effects into one
The Filter Editor allows you to build simple effects with all scripting and configuration created automatically. However, with more complex effects, you need to manually modify the logic and effect code. Before merging effects, please, refer to the Effect Construction section for general introduction into Banuba API.
In this article you’ll learn steps to combine multiple Face AR filters into one. In our example, we’ll merge 2 effects:
Beauty_1 GlassesStudy AR effects#
Before we merge effects, let's understand how they work and what they include.
tip
You can look at a cfg.toml file at draw_order to see the names of the rendered materials. You'll see their maximum number, possible if all the models, to which these materials are referring, are spawned in config.js.
Beauty_1 effect includes Beautification (retouch) and Background separation (TriMBG). You may see it from its draw_order = ["TriMBG" , "!glfx_UPDATE_BG" , "retouch"].
Glasses effect includes a 3d model of glasses without animation. The retouch material in cfg.toml has no samplers attached so it minimally or not at all affects the result.
Steps to merge AR effects#
Choose the ‘base’ effect. All the rest effects will be ‘additive’.
Usually, the base effect is the most complicated one which has more code base in config.js or more materials in cfg.toml. If effects look pretty much the same, it doesn’t matter.
We choose the Beauty_1 effect as a base one as it has more lines in config.js. It'll be easier to copy a few lines from Glasses, then the opposite.
Copy all assets (except config.js, config.json, cfg.toml, preview.png - we’ll deal with them later) from Glasses effect root folder to Beauty_1. Make sure that your base effect is still working.
note
If some duplicates occur, choose 'Keep both' for not to break your base effect and use effects later if needed or delete them if they don't.
Open the addivite effect (in our case Glasses) config.js. We need to copy the additive effect(s) code to the base one. The entering point of the every effect is
this.init(){...}method of theEffect()function.
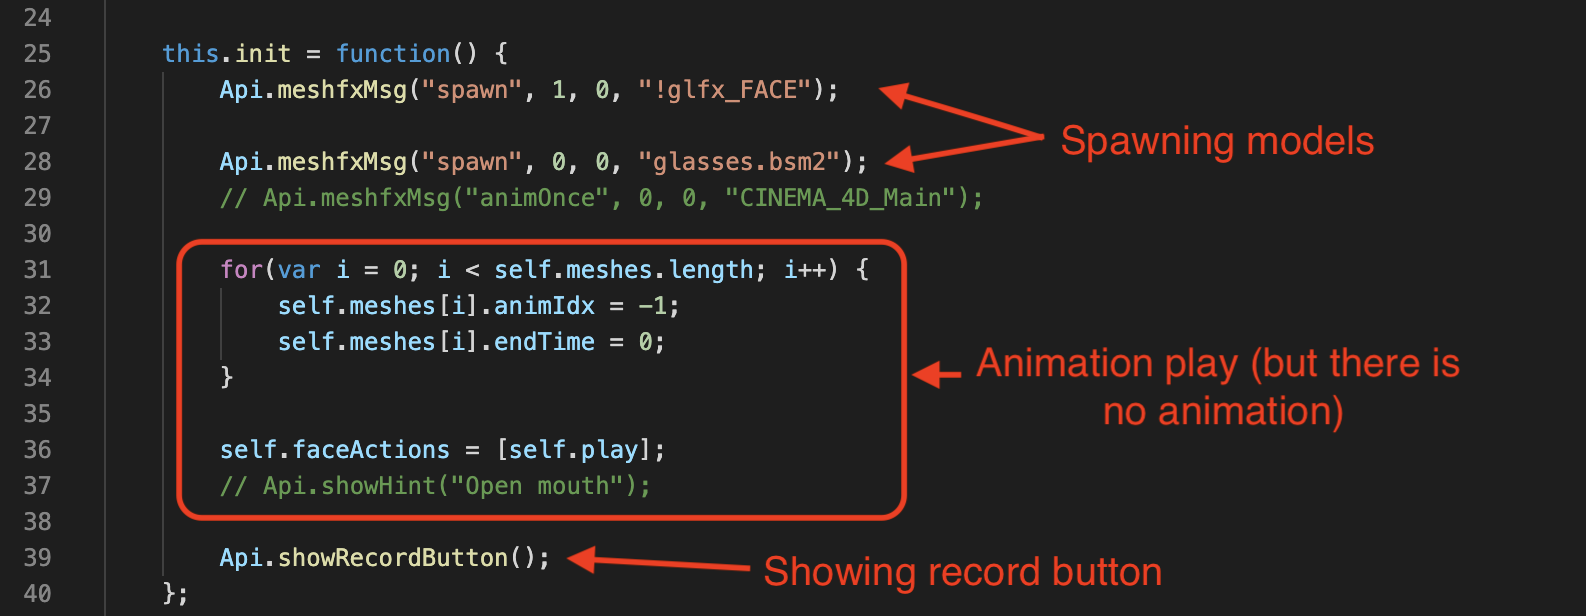
In Glasses effect we have 2 ”spawn” function calls:
Api.meshfxMsg("spawn", 1, 0, "!glfx_FACE");- it spawns a recognized face model, which is used by the retouch material.Api.meshfxMsg("spawn", 0, 0, "glasses.bsm2");- it spawns a glasses.bsm2 model, which activates its materials ('glasses', 'glass') in the rendering pipeline in cfg.toml.The further code line 31-36 is generated automatically to play all the animations in a loop, that our spawned models may have. As our model doesn’t have any we may delete it. Even if we have had some animations, this code is written just to show that everything works at the start and should be changed to fit your logic.
Api.showRecordButton();- internal method for showing the camera's default record button. Its call is included in the Beauty_1 init() method, so you can just skip it.Finally, we need to copy only spawn functions.
note
It’s also necessary to compare with the base effect/copy all the trigger functions, if they are declared, global variables used and functions mentioned in the following arrays:

After copying the code from “additive” effect(s) we need to edit it (if required) to merge with the base effect’s code:
a) all models should be spawned with a unique mesh id
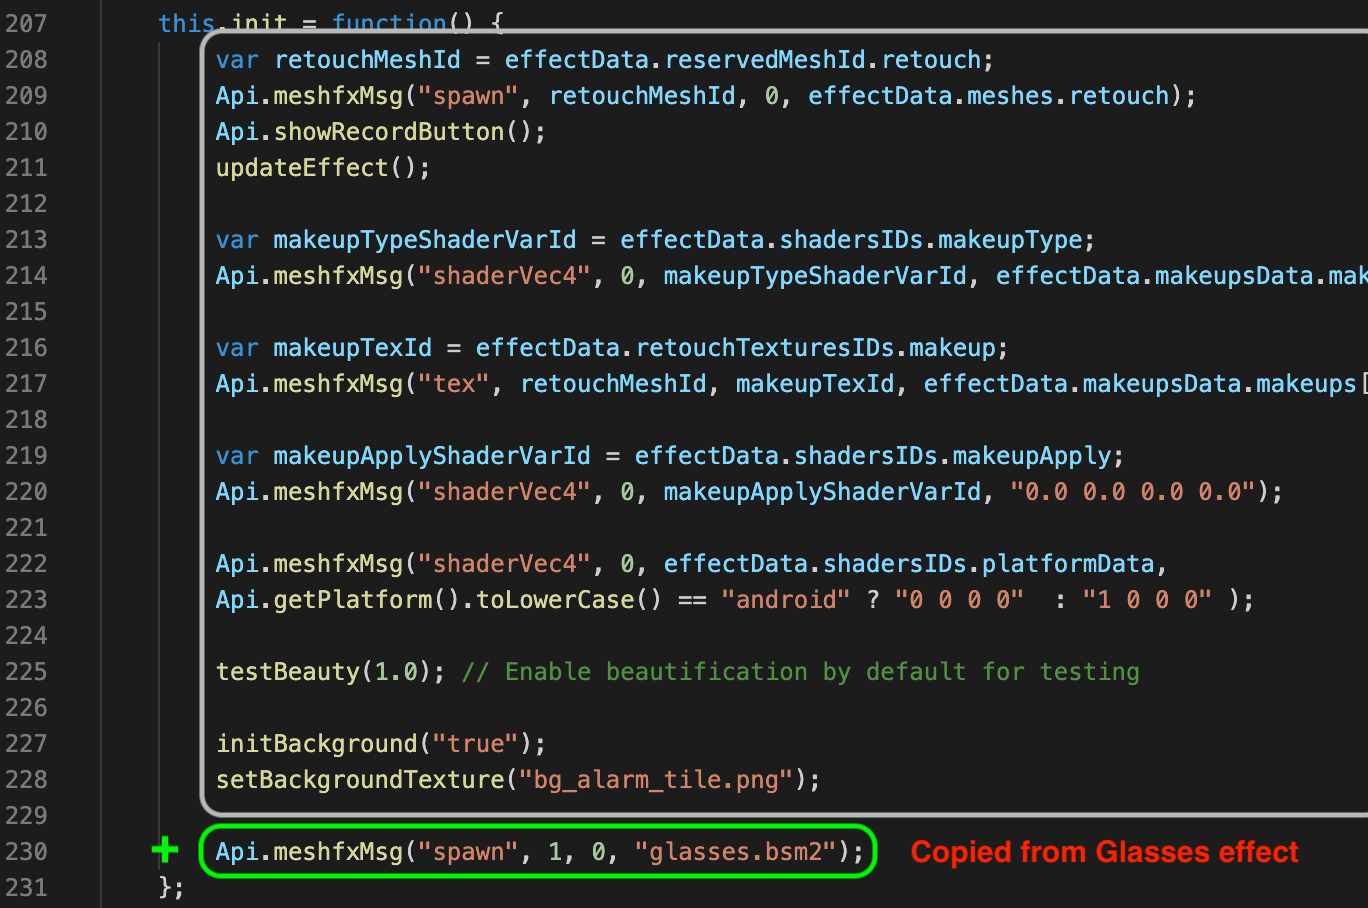
Api.meshfxMsg("spawn", mesh id, 0, "modelToSpawn");In Beauty_1 effect, we have a dictionary with reserved mesh ids on line 25 and model file names on line 30. It tells us that there are 2 models used with mesh ids 0 and 7. You can use any integer, but numbers in the range [0,47] are recommended, as 48 is a maximum number of models that can be spawned within the effect.
Beauty_1 already has
!glfx_FACEmodel spawned, so we don’t copy it from Glasses effect. As soon as mesh id 0, used by glasses.bsm2 model in Glasses effect is reserved we’ll use mesh id 1 instead and paste owr glasses.bsm2 model spawn into the init() method of Beauty_1 effect like it is shown below.
b) Check that base function works. If you copied some function declarations (especially trigger function, etc.), check that they are merged appropriately without duplicate and don’t conflict with base effect functions.
Merge effect cfg.toml files:
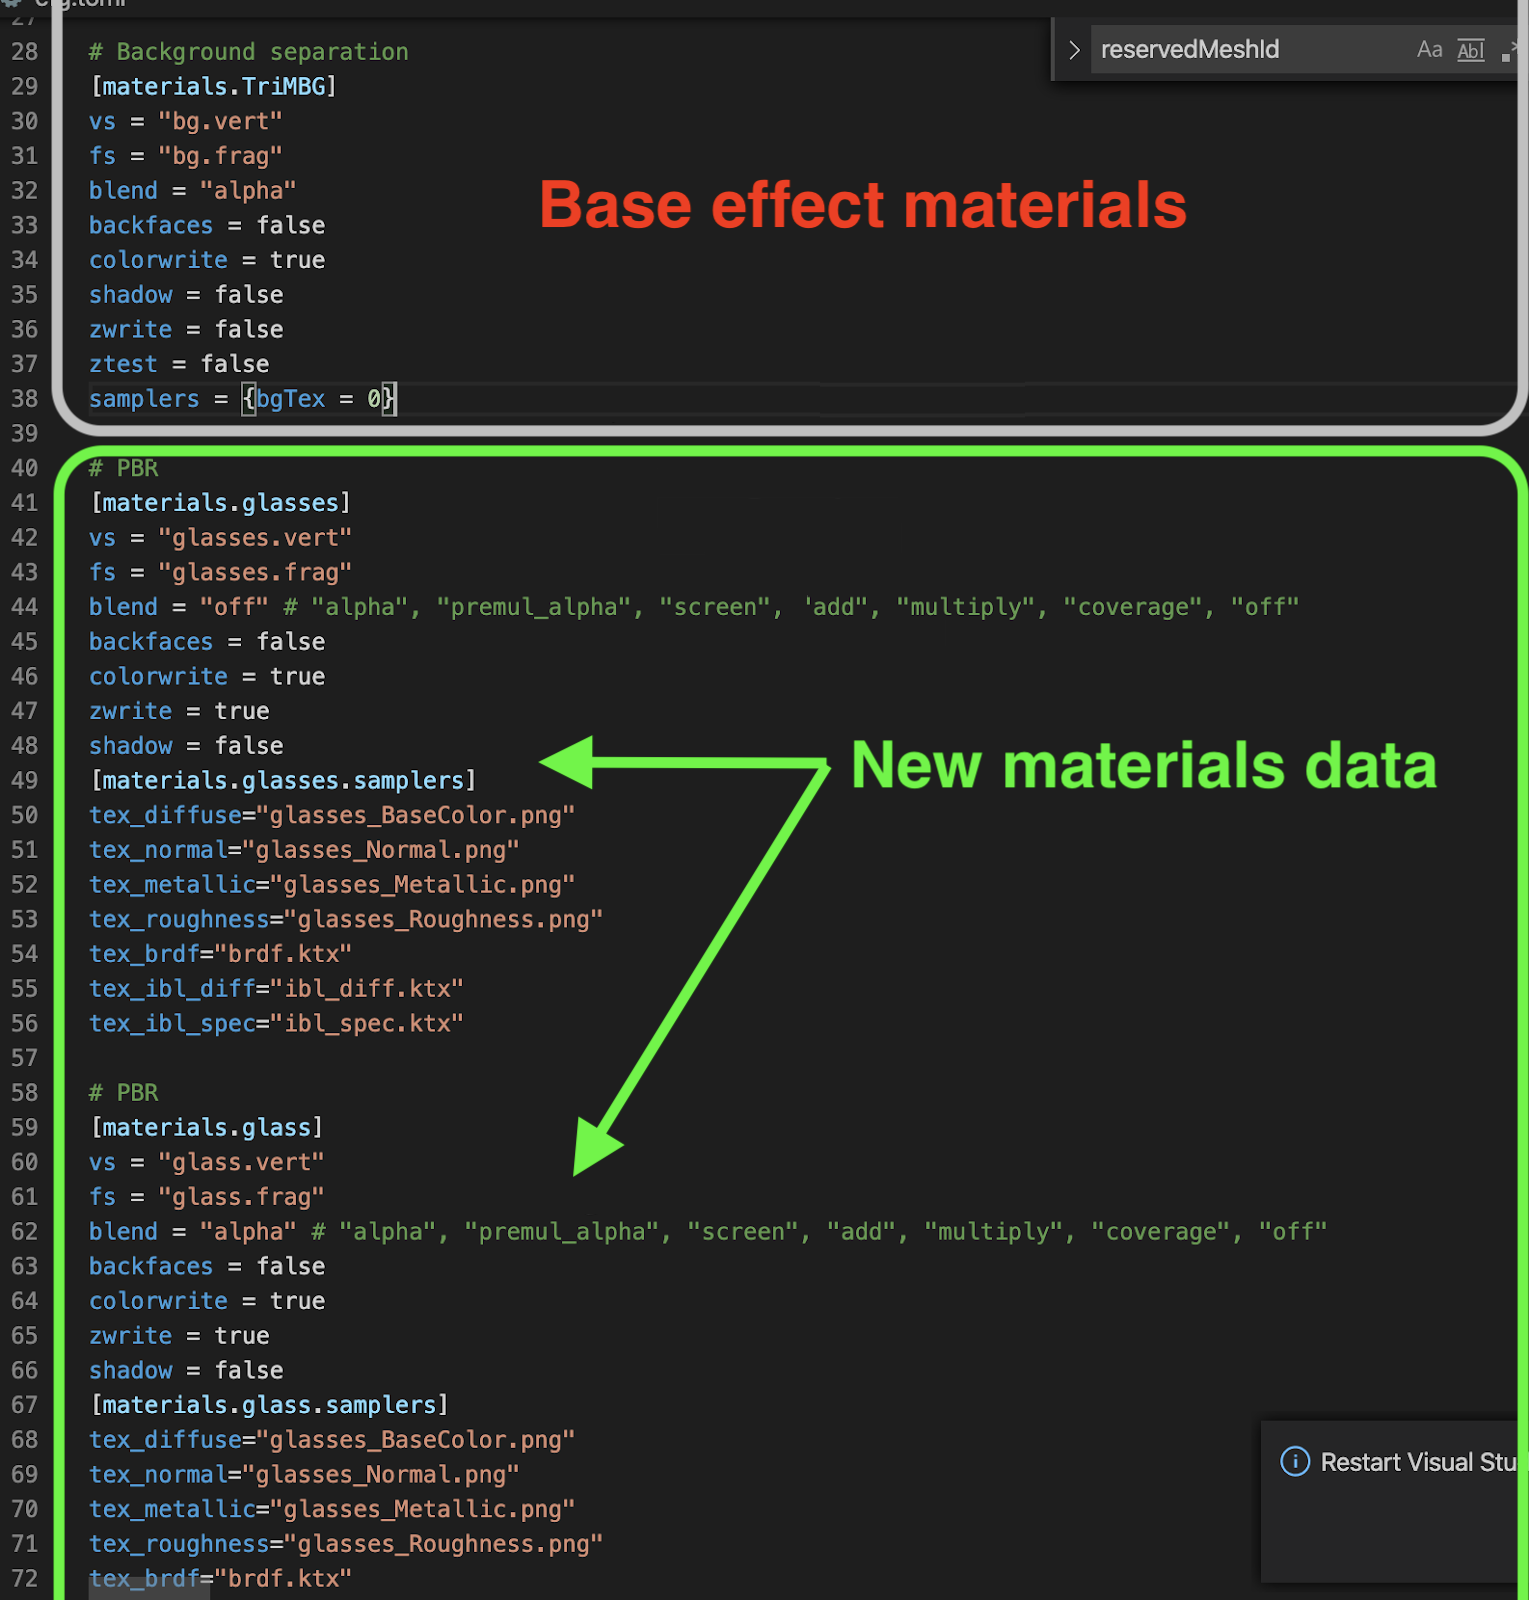
a) copy all materials and place them into base effect cfg.toml.
In Glasses effect we have 3 materials:
retouch,glasses,glass. As we already haveretouchin Beauty_1 we don’t copy these data (and won’t use its shaders) from Glasses effect:
b) add new material names to draw_order.
As soon as in the Glasses effect our
glasses,glassmaterial were placed afterretouch, we paste them into the Beauty_1 in the same order:By setting draw_order you organize your rendering pipeline. Placing material in the wrong place can make it invisible (covered by other geometry and so on).
tip
You can edit .frag shader for visual debugging of your material by finally assigning vec4(1.); value to frag_color variable. It’ll make all the geometry white, so it’ll be easier to detect it on the screen.
Merge config.json files.
In our case, they are the same, but we have many layer settings available (see the docs link above), that we may need for the mixed effect.
Download the final effect:
Beauty_1&Glasses