User Interface
Filter Editor#
The menu bar has 4 buttons: Import, Save, Reload and Construct.

- Import. Upload your effect folder with assets files.
- Save. Save your progress with the effect construction.
- Reload. Refresh the changes.
- Construct. Converts the source files in the SRC folder to native formats and constructs the configured effect.
Filter Editor has 4 tabs: Textures, FBX models, Rendering and Media
Textures. Your textures and images that are located in the SRC folder. You upload textures in PNG, JPEG, HDR or EXR formats and the Filter Editor converts them into its native KTX format.
FBX models. Your geometry and animation files located in the SRC folder. You upload geometry files in FBX or OBJ format and the Filter Editor converts them into its native BSM2 format.
Rendering. The major workspace to configure your effect. It has 3 fields i.e. Draw order where you set the drawing queue, Material options where you specify material properties, and Rendering options where you define the scene settings and effect properties. You can also add beautification, physical based rendering, cutoff geometry, shading, etc.
Media. Audio files like music or sounds for the effect. Supported formats for audio files are .ogg, .wav, .m4a, and .mp3.
Banuba Viewer#
To view the 3D mask (effect) in the Viewer simply drop the effect folder into the Viewer window.
UI controls#
Effects — built-in post-processing effects. Tick the Use effect checkbox to activate the feature.
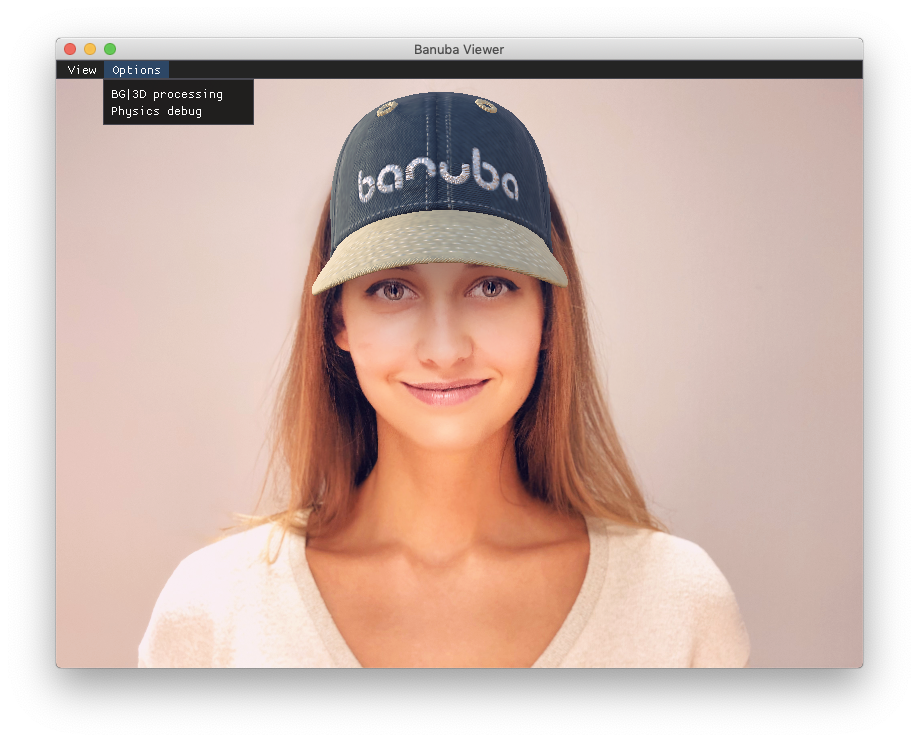
Physics debug — enable/disable physics debug outline for 3D effects. The option can be switched on only when the face isn't recognized yet.
BG|3D processing — enable this option to separate a photo or video being processed from the effect. The 3D part of the effect will be rendered separately from the input. With video processing, the 3D part of the effect will be saved under png folder for each frame of the video.
Online processing — allows to process a pack of photos (folder) as a sequence of frames. In this mode the face recognizer will detect the face only once. Once the face is detected, the face tracker will work as on video. Also can be used from CLI with -p (--processing) parameter. Example:
/Applications/Banuba\ Viewer.app/Contents/MacOS/Banuba\ Viewer --processing path/to/folder
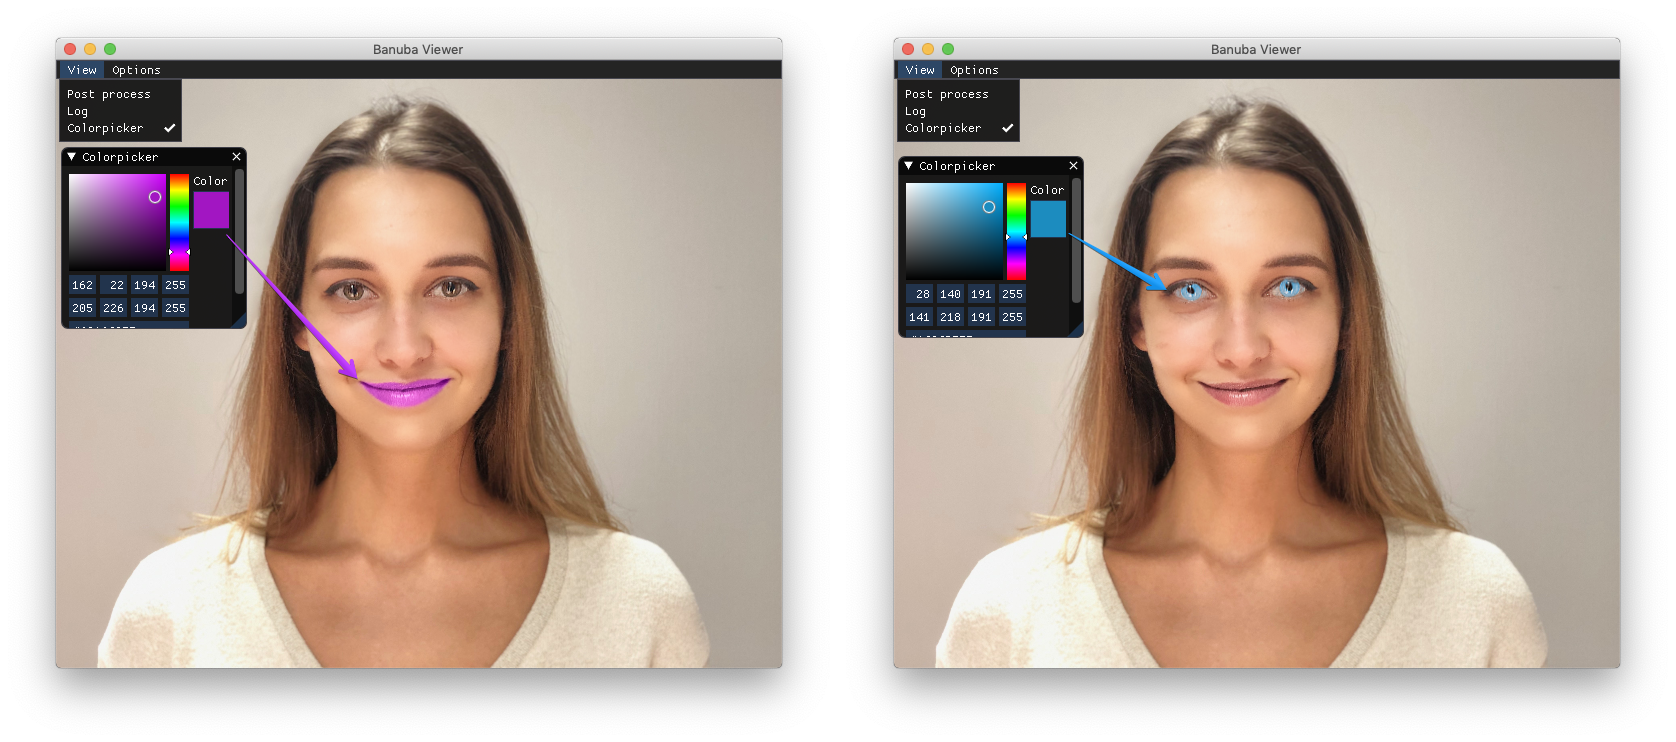
Colorpicker#
With the help of our Colorpicker feature you can process your photo, changing color of Hair, Eyes, Skin, Lips etc., in real-time. Re-coloring will be applied for all effects with Neural Networks. Effect Player should contains setColor method.
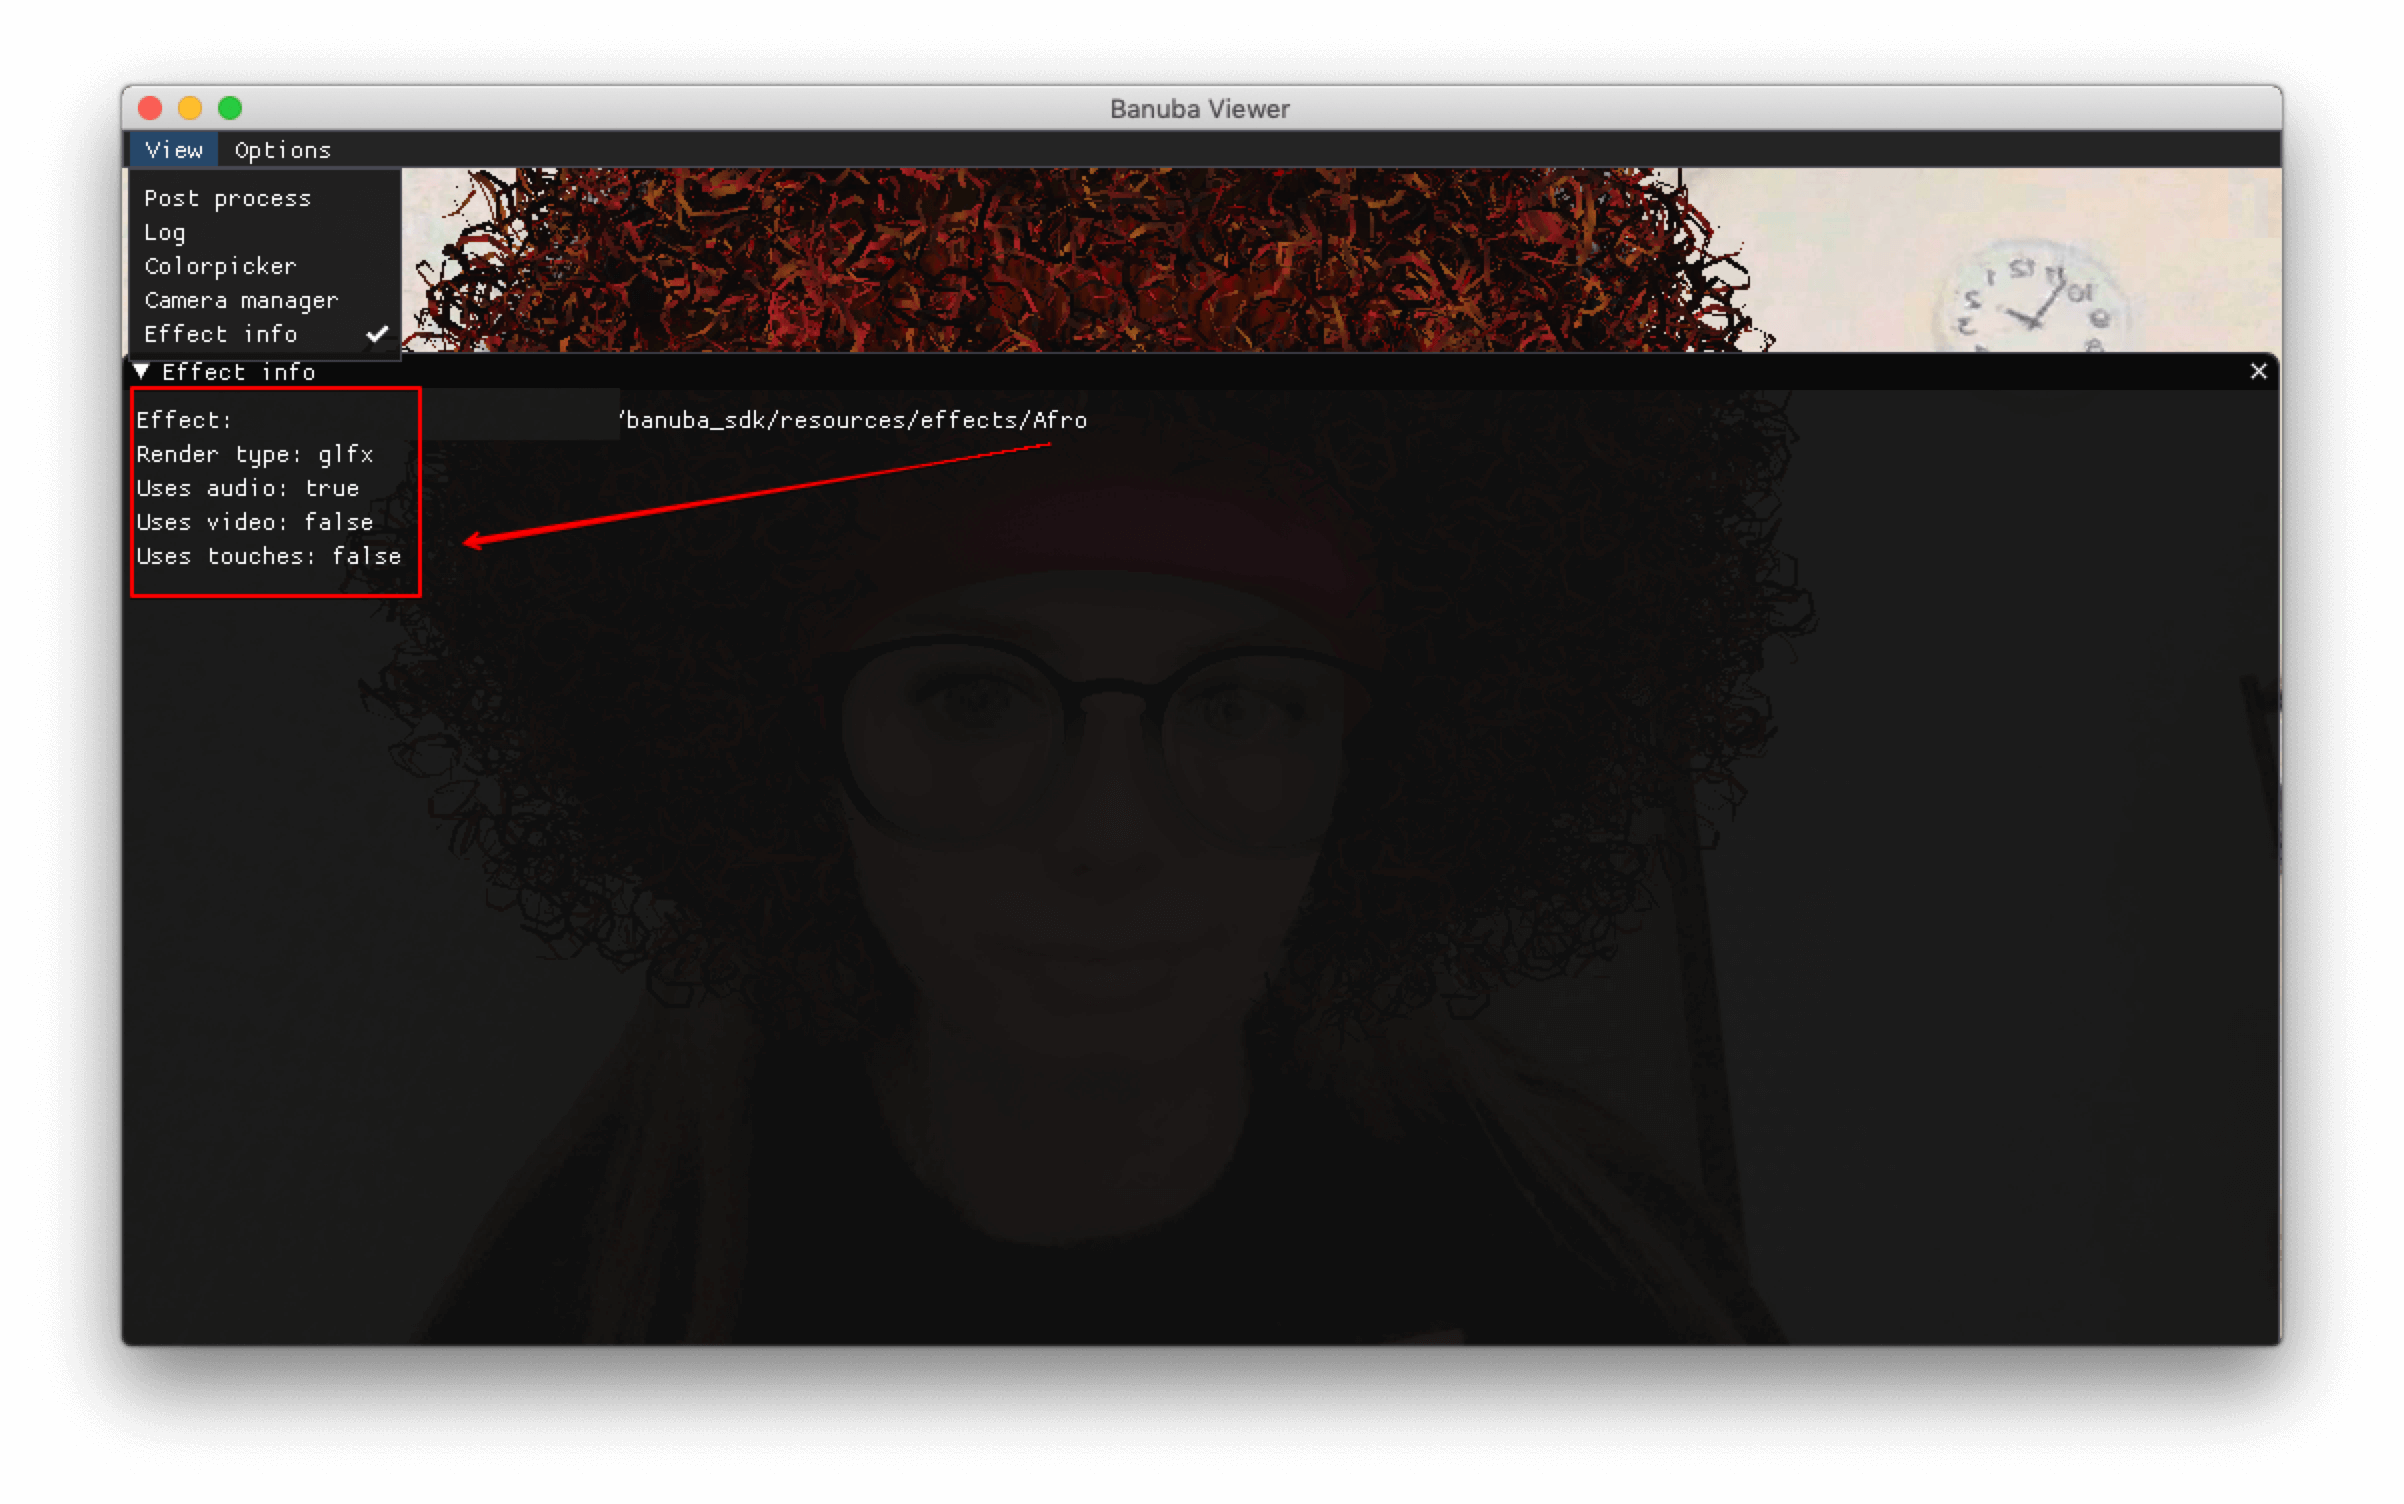
Effect Info#
If you want to know more details about the effect applied, you can open Effect info window under View tab. It contains the information about audio, video, touches usage and render type of the effect.
Hotkeys#
CTRL+R/⌘+R— BINs recordingR— reload effectP— pause/playCTRL+P/⌘+P— pause/play with surface killing
Image Processing#
- Launch the Viewer.
- Drag the entire effect's folder inside the Viewer window.
- Drag your photo inside the Viewer window.
- The processed photo will be stored with "_processed" suffix in the same folder where the original photo file is located.
Video Processing#
The video processing works in the same way as the photo processing with one small difference. The processed video will be stored with "_processed" suffix in the same folder where the original video file is located.
The result of the processing include 3 or 4 files:
- original-file-nameprocessed.gif — _gif file created automatically from video
- original-file-nameprocessed_with_sounds.mp4 — _video with a sound
- original-file-nameprocessed.mp4 — _video without sound
- original-file-nameeffect_sounds.wav — _separate audio track with effect sounds
Using external camera#
If you want to use an external camera, launch Banuba Viewer from the console with --camera-id parameter.
Example#
For Windows
.\bnb_viewer.exe --camera-id 1
For MacOS
/Applications/Banuba\ Viewer.app/Contents/MacOS/Banuba\ Viewer --camera-id 1
The command will set the camera with id = 1 as default camera for Viewer.