How to create face Beautification filter
Resource preparation#
1. FBX file with morphing#
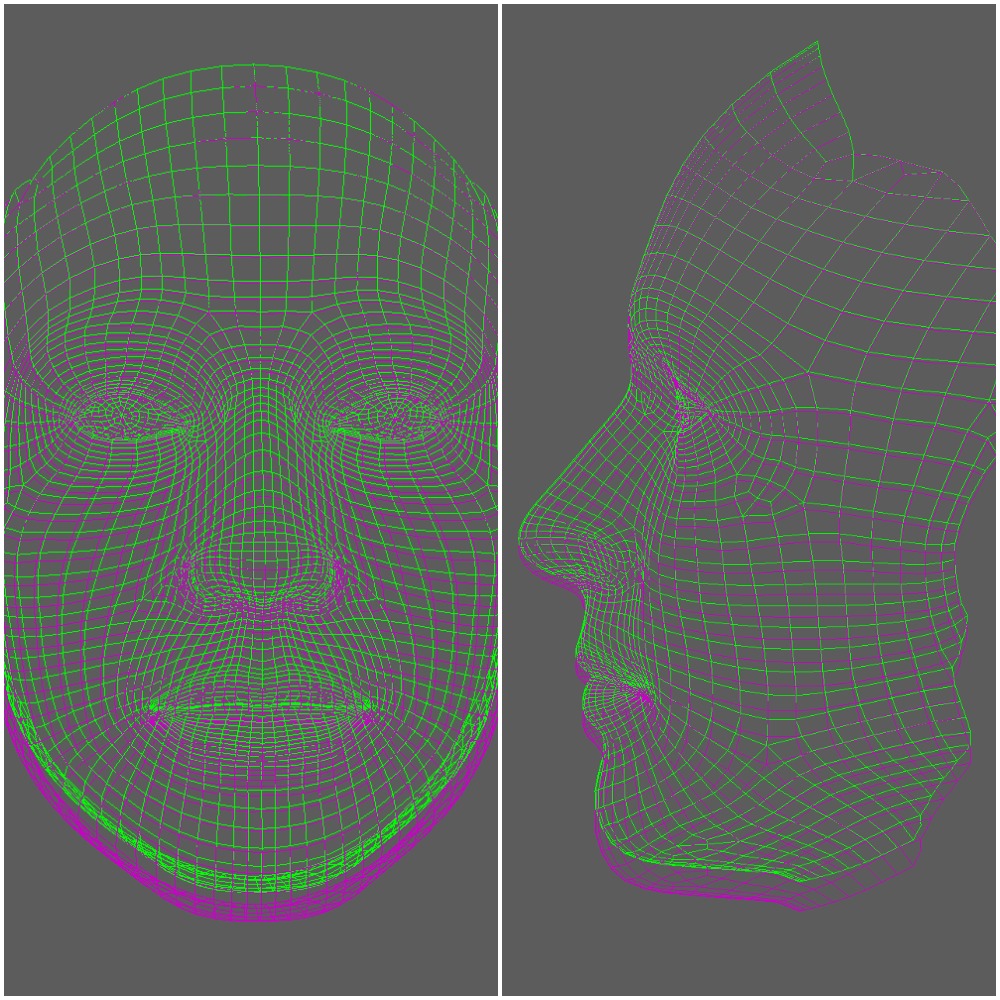
Create an FBX with a morphed base mask using any 3D editor. You can use the FaceDefault.FBX file with default face as a base model to create your morphed meshes.
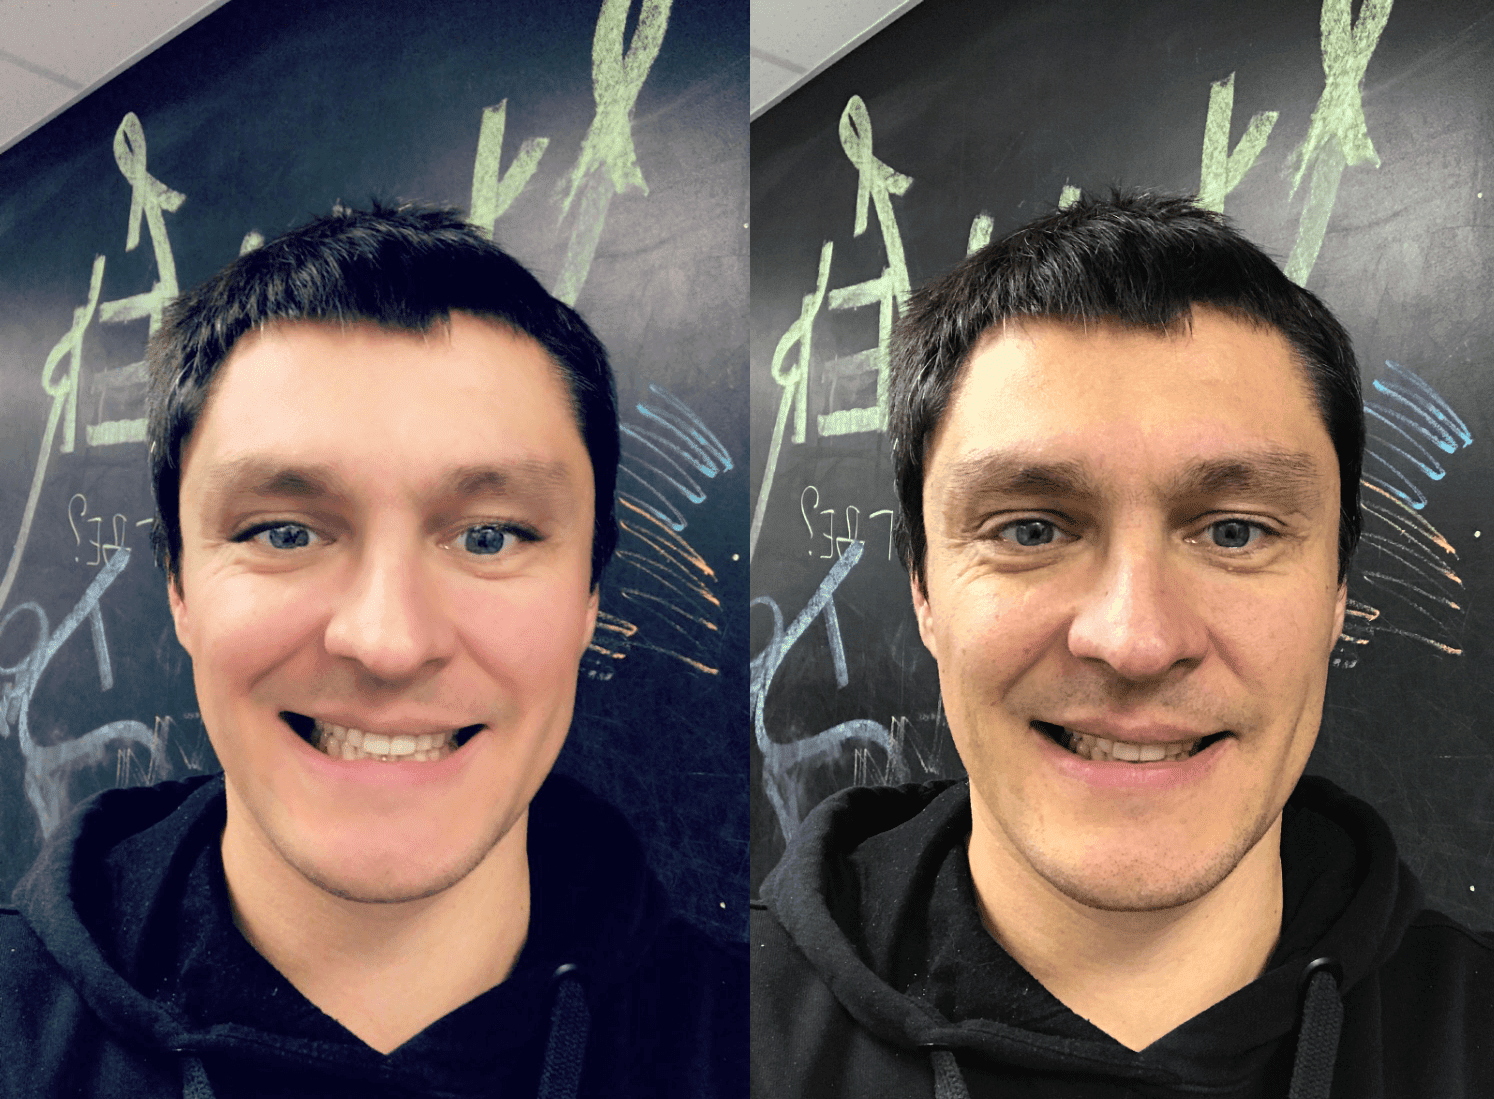
The images below show the base mask and the morphing effect (green mask) added to the base mask (pink mask). The morphing effect will be applied to the recognized face of the user, while the UV coordinates should remain unchanged.
2. Three textures as PNG files for Makeup, Softlight and Highlight.#
| Makeup texture | |
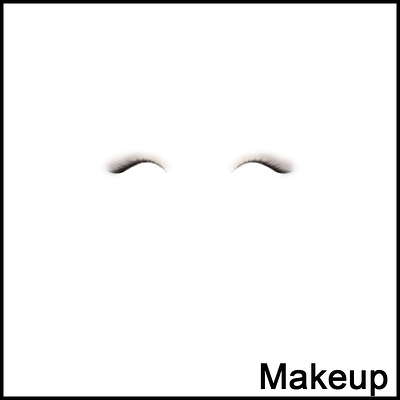 | The makeup texture is displayed on the face in normal blending mode using transparency. You can add tattoos, eyebrow color, shadows thrown by other objects (such as glasses), or, as in our case, eye shadow, lashes and eyeliner. |
| Softlight texture | |
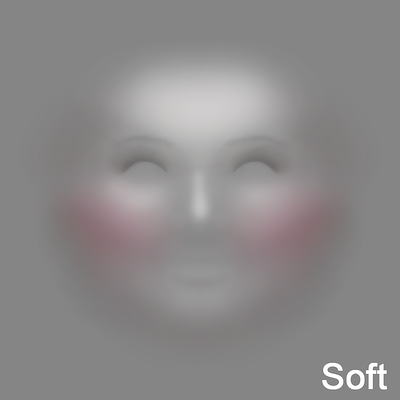 | The Softlight texture is displayed on the face in softlight blending mode. To produce a skin smooth effect, the softlight texture lightens the prominent areas of the face like the forehead, nose, cheekbones and chin. We also add a rosy tint on the cheeks. |
| Highlight texture | |
 | The Highlight texture is displayed on the face in blend mode. In our example, this texture adds glare to the eyes to produce an “expressive eyes” effect. |
3. Three LUT files in PNG format for eyes and teeth whitening and general color correction.#
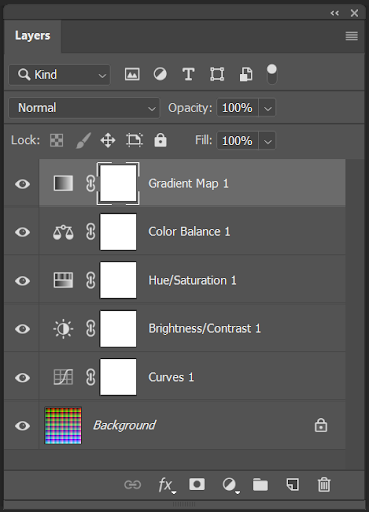
You can make your own LUT file by making color correction of the image in Photoshop using adjustment layers without masks, and apply these layers to the neutral LUT file.

Please note, files for eyes and teeth whitening should be without an alpha channel and the file name should begin with the lut3d_ prefix.
Effect construction#
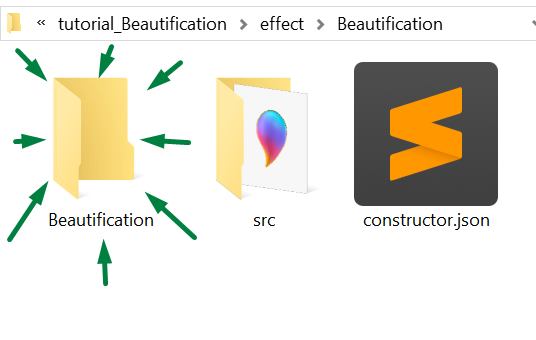
- Create a folder with the name of your effect (“Beautification”).
- Create src folder inside this folder for your source files and place the FBX file with morphing there.
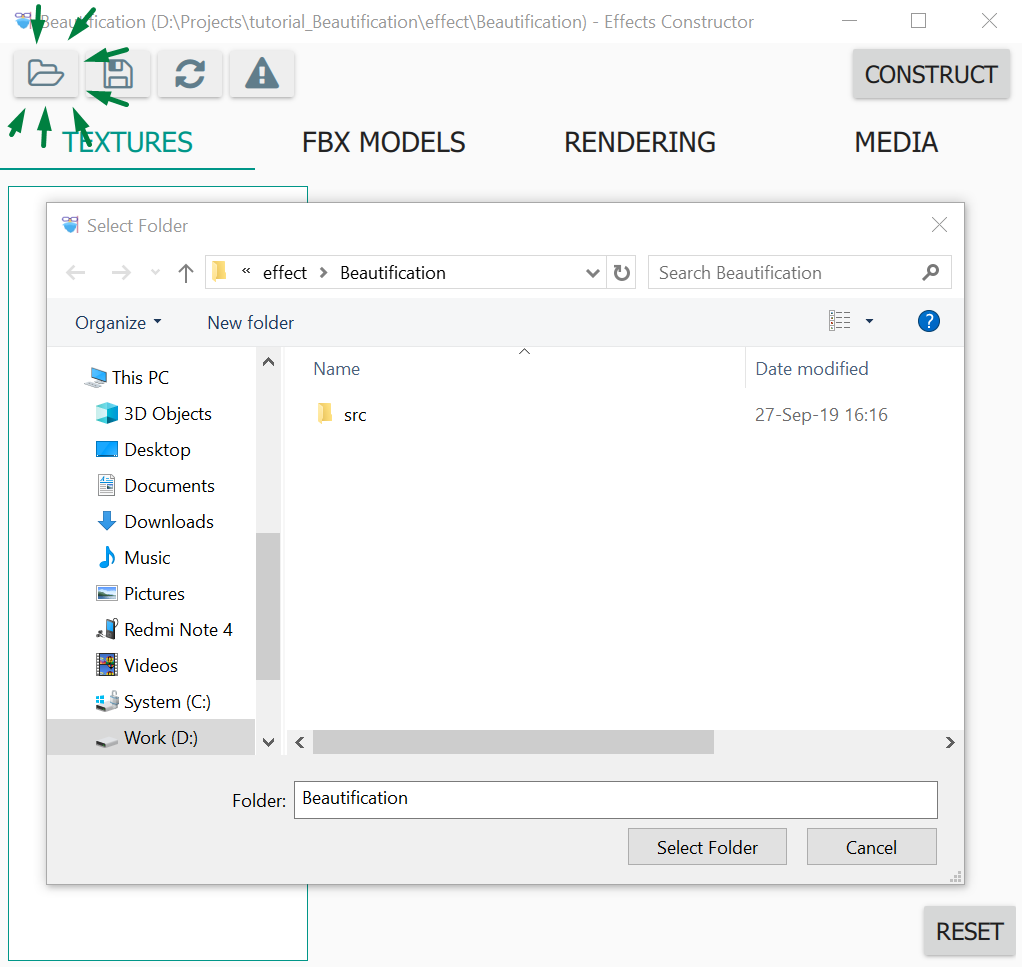
- Run the Effects Constructor, click the Open button and specify the path to the root folder "Beautification". This action will create a new folder with the configured effect.
- Add the rest of the source files to this new constructed folder: three LUT files and three PNG files Soft, Makeup and Highlight.
Effect configuration#
Step 1. Basic settings#
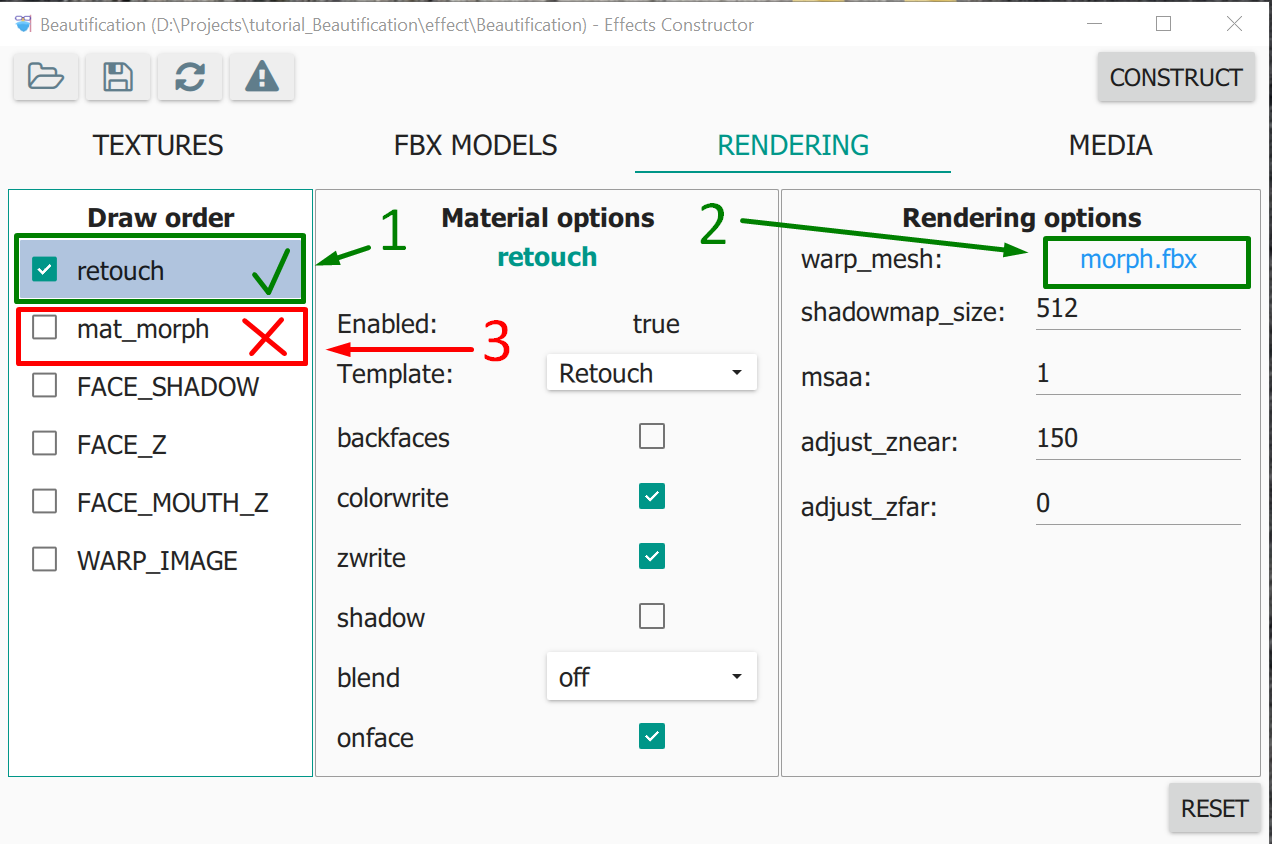
In the Filter Editor, go to the Rendering tab
- Turn on the retouch layer. We’ll set it up a bit later.
- In the warp_mesh option, point to the file with morphing.
- Disable the mat_morph layer with the morph geometry material as it’s not needed in our face beautification filter.
Press the Construct or Save buttons to save the settings.
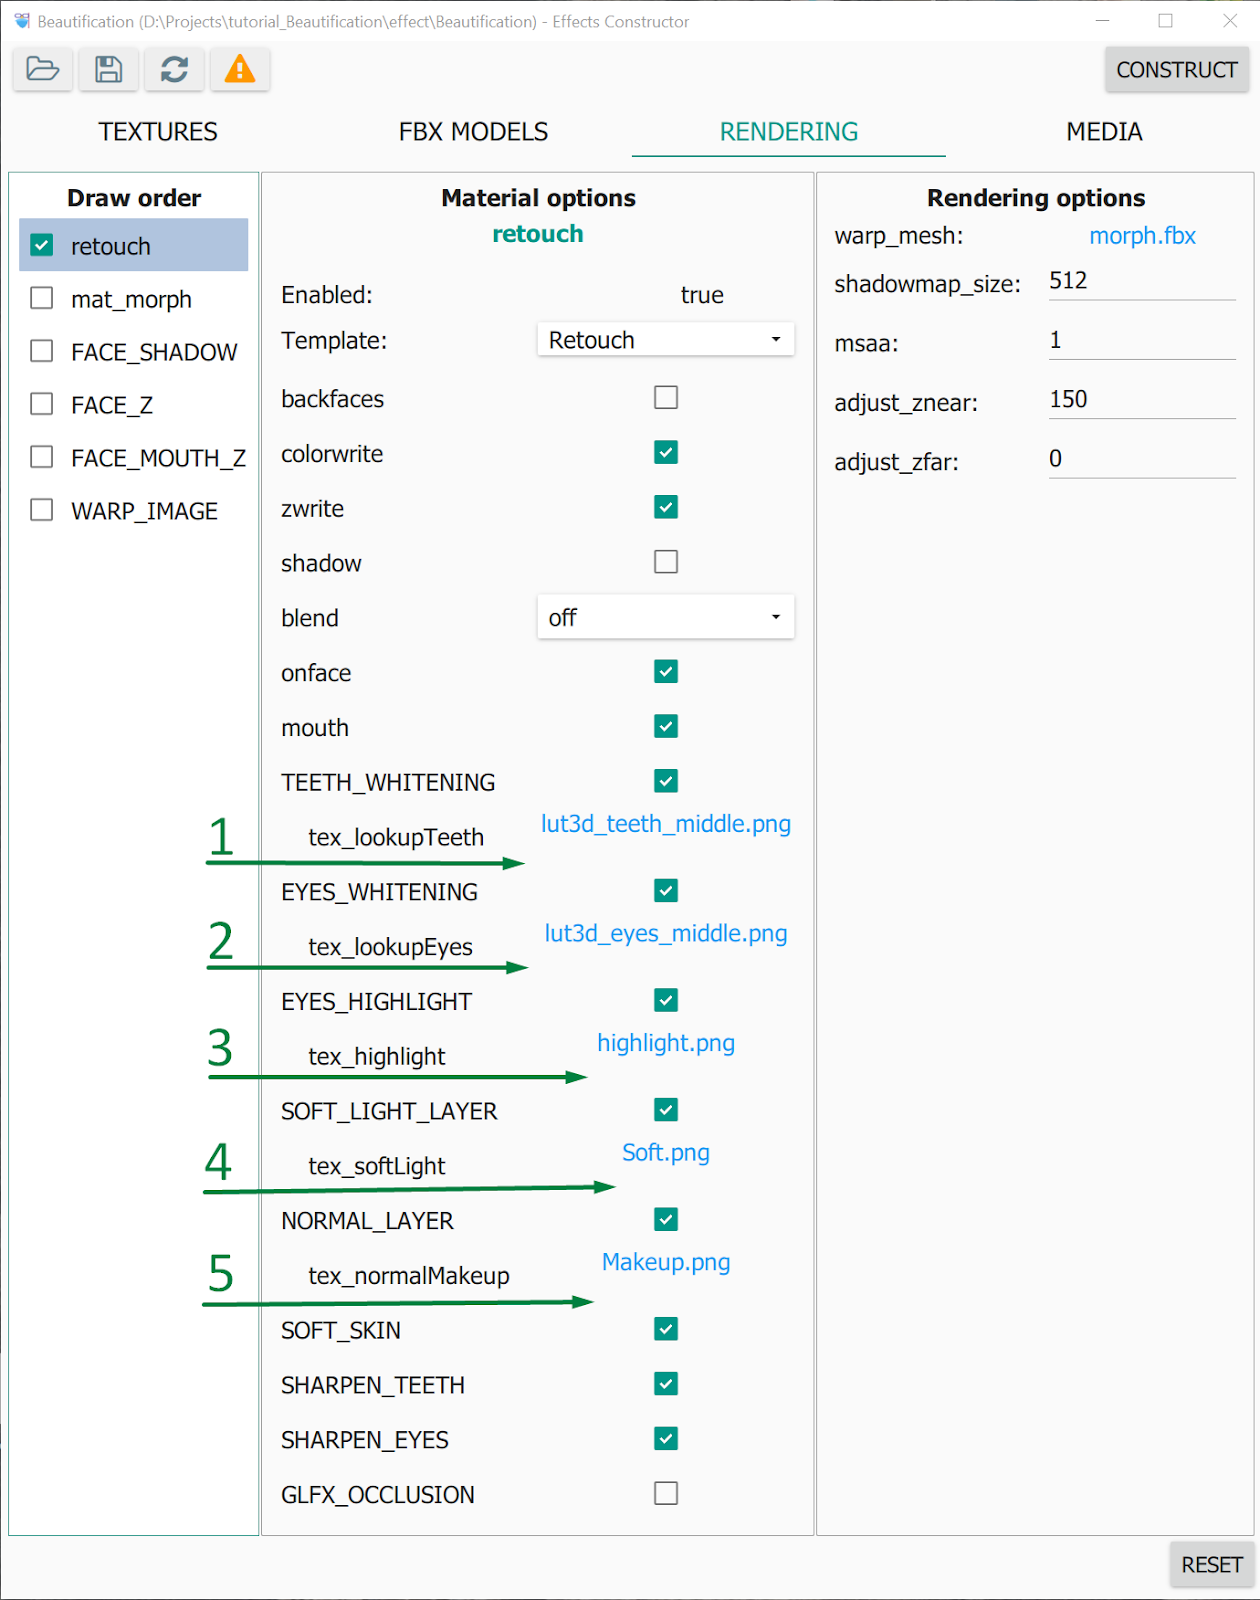
Step 2. Set up up the retouch layer#
To set up the retouch layer, specify the necessary options for the files.
LUT file for teeth whitening LUT file for eye whitening PNG file with glare in the eyes Softlight PNG file Makeup PNG File
Press the Construct button.
Step 3. Add color correction#
At the final step, we apply the color correction to the entire image which adds consistency to our face beautification filter.
Save the finalColorFilter.fsh file to the folder with your constructed effect and insert this code into the config.json file to enable it. In the code, we indicate the name of the LUT file nashville.png saved earlier in the folder with the constructed effect.
Summing up#
The example of the beauty filter described above can be used as a real-time effect or for photo post-processing in selfie editors. You can see more of Banuba video face beautification and retouch features from the video.
Download example