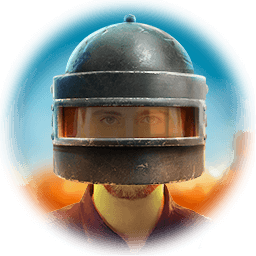
Animated 3d mask

Effect example: helmet
Steps to implement#
Resource preparation#
- Create a folder for your effect and name it the way you name the effect (helmet).
- Create src folder inside the folder you created in step 1.
- Place helmet.fbx model to src folder.
- Place textures to src folder:
- helmet_BaseColor.png
- helmet_Metallic.png
- helmet_Normal.png
- helmet_Roughness.png
Conversion with the Filter Editor#
- Press Open button and select helmet folder created in the "Resource preparation" phase.
- Make sure that the textures and model are in place and click CONSTRUCT button. You'll see a new folder created inside the effect folder which has the same name. The converted textures with ".ktx" extension and the model with ".bsm2" can be found inside the new folder.
Configuring materials with the Filter Editor#
- Go to RENDERING panel.
- Enable FACE_Z and place it to the first position in the draw order.
- Place glass material after helmet in the draw order. The right order:
- FACE_Z
- helmet
- glass
- Enable GLFX_TEX_MRAO material option and set helmet_MRAO.ktx as MRAO texture value both for glass and helmet. Set the values for the Base color and Normal textures as well: helmet_Base_Color.ktx and helmet_Normal.ktx respectively.
- To make the glasses transparent, switch the blend mode to alpha for the glass material. Make sure that the glass goes after the helmet in the draw order. Otherwise, you'll get the incorrect behavior of the effect — the helmet will be invisible under the glass.
- Click CONSTRUCT button.
The effect construction is completed. You can preview your effect in the Banuba Studio application. To preview the effect, drag'n'drop it to the Previewer window.