Offscreen Effect Player Demo App
Requirements#
- Latest stable Android Studio
- Latest Gradle plugin
- Latest NDK
Get the client token#
To start working with the Banuba SDK Demo project for Android, you need to have the client token. To receive the trial client token please fill in our form on banuba.com website, or contact us via info@banuba.com.
note
Before building the Android Offscreen Effect Player Demo project, place your client token inside an appropriate file in the following location:
src/offscreen/src/main/java/com/banuba/offscreen/app/BanubaClientToken.java
Client token usage example#
Get the Banuba SDK archive#
With the client token, you will also receive the Banuba SDK archive for Android which contains:
- Banuba Effect Player (compiled Android library project with .aar extension),
- Android project folder (src) which contains demo apps, located in
src/appandsrc/offscreenrespectively.
Build the Banuba SDK OEP Demo app#
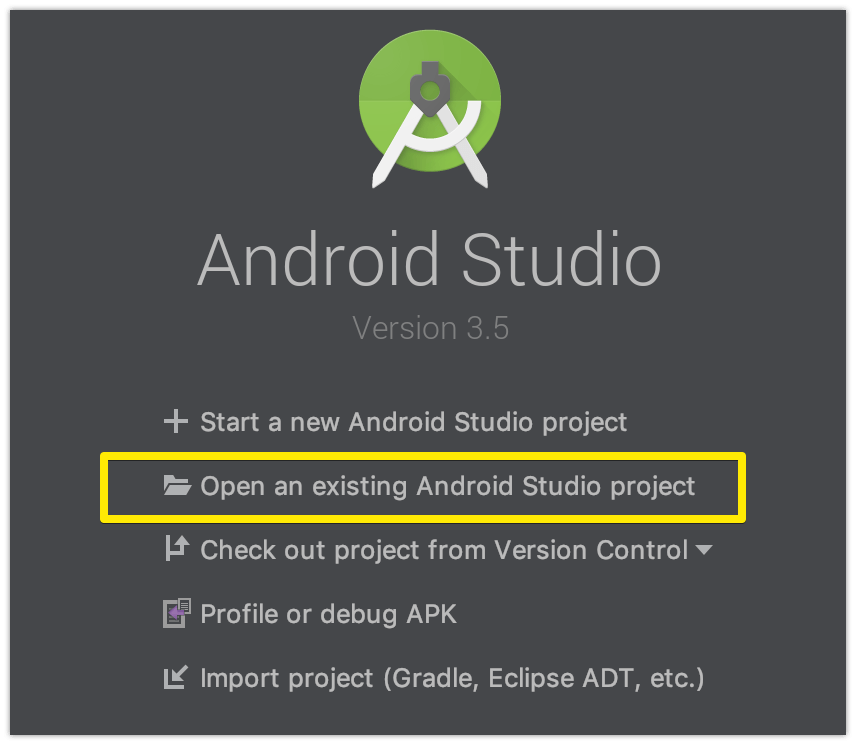
- Import the Android project under
srcfolder in Android Studio.
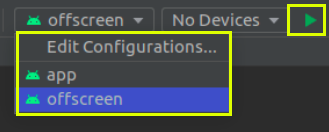
- Select the needed application for the build.
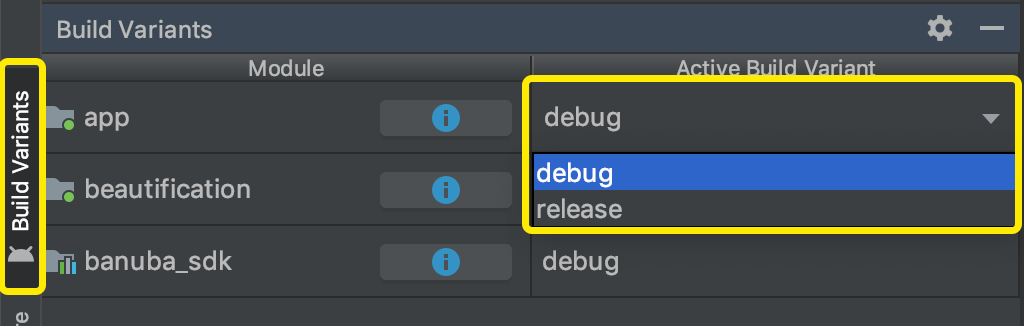
- Select Build Variant from the left side menu in Android Studio.
Debugbuild variant allows to properly debug and profile app during its execution.Releasebuild variant allows testing release variant of the application for faster performance.
Offscreen Effect Player Demo App briefly#
The application shows different conveyors for image processing when the active effect is rendered to the buffer in the memory. Additionally, it shows how to configure input image orientation for processing in the different device orientations and video frame sources.
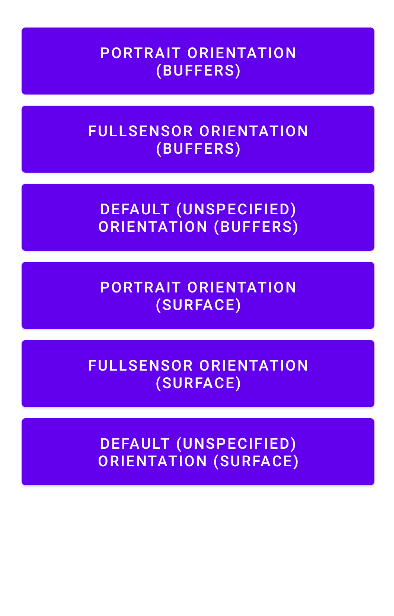
SURFACE mode buttons in the picture above reflect the usage of Offscreen Effect Player with Surface texture.
Offscreen Effect Player Demo app contains the following packages:
camera— the camera capture functionality. SeeCamera2Simple,Camera2SimpleThreadandCameraWrapper.fragments— the fragment configuration functionality.gl— the needed Open GL ES configuration functionality.orientation— the device orientation change observing functionality.render— the rendering purpose functionality. SeeCameraRenderSurfaceTextureandCameraRenderYUVBuffers.
Offscreen Effect Player notes#
The
BanubaSDKManageris not used in the case of OEP. Instead, use theOffscreenEffectPlayerclass. You can use only one static methodBanubaSdkManager.initialize(Context, BNB_KEY)to initialize Banuba SDK with the token. See theCameraFragment.javaclass from the Offscreen Demo app. There are two cases of Banuba SDK initialization in the case of OEP: usingEffectPlayerConfigurationorOffscreenEffectPlayerConfig:
As you can see in the above source code, the mEffectPlayer object is used as an input parameter for the OffscreenEffectPlayer constructor. In this case, OEP is initialized with pre-created EffectPlayer. You can assign more listeners related to EffectPlayer, e.g. refer to the How to use Face Triggers in Android to see how to access triggers.
The OEP is included in the banuba_sdk module that is available with sources, and you can see the structure and architecture of the OEP. The main idea is that OEP is not responsible for camera frame acquiring. OEP just processes an input image and returns the processed image synchronously either as a buffer (see the OffscreenEffectPlayer.setImageProcessListener) or draw a processed image on the texture (see the OffscreenEffectPlayer.setSurfaceTexture).
The Offscreen effect player will create a rendering surface taking the min value of SIZE dimensions as an OEP surface width and the max value of SIZE as a surface height. In the sample above we have surface size 720x1280 (width, height correspondingly).
The surface size determines the effective area for OEP's rendering. So if the surface size is 720x1280 (width, height correspondingly) the surface will have the following look:

If UI changes orientation with a size of 1280x720, the OEP surface will have the following look:

The rendering surface size of OEP determines the size of the output image.
Offscreen Effect Player automatically manages the surface size if an application changes UI orientation.
For processing input camera frames, use methods
OffscreenEffectPlayer.processImageorOffscreenEffectPlayer.processFullImageData. The processed image you can get viaImageProcessedListener.onImageProcessed(see theOffscreenEffectPlayer.setImageProcessListenermethod) in the case of processed image buffer. Or the OEP can draw processed image on the texture (see theOffscreenEffectPlayer.setSurfaceTexture). Next methods should not be used with OEP:BanubaSDKManager.attachSurface,BanubaSDKManager.effectPlayerPlay,BanubaSDKManager.startForwardingFramesand other methods ofBanubaSDKManagerrelated with the camera frames processing.For loading an effect, use the method
OffscreenEffectPlayer.loadEffectinstead ofBanubaSDKManager.loadEffect.For making
FullImageData: Use theOrientationHelperclass to set the right face orientation based on the camera and the image orientations.
The steps of OrientationHelper usage include:
Where the videoFrame is WebRTC VideoFrame object but it can be any other frame object type. After FullImageData creation it should be passed into OffscreenEffectPlayer.processFullImageData method.
You also can review how the Offscreen Demo app manages the input image orientation: The application's UI orientation is necessary to determine the OEP input image orientation:
Based on this information, the input image orientation is calculated:
Use the
OffscreenEffectPlayer.callJsMethodmethod instead ofBanubaSDKManager.effectManager.current().callJsMethod.The processed image may be returned by OEP via
ImageProcessedListener.onImageProcessedcallback method (see theOffscreenEffectPlayer.setImageProcessListenermethod). Also, OEP may draw the processed image on the texture (see theOffscreenEffectPlayer.setSurfaceTexture). So theIEventCallback.onFrameRenderedcallback is not used in the case of OEP at all. Use theImageProcessedListener.onImageProcessedinstead. See theCameraRenderYUVBuffers.constructHandlerfrom the Offscreen Demo app sources for more details:If rendering to the texture is not used, the output image orientation will coincide with the input image orientation.
In the context of libYUV java wrapper library, an incorrect case of
I420Buffer.wrapuse may occur. The capacity (allocationSize) of output OEPImageProcessResultobject is:
You can find this code in the OffscreenPlayerThread.handleFullImageData method. But only (3 w h / 2) of size is used for processed output YUV data (as you can see in the comment). So (w h / 2) part of the buffer is not used. But I420Buffer.wrap expect that there are no unused buffer parts. In this case, we can make buffer slicing with the size of (3 w * h / 2):