iOS Legacy Installation
This document descrides legacy installation process. Since 1.4.0 Banuba SDK provides platform-specific packages. Packages should be preferred over archives.
Requirements
- Latest stable Xcode
Get the client token and a configuration file
To start working with Banuba SDK in your project, you need to have a client token. To receive a client token please fill in our form on banuba.com website, or contact us via info@banuba.com.
Together with the token, you will receive a configuration file config.json which contains the required SDK resources defined by the token. Read more about this in Repack your SDK archive (minify SDK size) section.
Get the Banuba SDK archive
With the client token, you will also receive the Banuba SDK archive for iOS which contains:
- Banuba Effect Player XCFramework (
BanubaEffectPlayer.xcframework), - BanubaSdk Xcode project,
- Effect examples located under
effectsfolder.
Repack your SDK archive (minify SDK size)
SDK release archive contains all SDK resources by default. They may consume more disk space in the finished build.
To reduce the SDK size, please use the sdk_repacking.py script provided with the SDK archive.
Please refer to SDK repacking readme in your SDK archive or to our video guide for more information and a usage example.
After repacking your SDK archive you can try the usage of external resources. It can additionally reduce the size of the SDK.
Build your project with the Banuba SDK
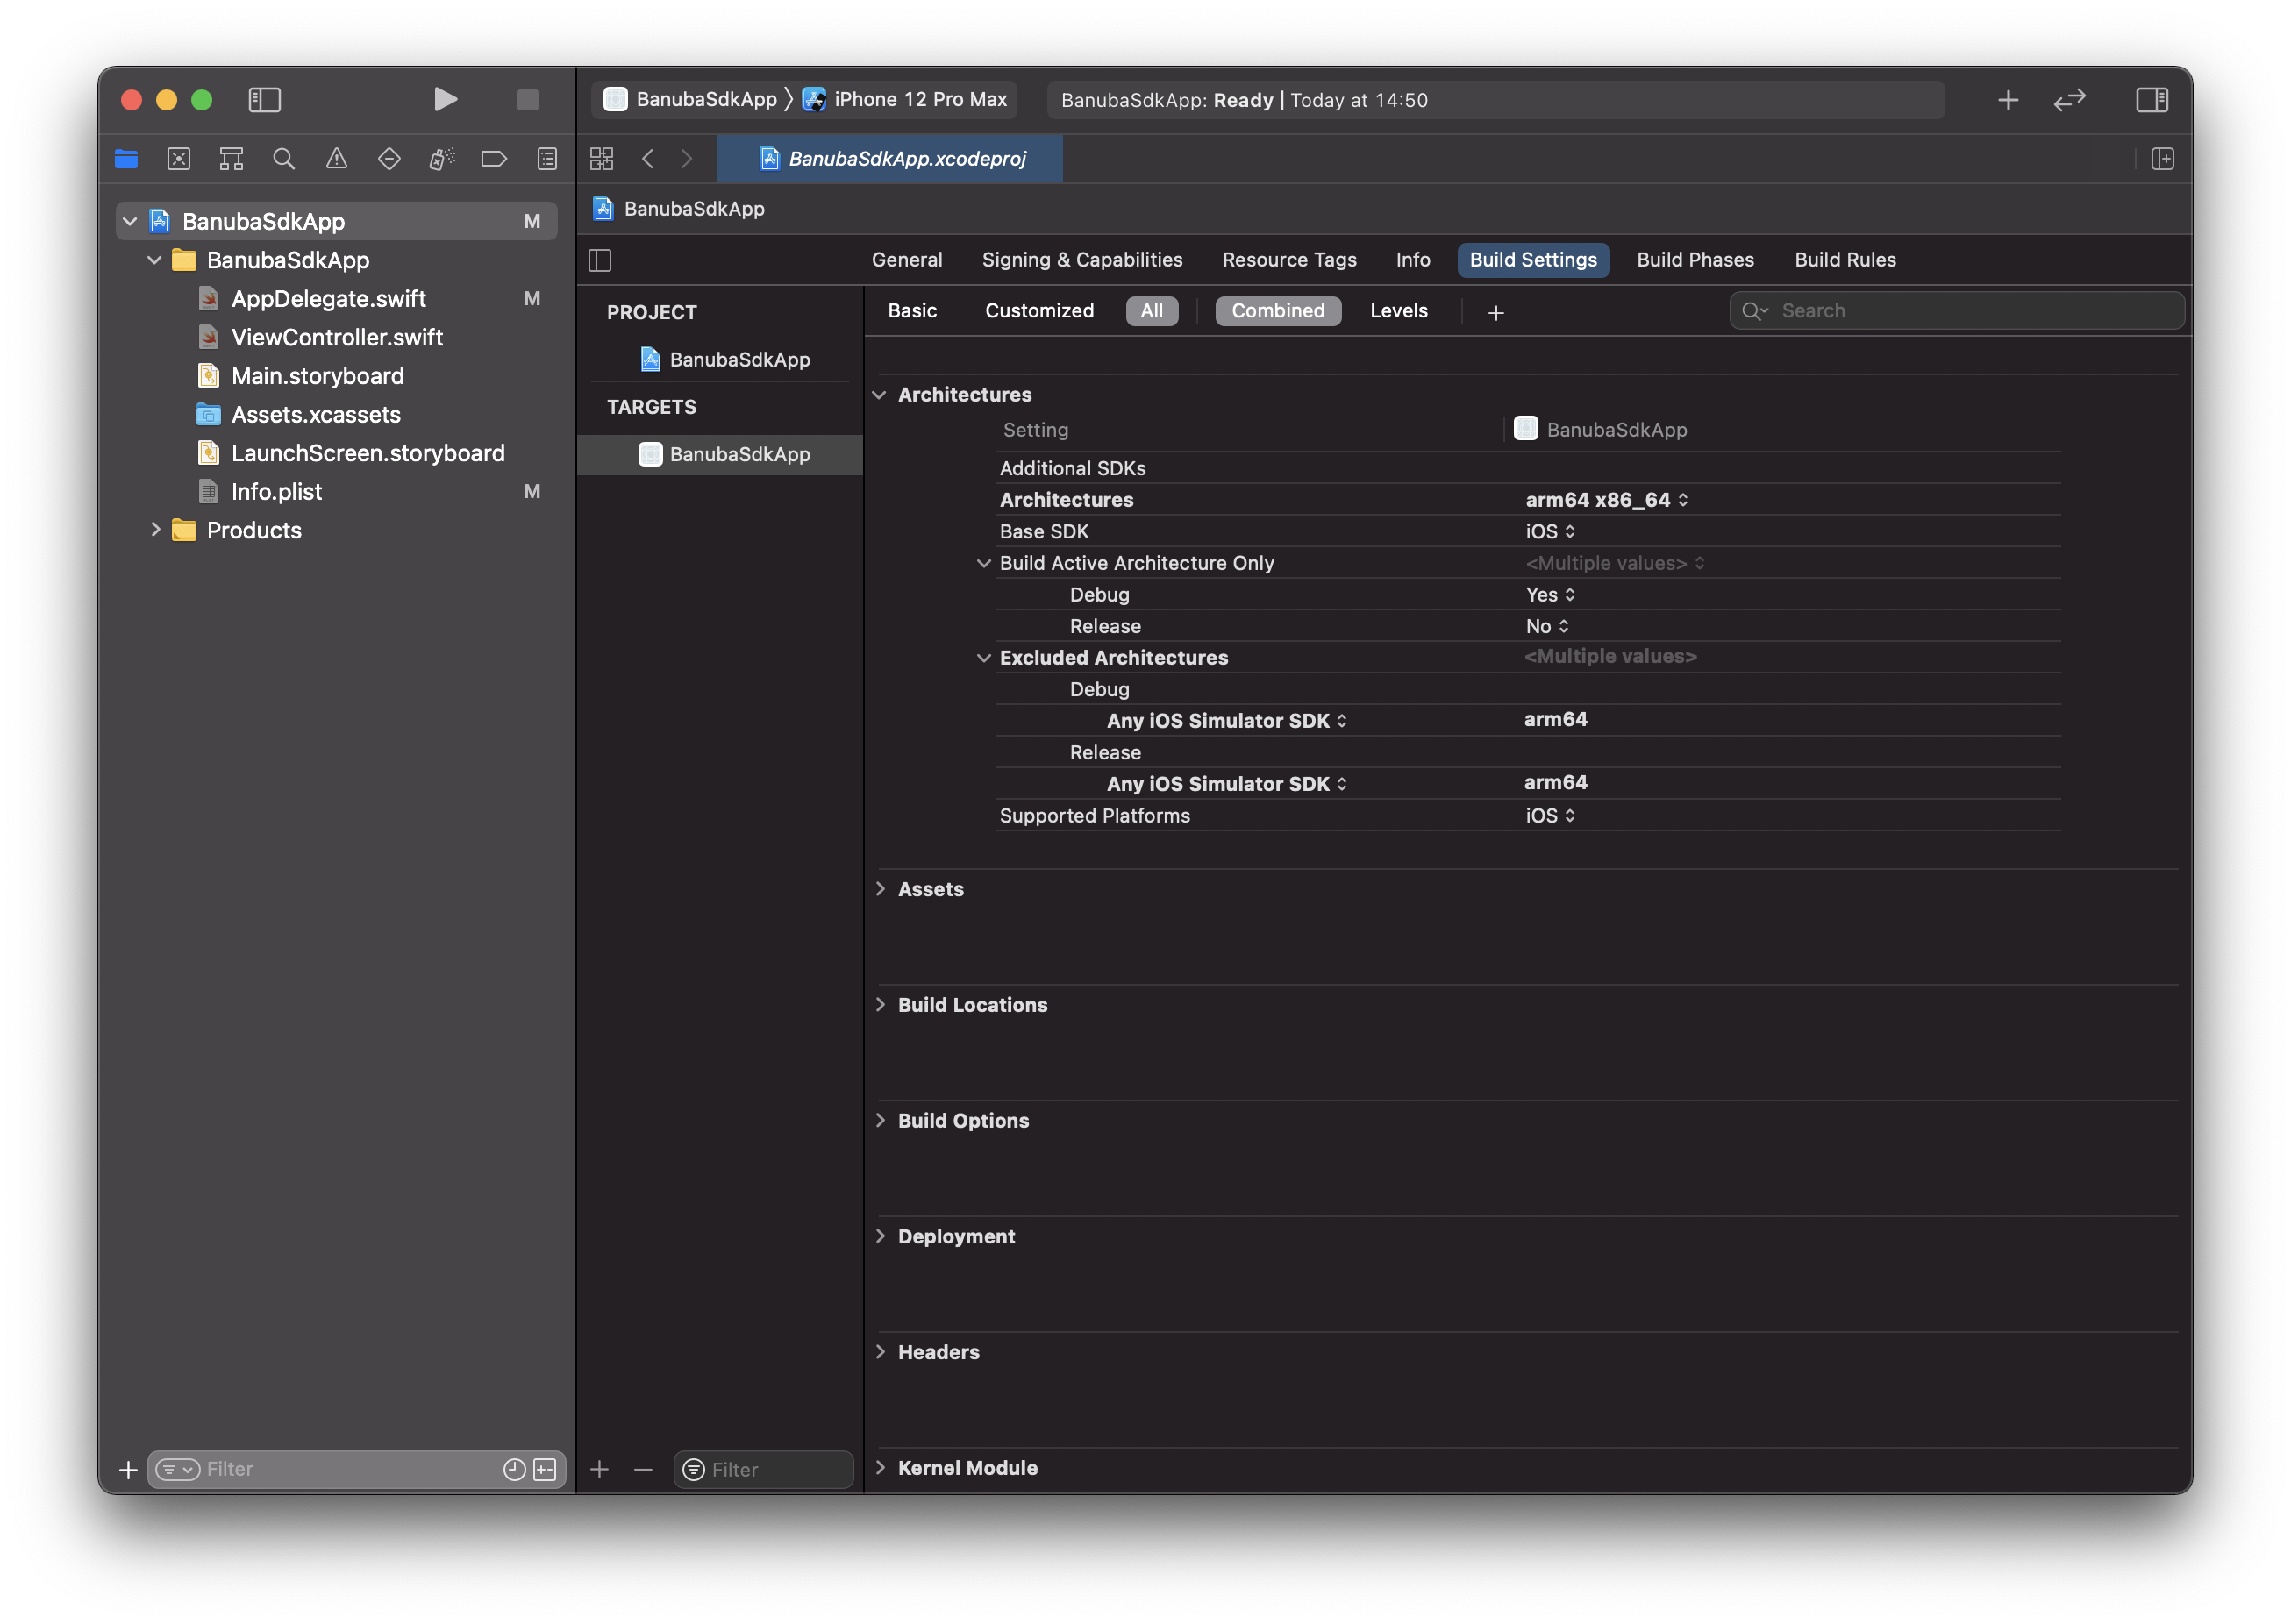
- By default, Xcode provides
arm64, armv7architectures. Since Banuba SDK supports onlyarm64, x86_64you should change you valid architectures and addarm64as excluded forAny iOS Simulator SDKin order to run Banuba SDK on simulators.
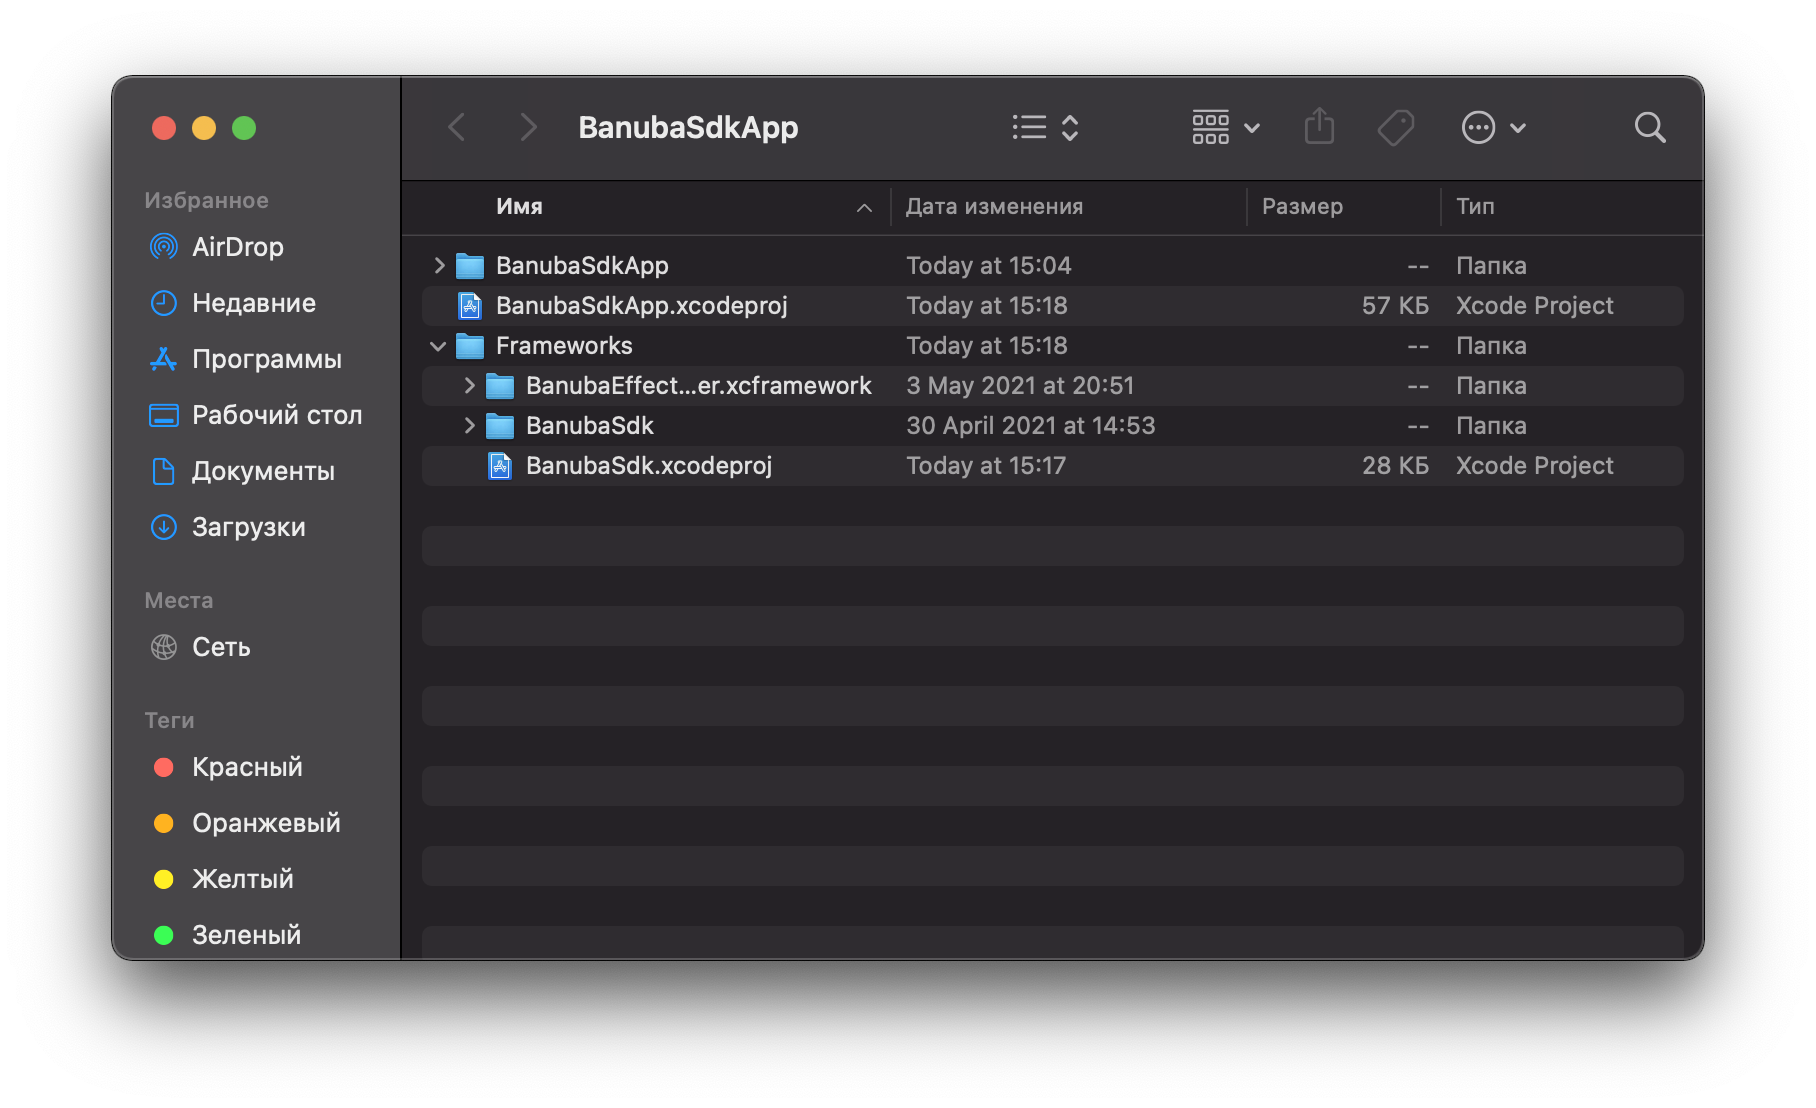
- In your project, create
New Groupwith the nameFrameworks. Then, open this folder in Finder and copy the following files from your SDK archive:
BNBEffectPlayer/bin/BanubaEffectPlayer.xcframework.BNBEffectPlayer/src/BanubaSdk/BanubaSdk/BanubaSdk/.BNBEffectPlayer/src/BanubaSdk/BanubaSdk/BanubaSdk.xcodeproj.
- Drag
BanubaEffectPlayer.xcframeworkandBanubaSdk.xcodeprojfromFrameworksfolder in Finder to your Xcode project.
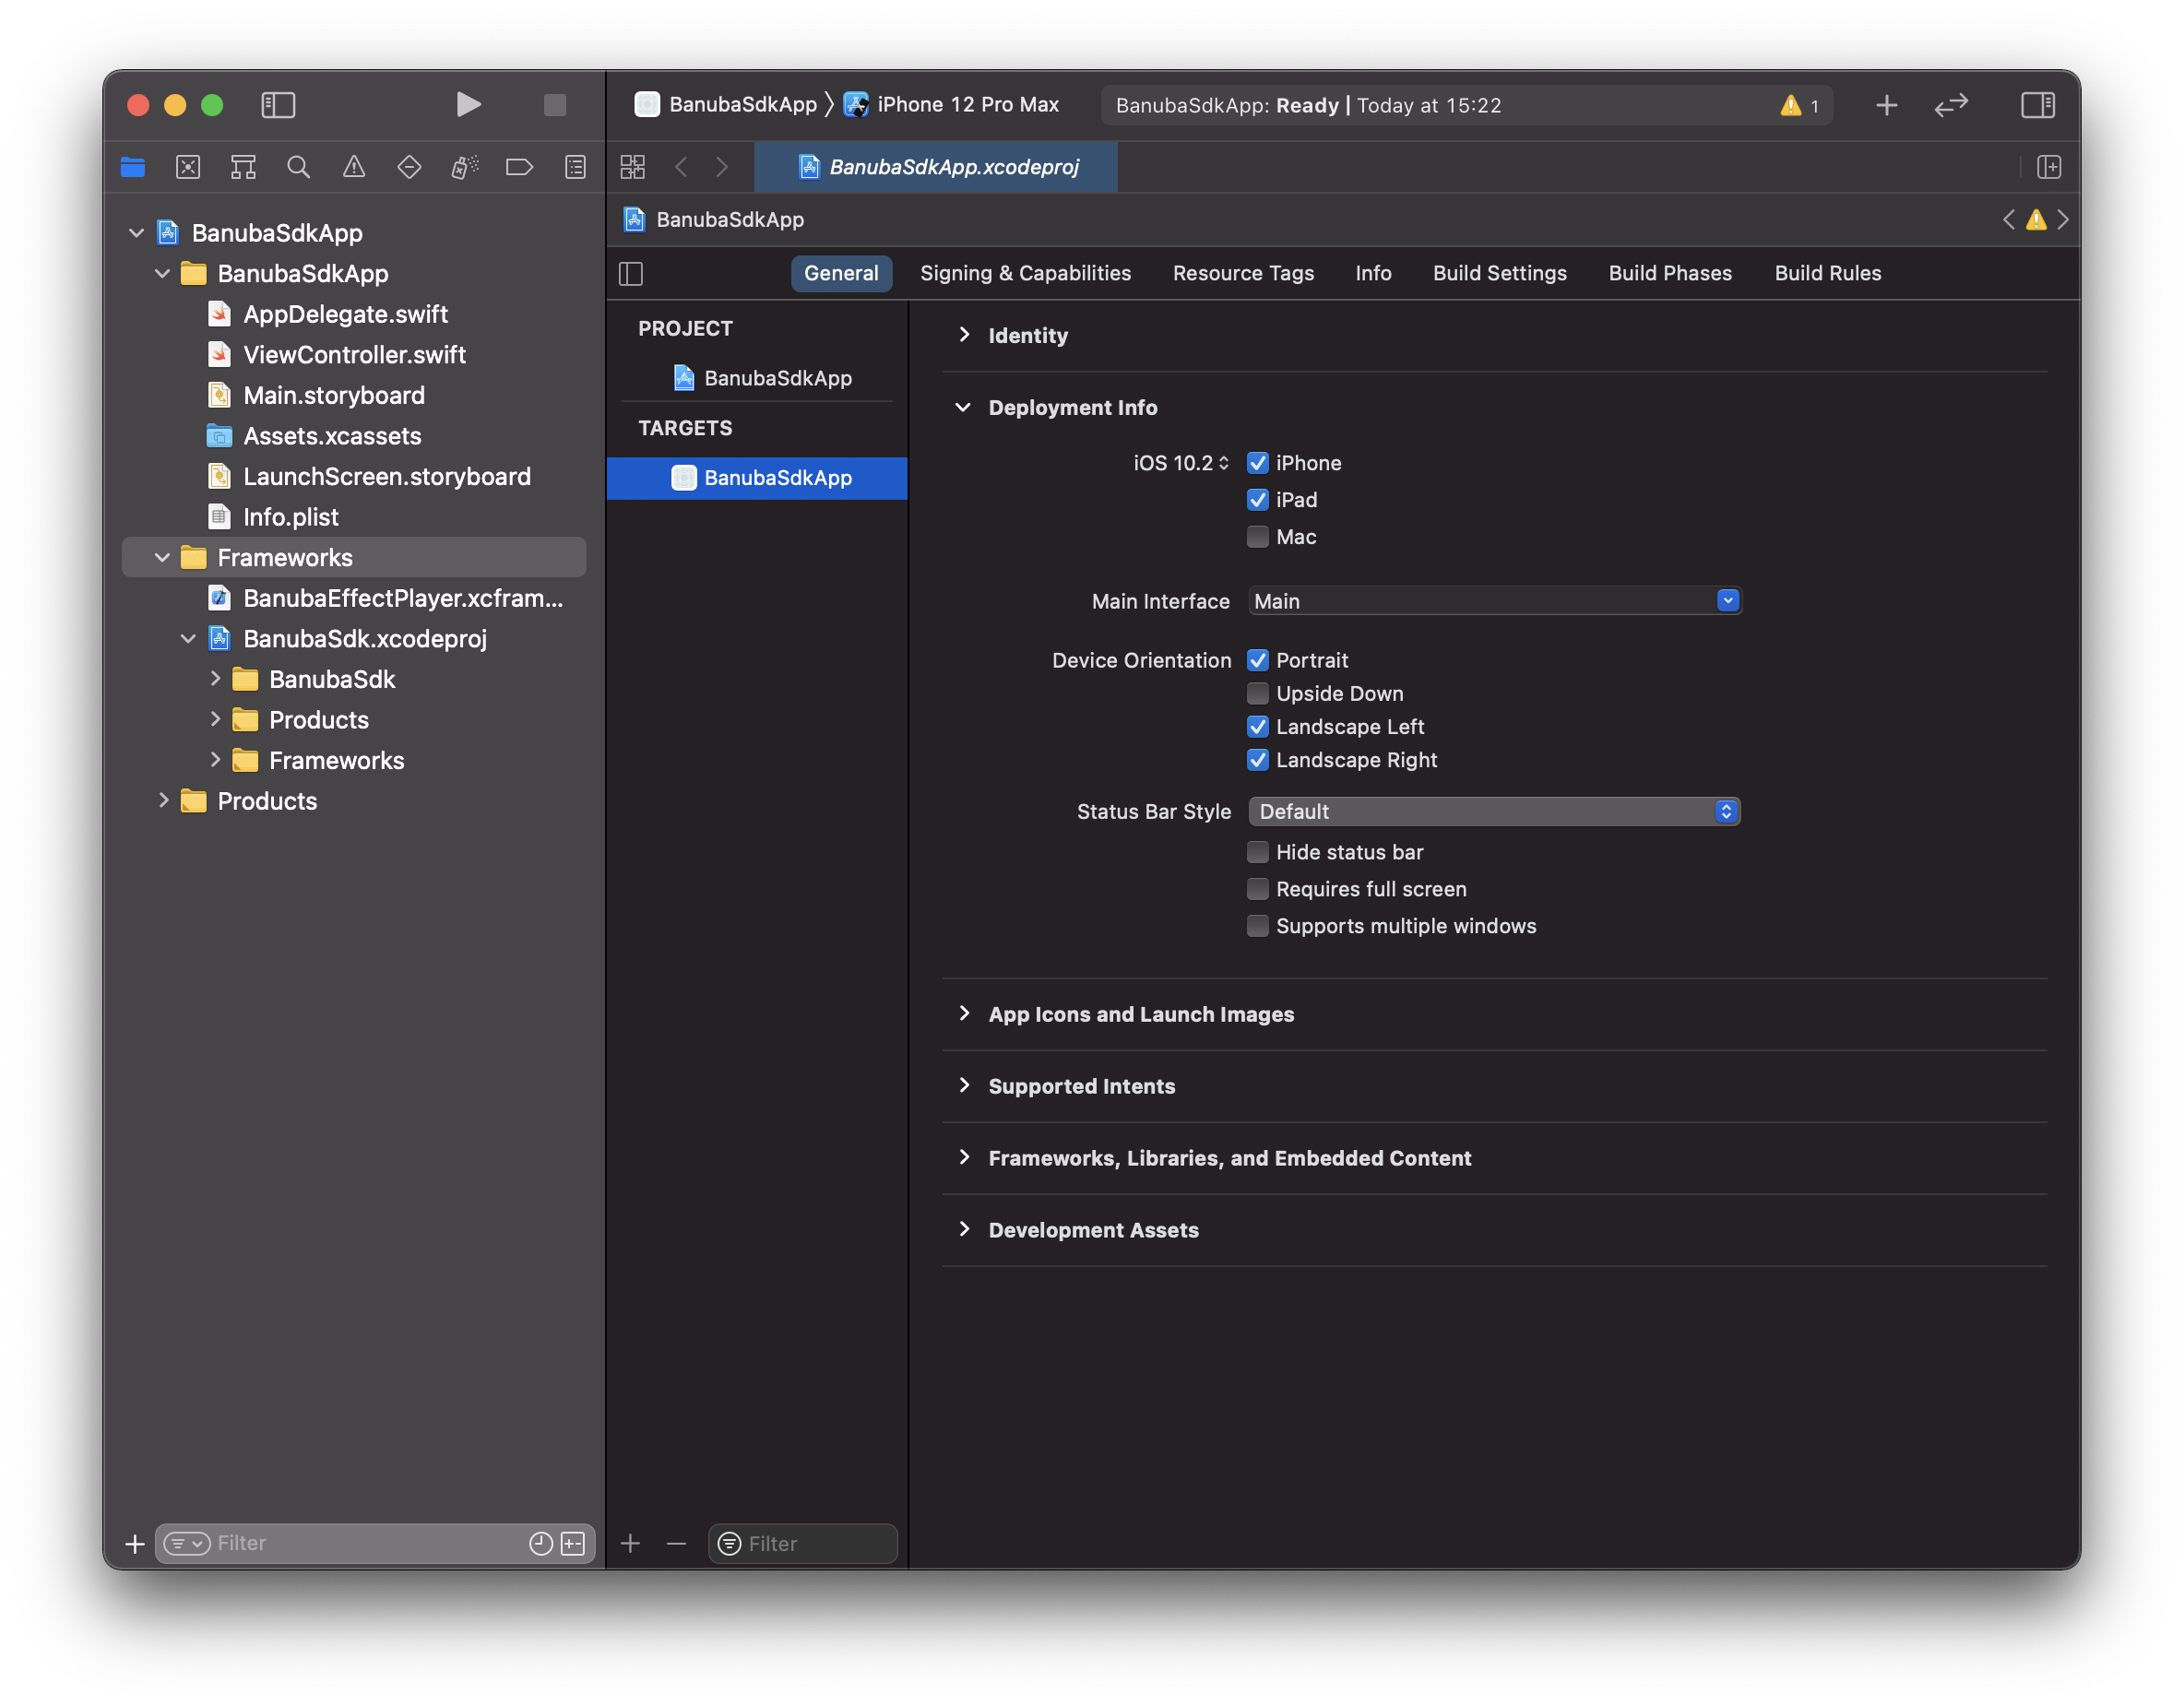
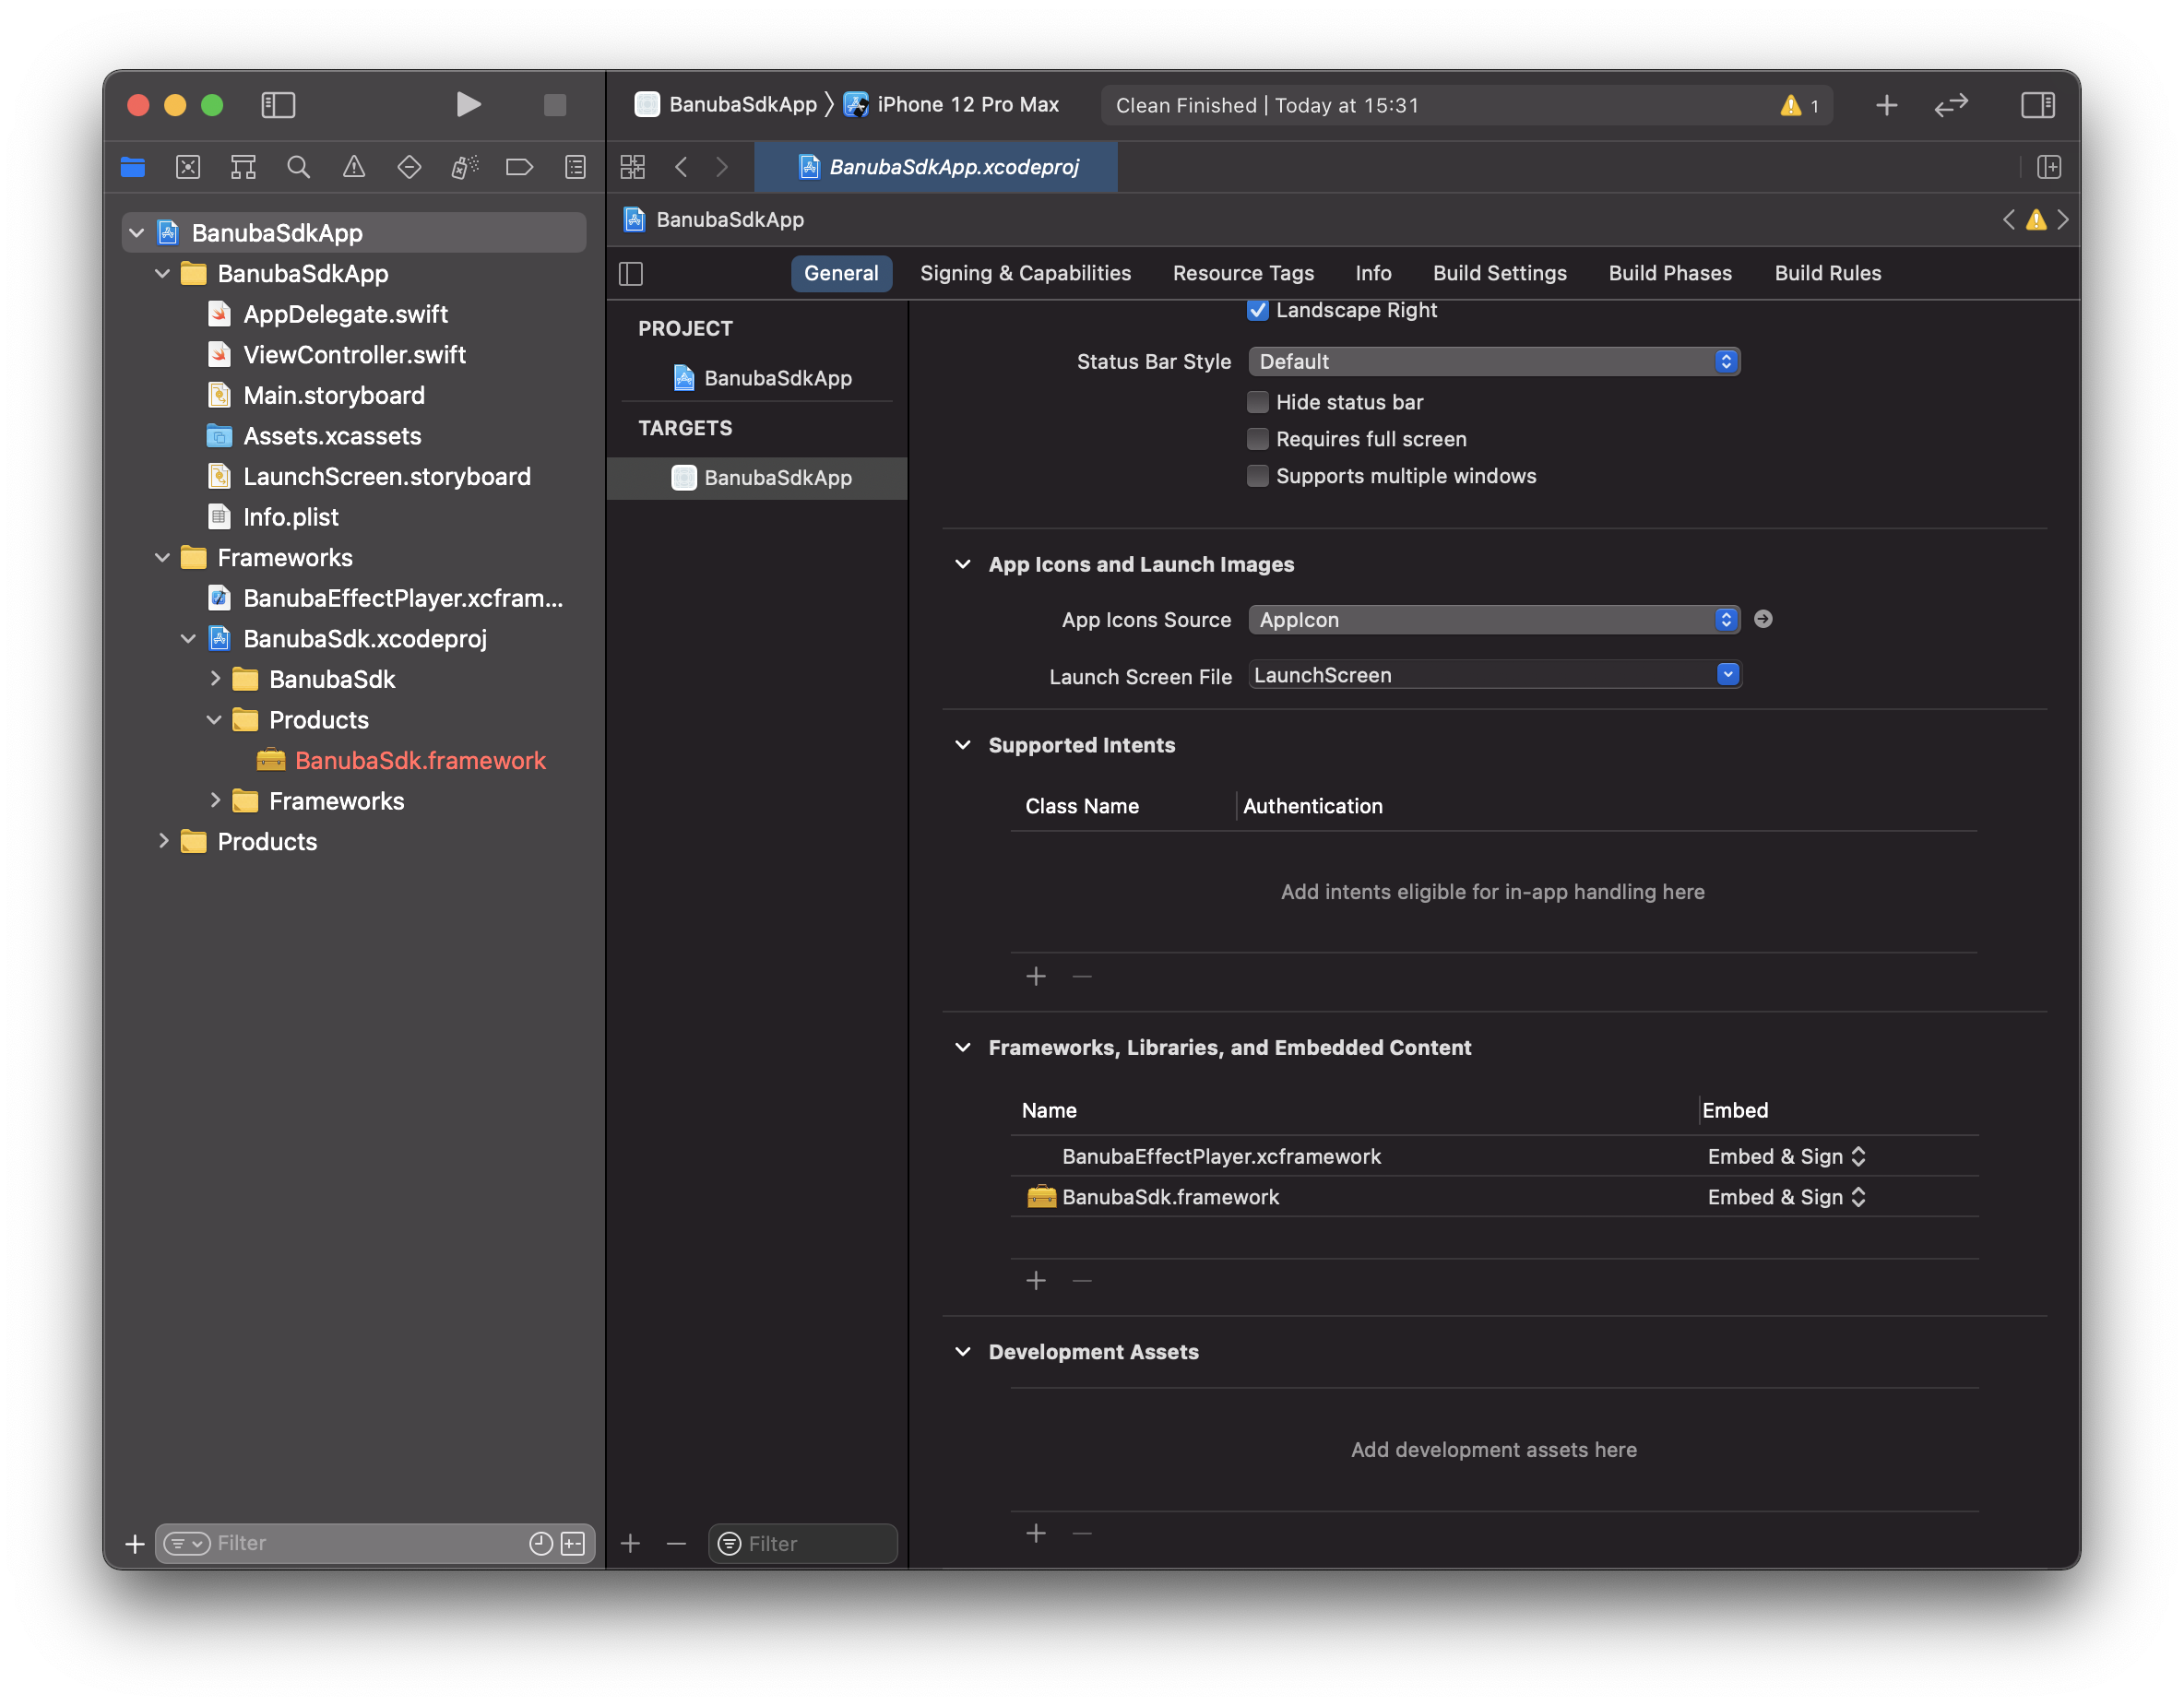
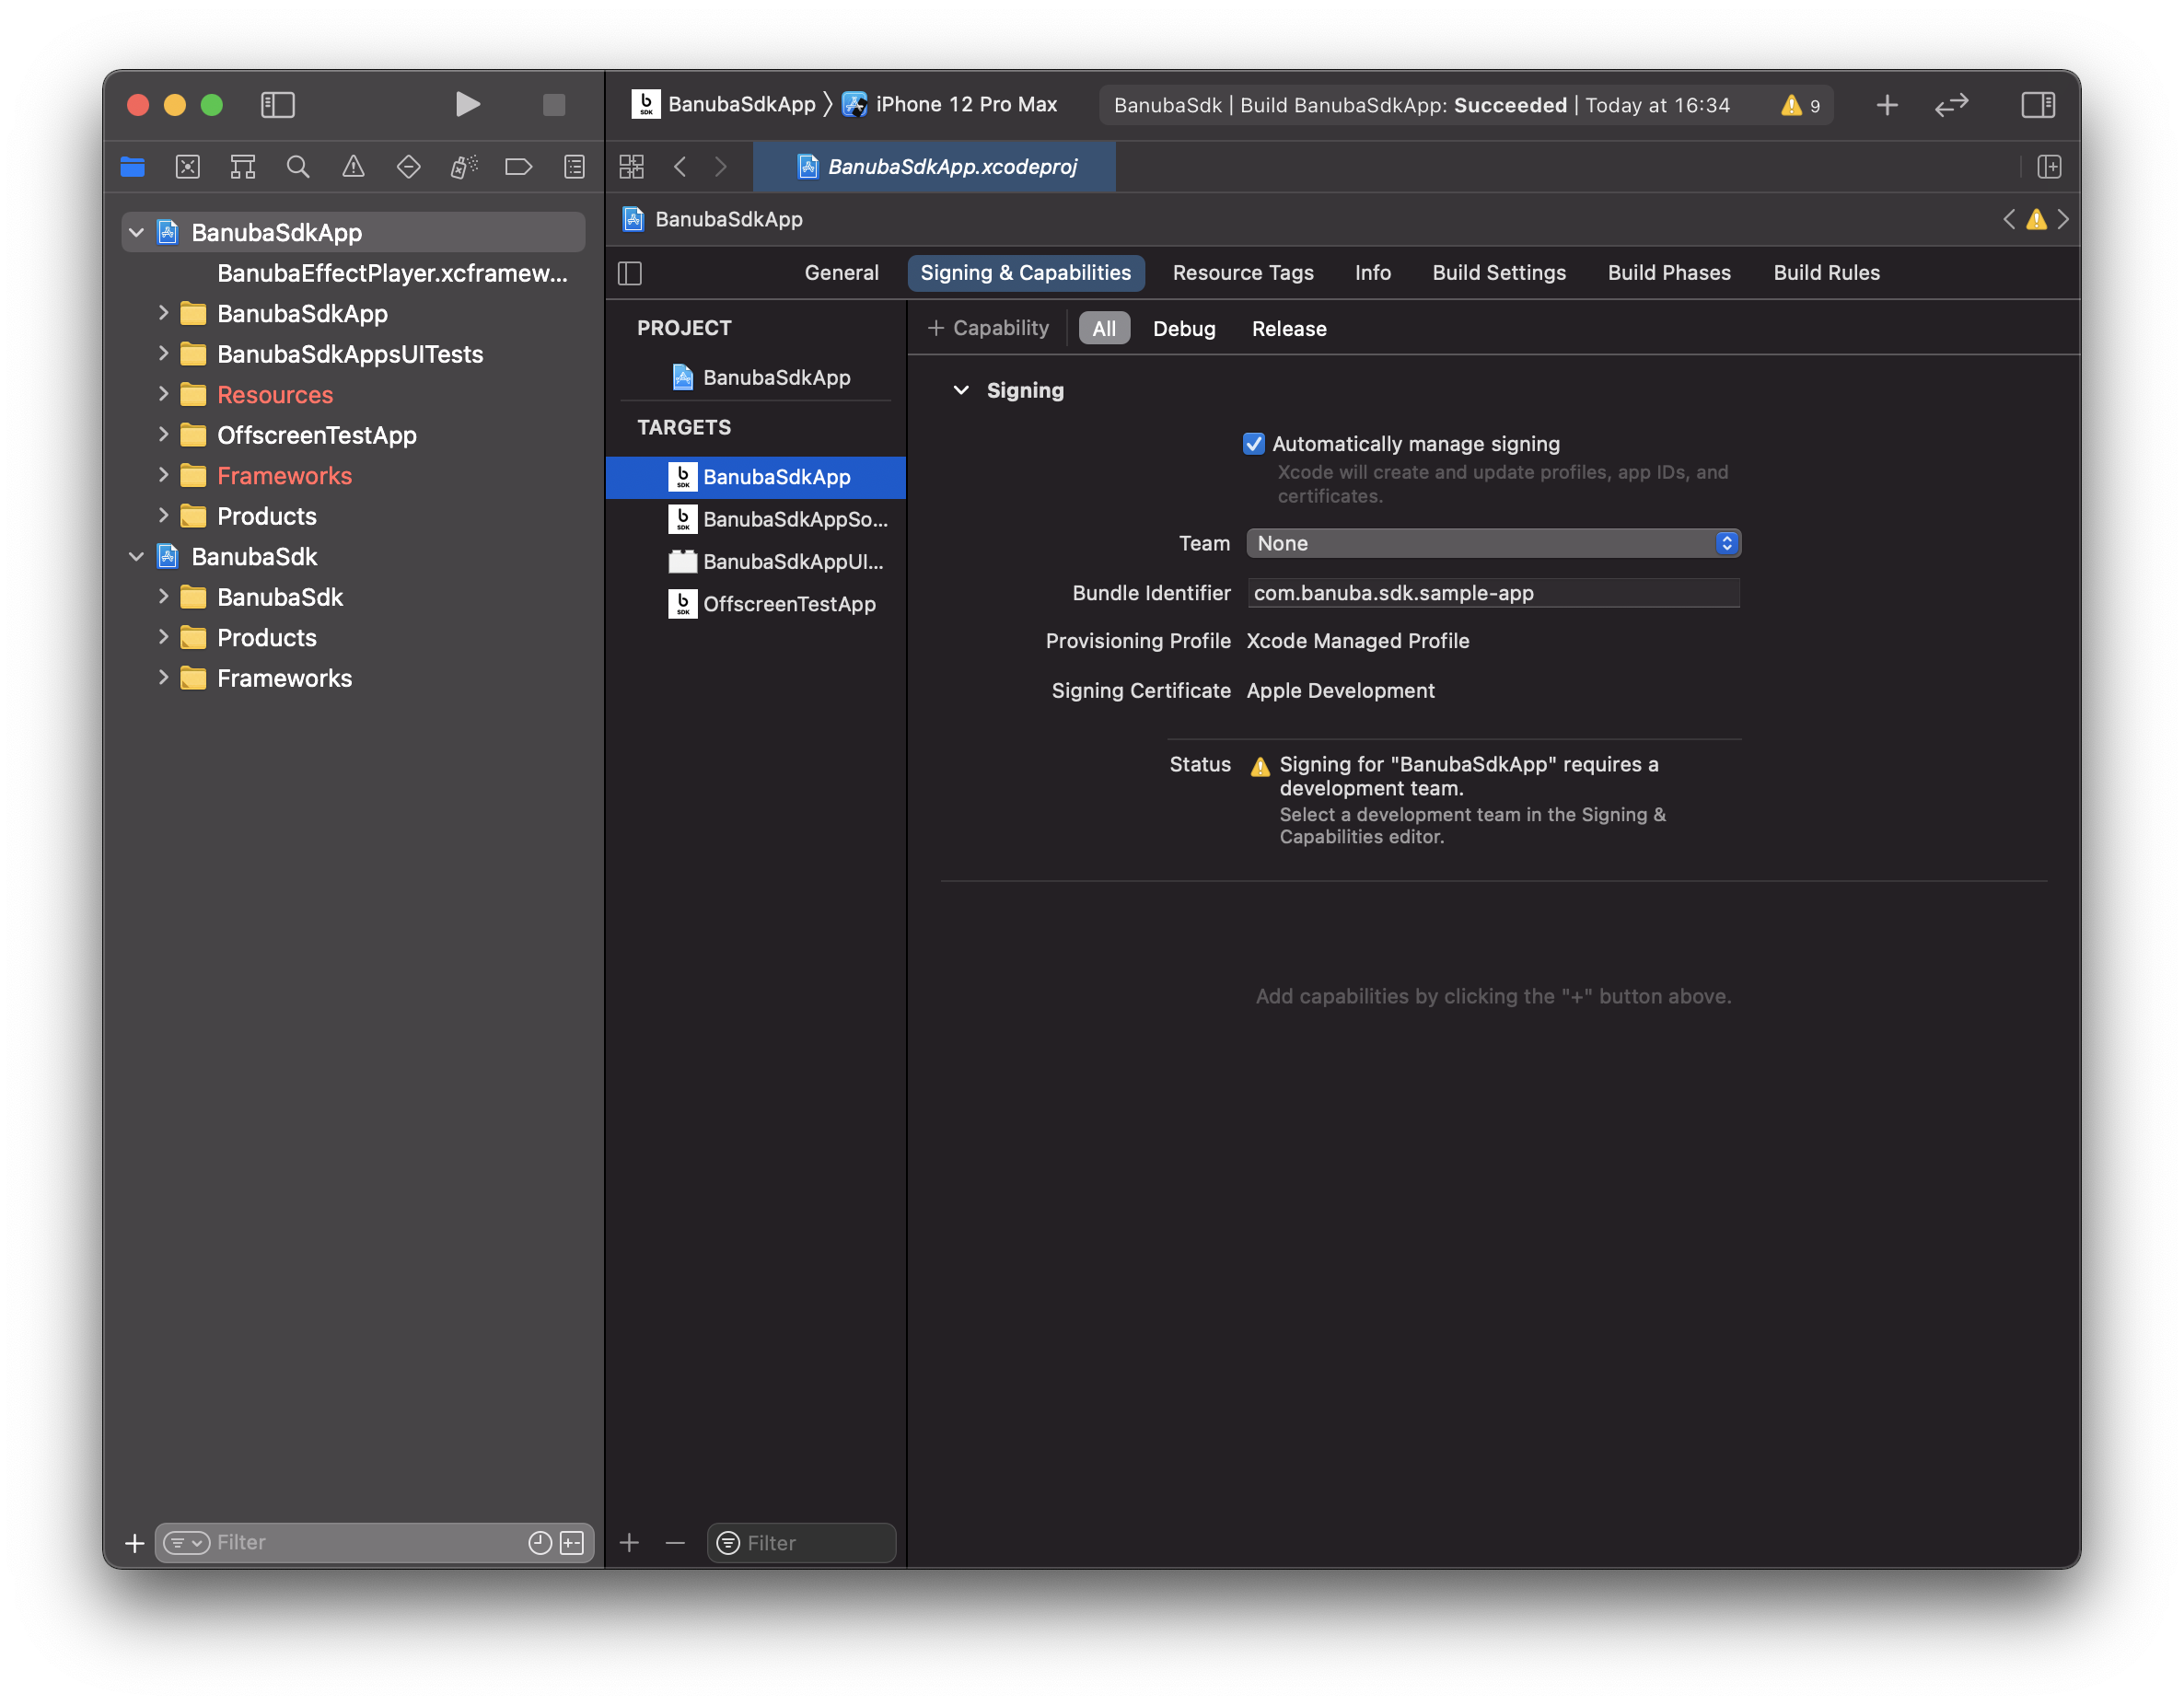
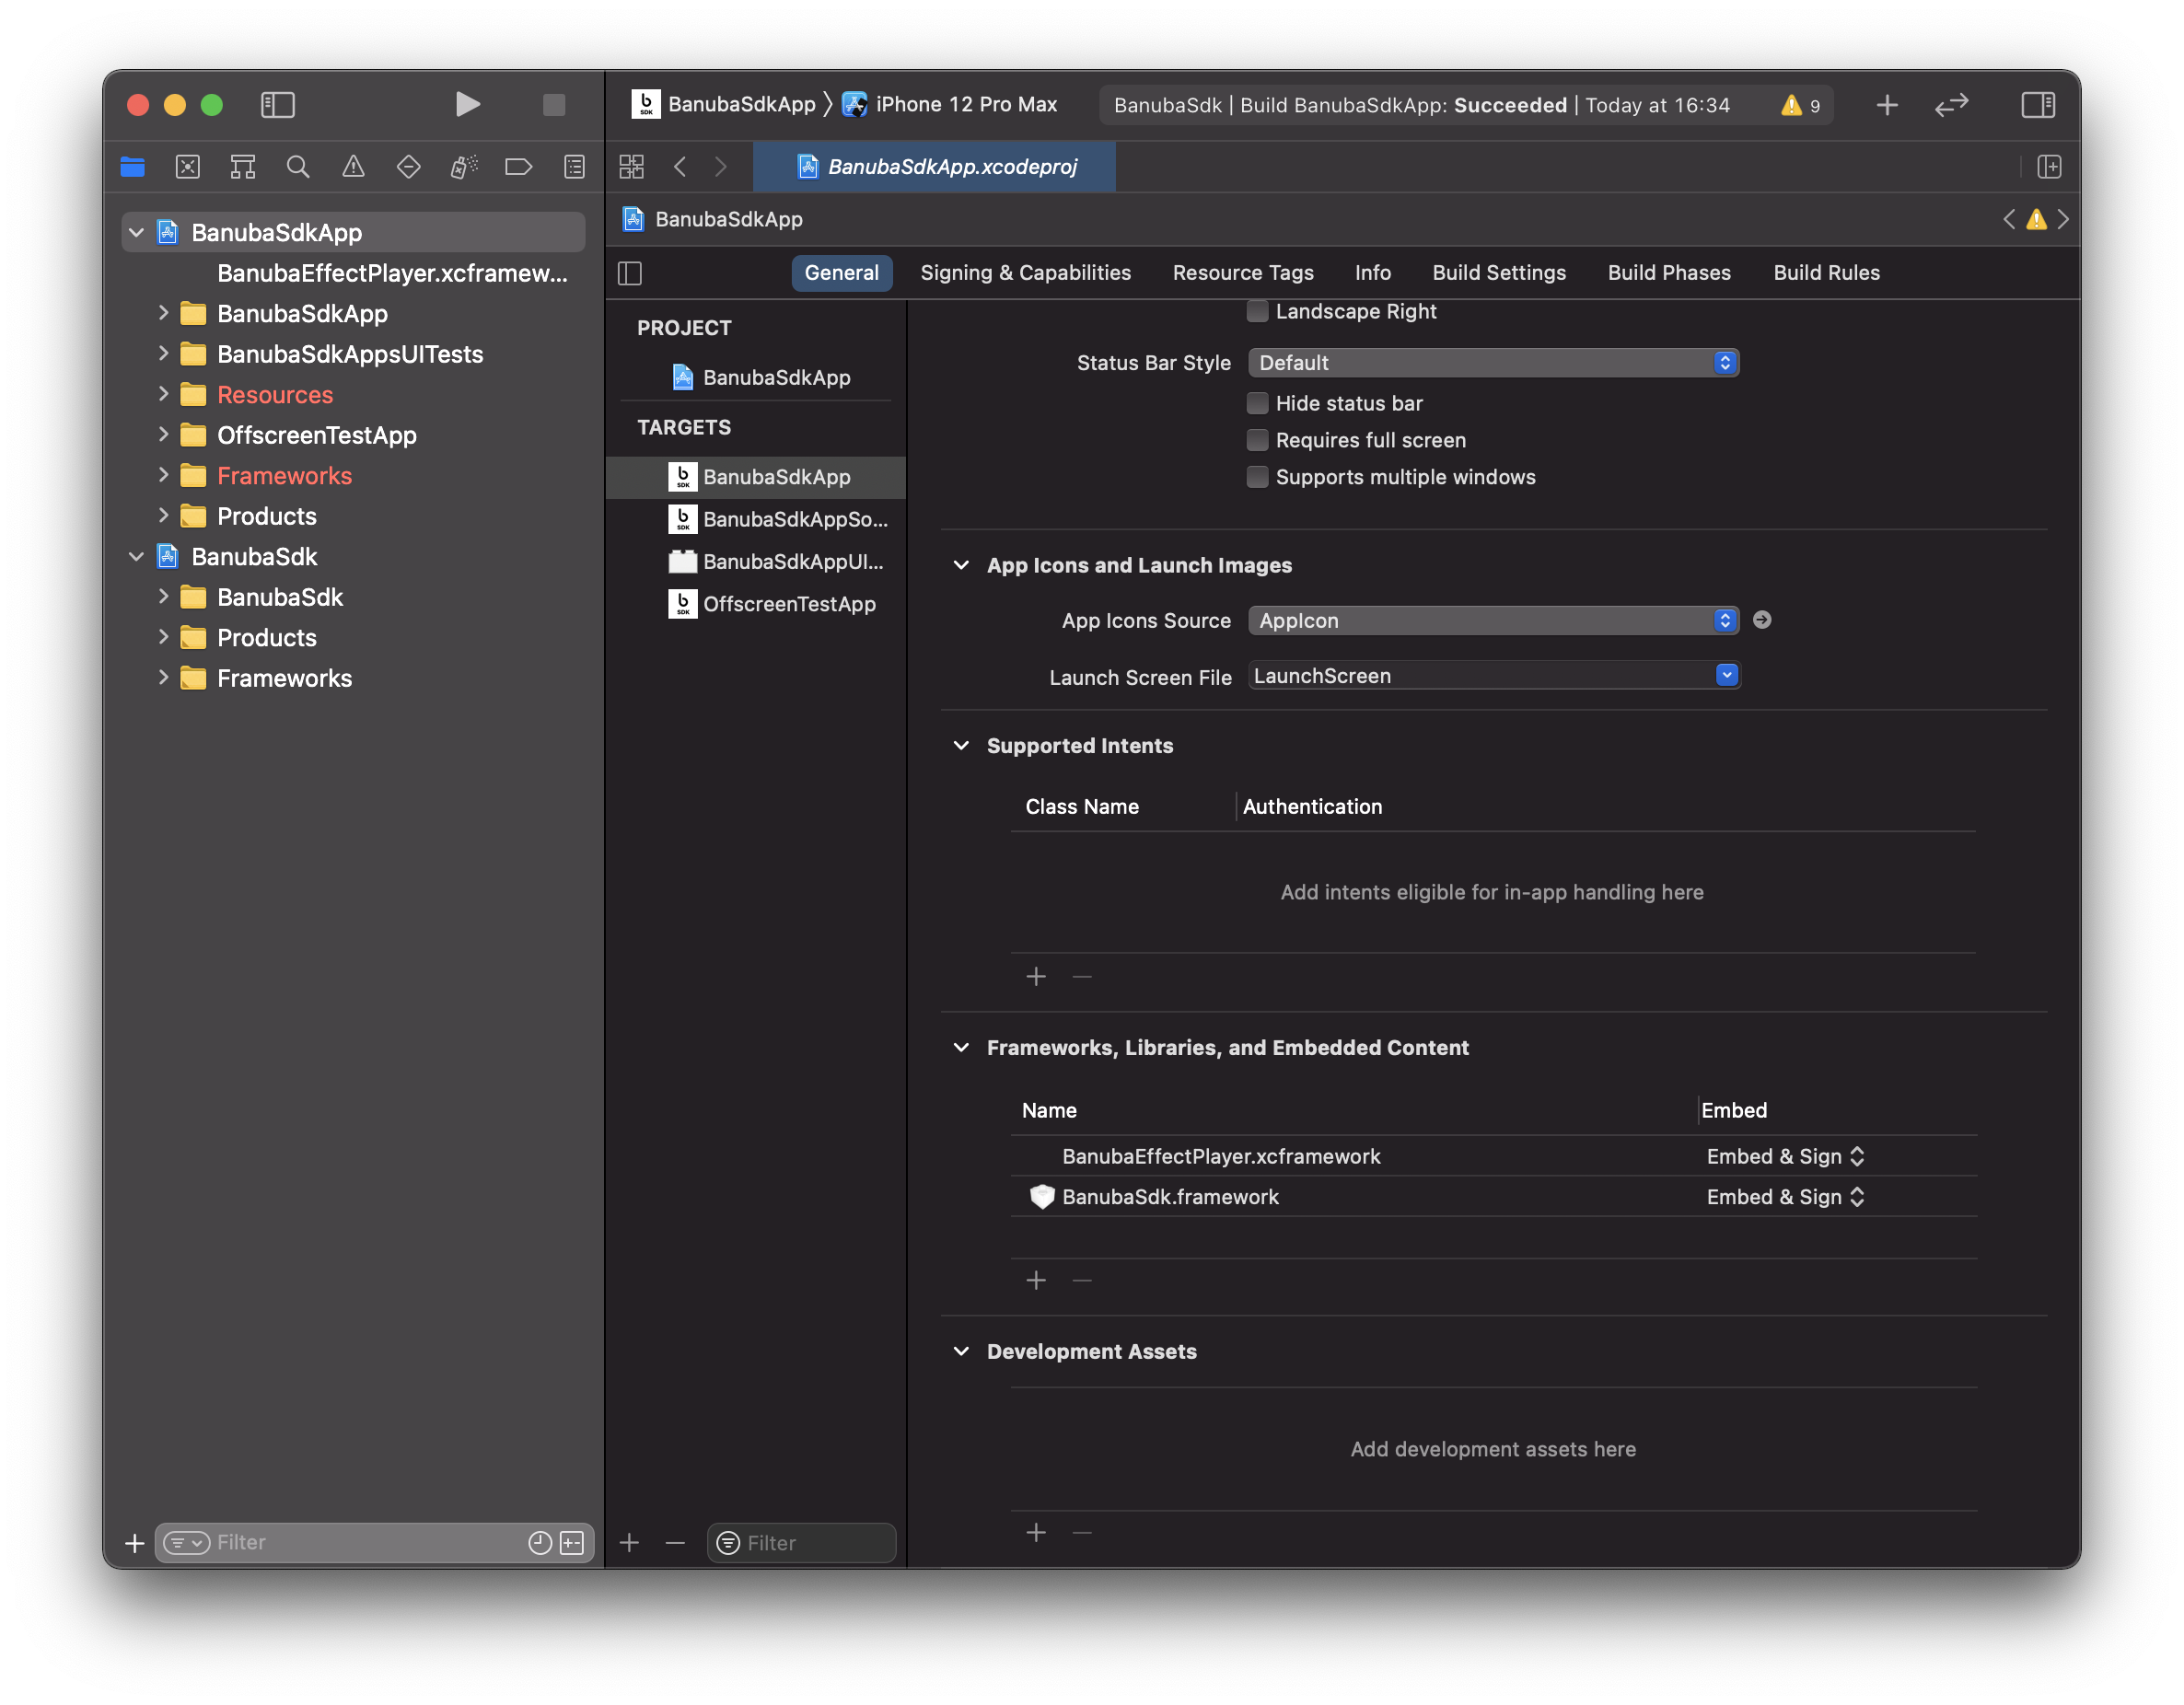
- In
Generalof your project addBanubaSdk.frameworkandBanubaEffectPlayer.xcframeworktoFrameworks, Libraries, and Embedded Content. Here this frameworks should be marked asEmbed & Sign.
- In
GeneralofBanubaSdk.xcodeprojreplaceBanubaEffectPlayer.frameworkwithBanubaEffectPlayer.xcframeworkand mark it asDo Not Embed.

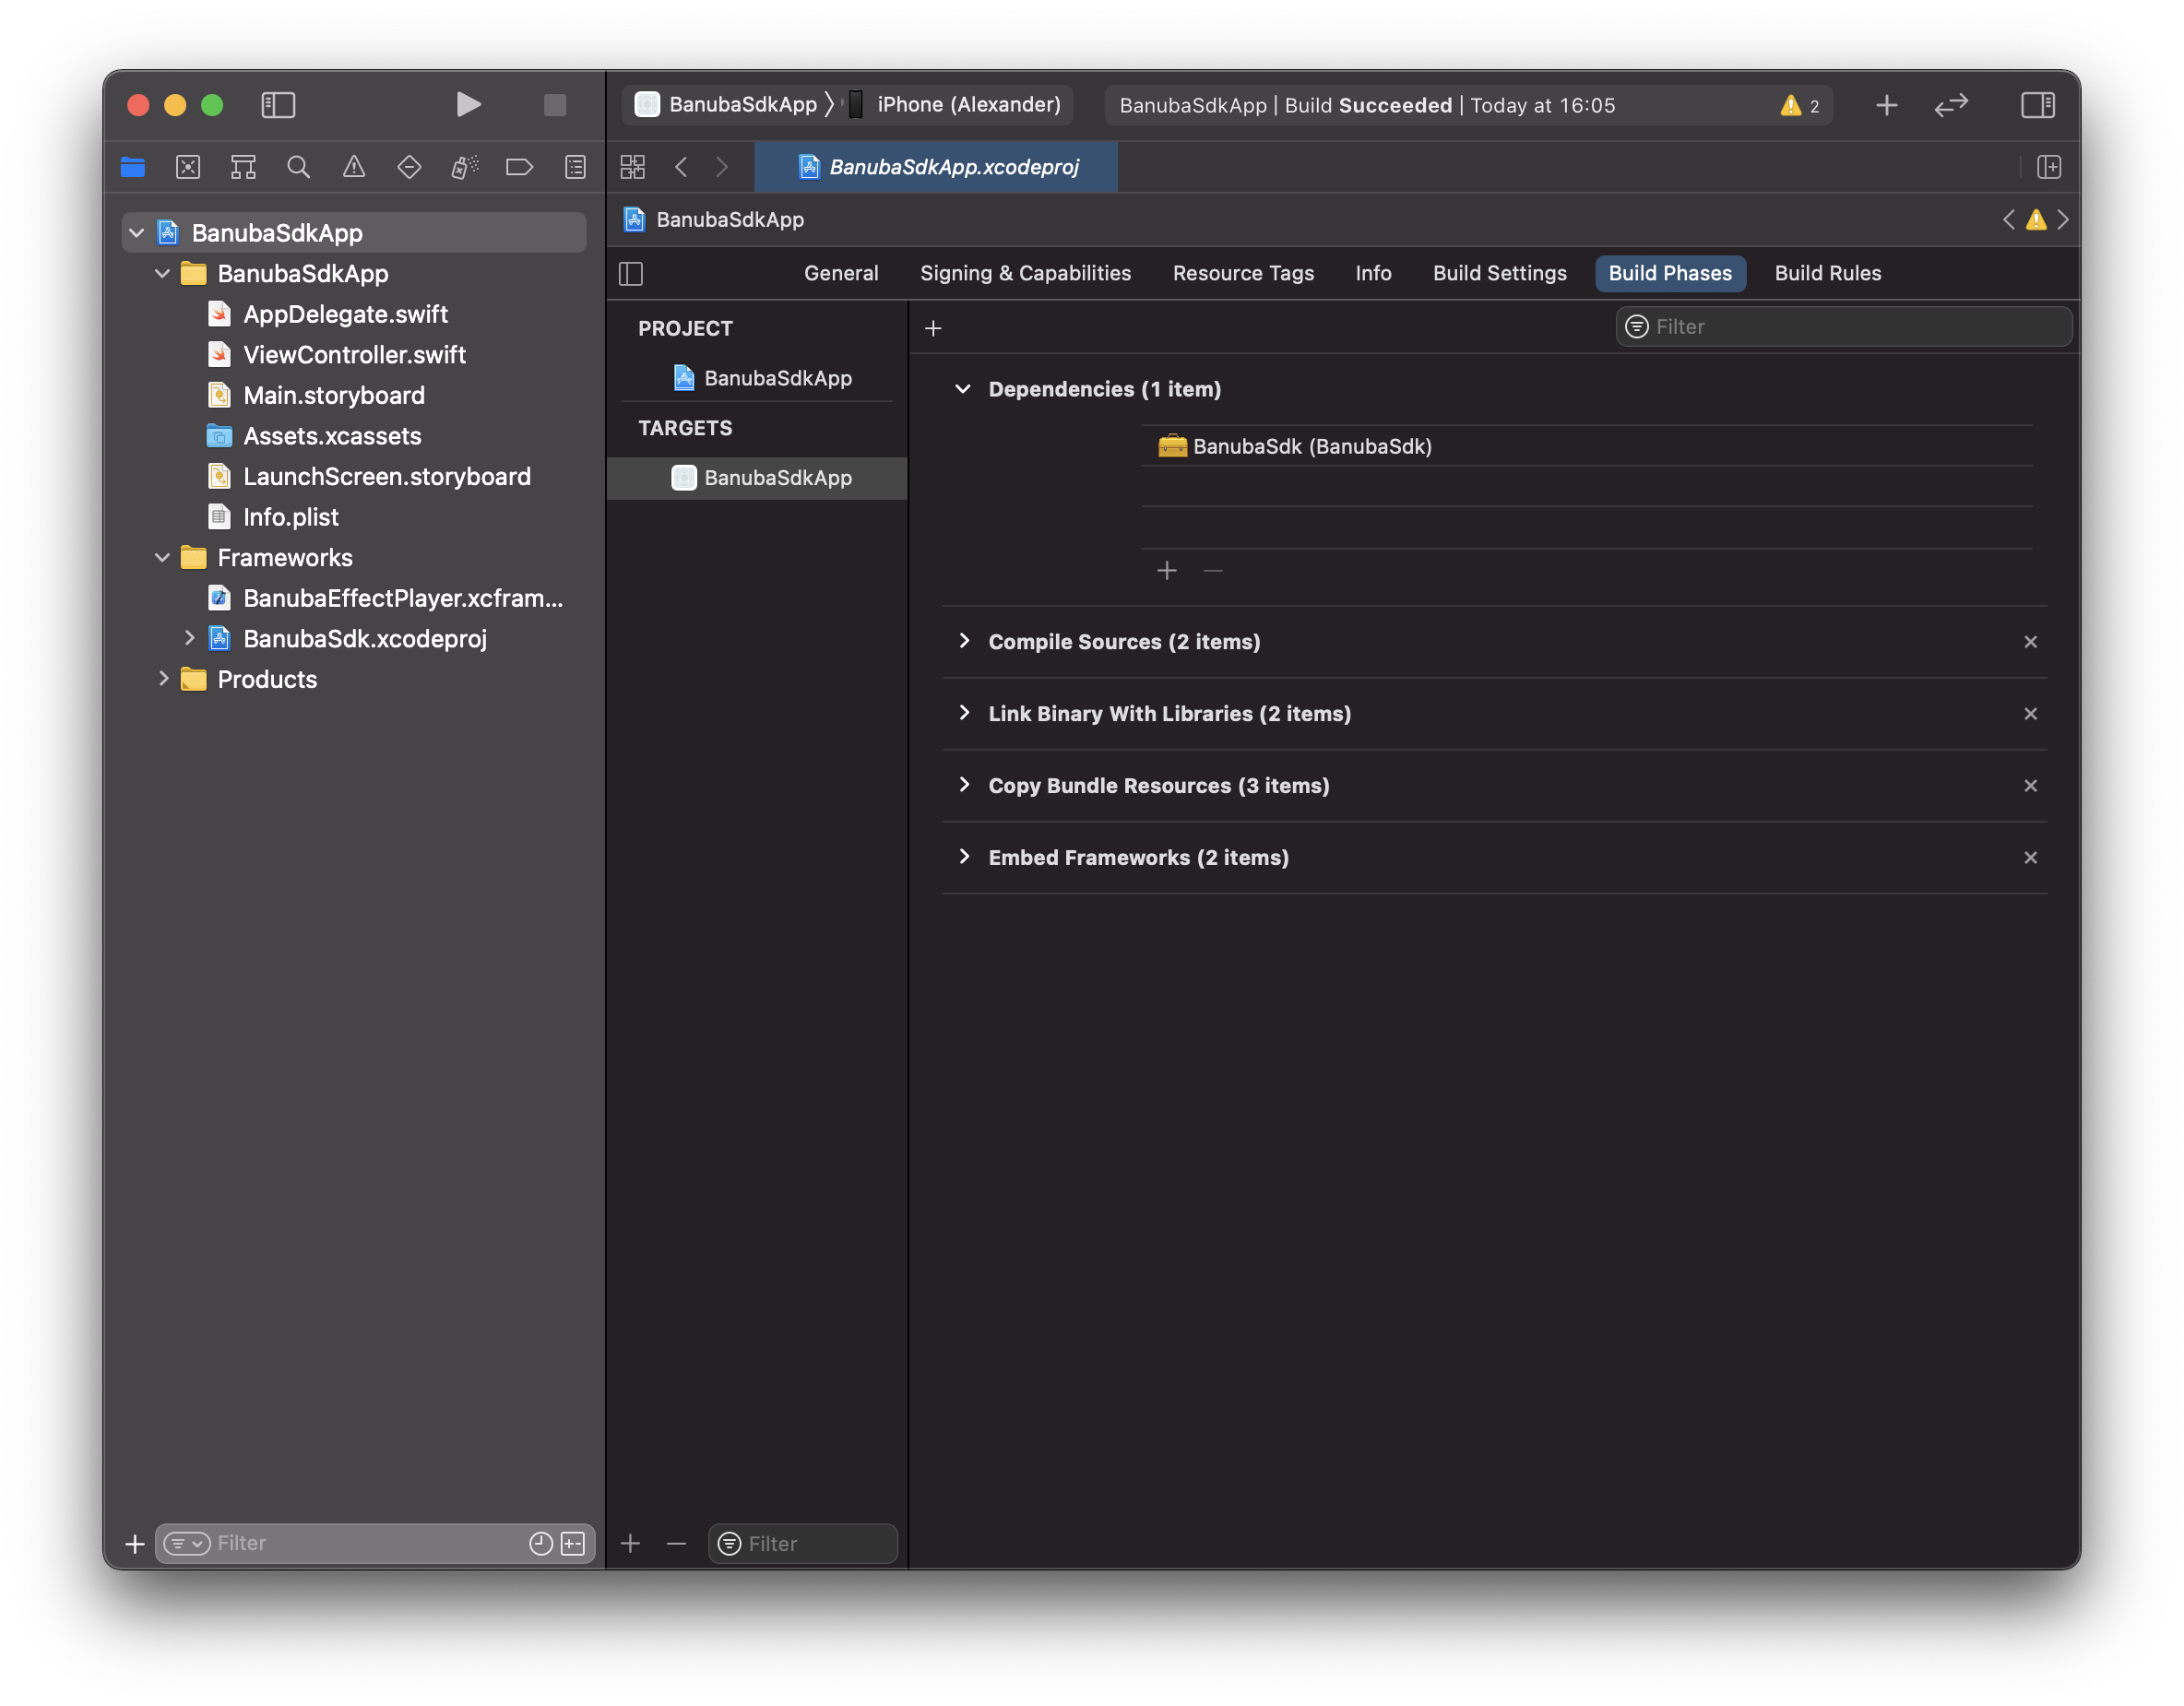
- In
Build Phasesof your project add BanubaSdk as a dependency.
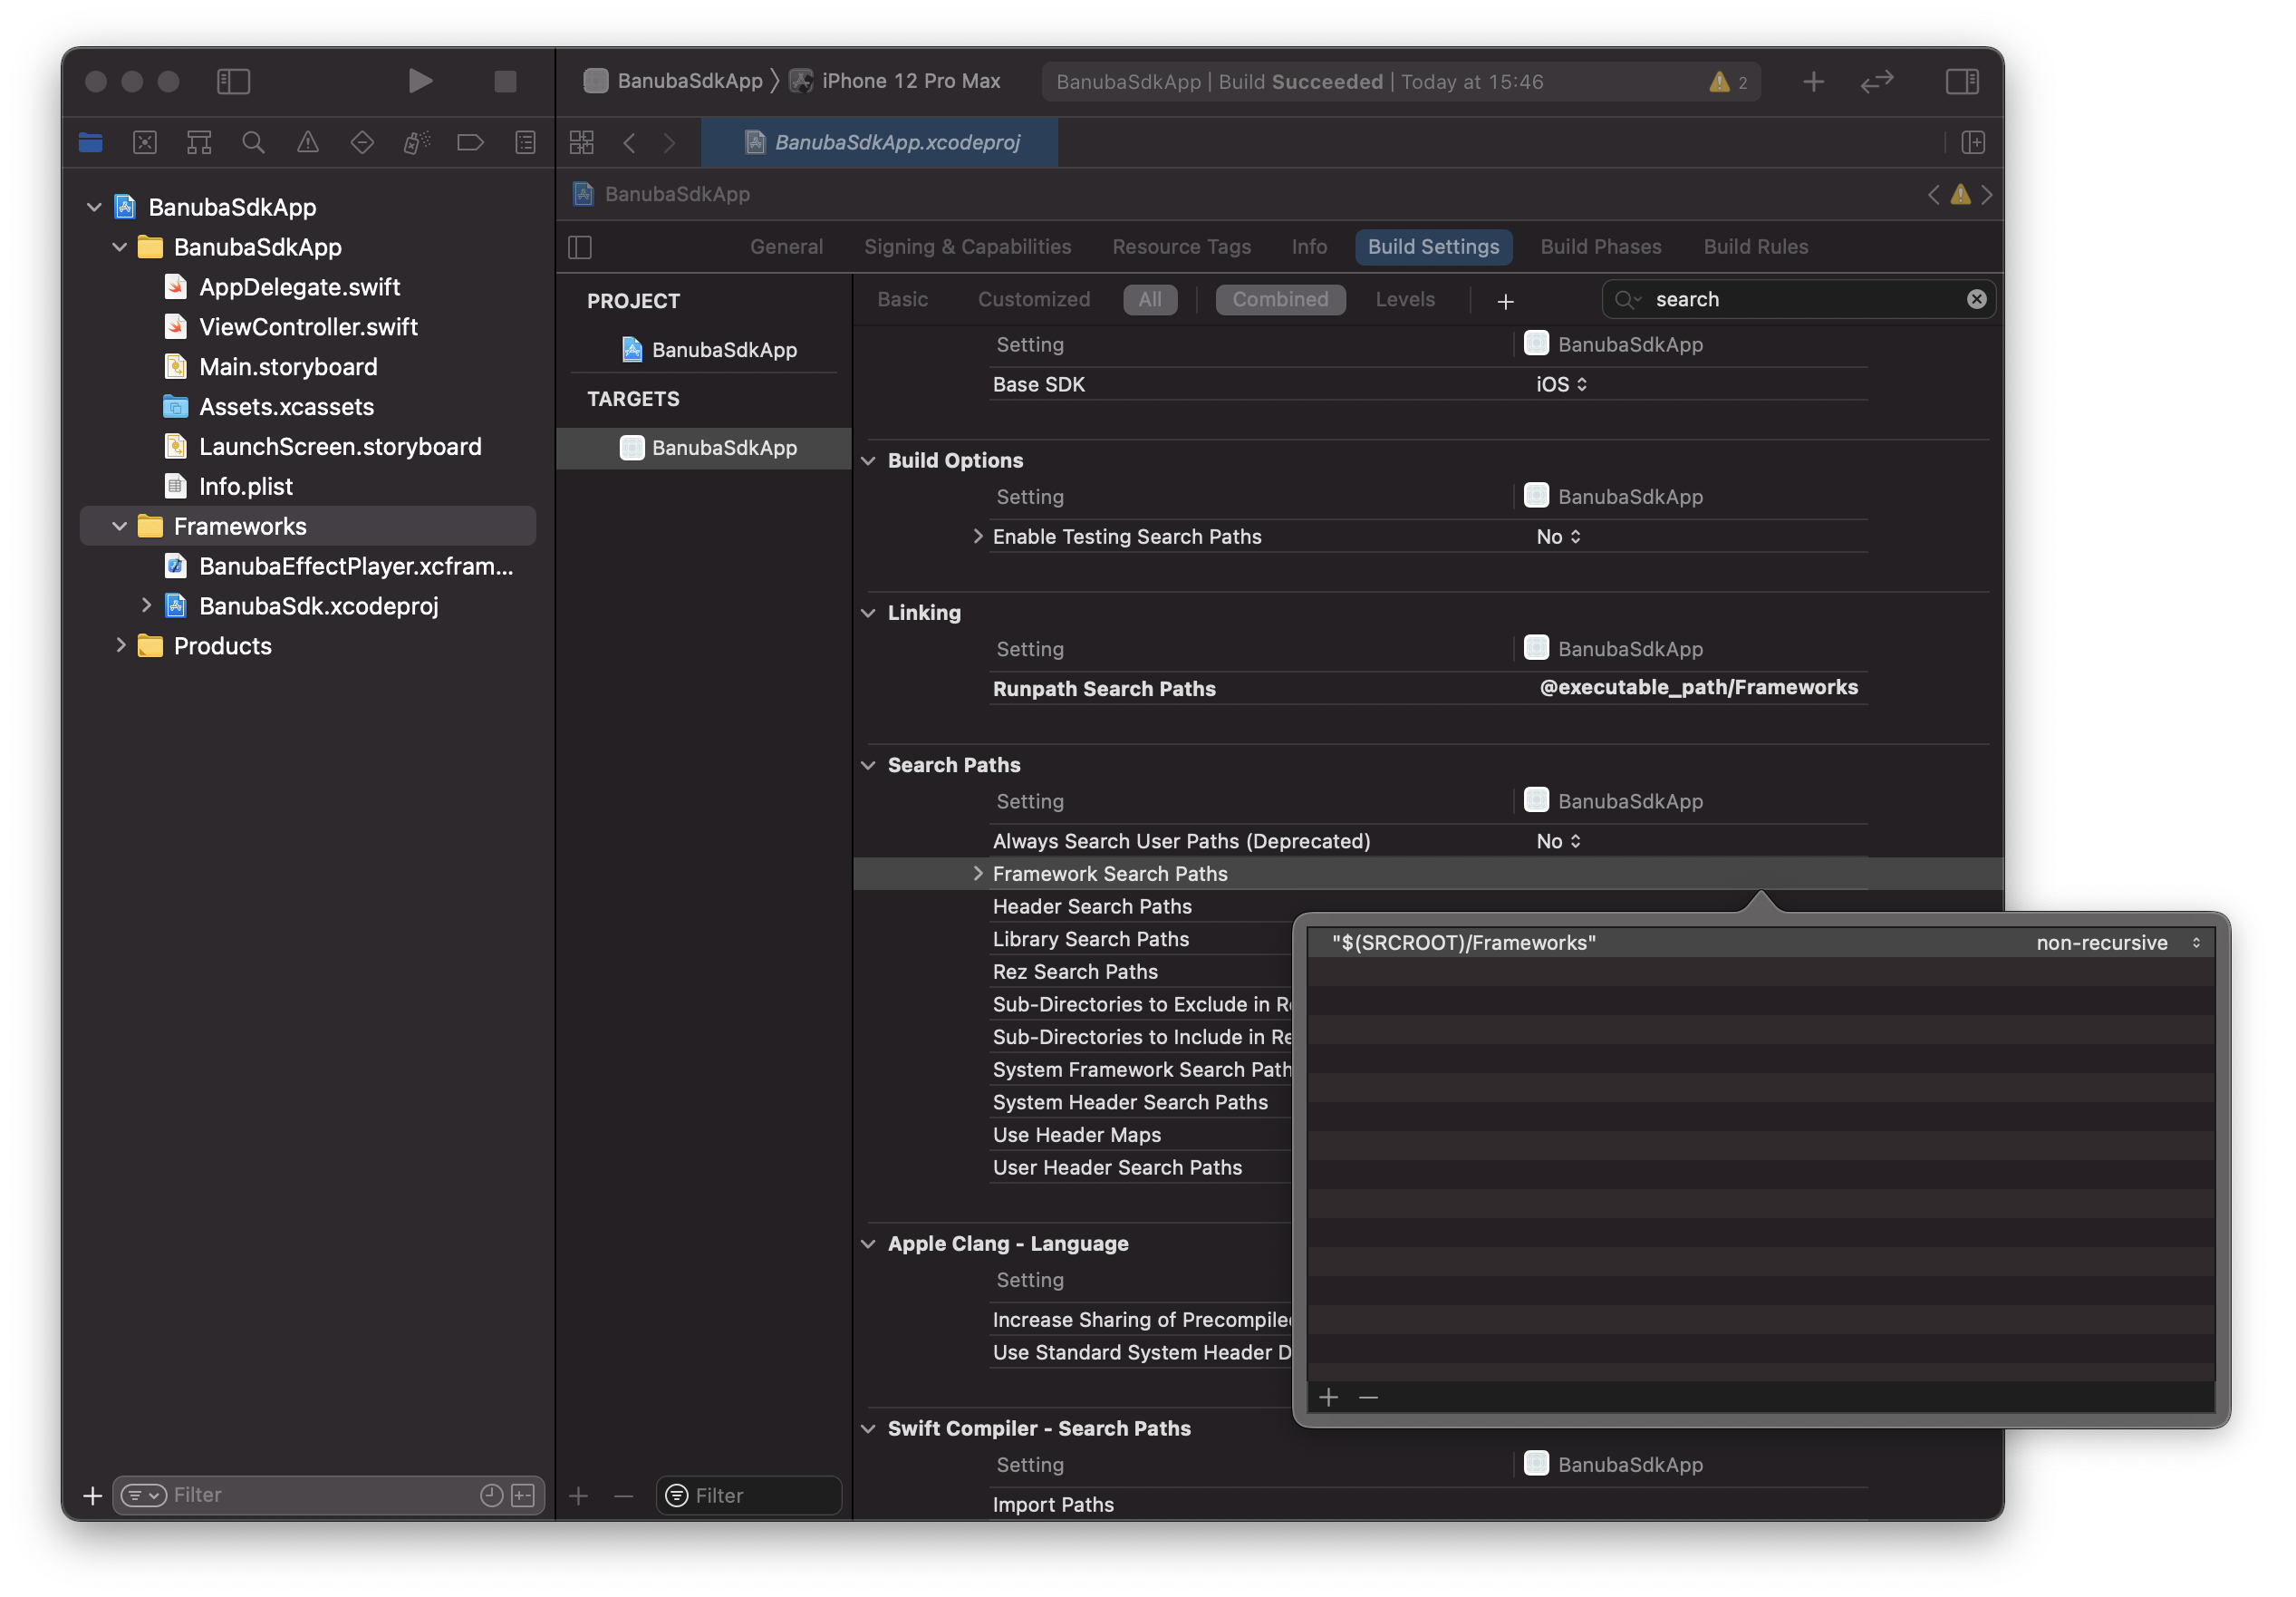
- Make sure that you have correct
Framework Search PathtoFrameworksfolder in your project andBanubaSdk.xcodeproj.
- Now you can run your project with the Banuba SDK on your device or simulator.
Build the Banuba SDK Demo app from release archive
Before building the xCode Demo project, place your client token inside appropriate file in the following location: src/BanubaSdk/BanubaSdkApp/BanubaSdkApp/BanubaClientToken.swift.
Client token usage example
internal let banubaClientToken = "YOUR_TOKEN_HERE"
Build process
Open
src/BanubaSdk/BanubaSdk.xcworkspacein XCode.Select the target
BanubaSdkAppinBanubaSdkAppproject.Drag
BanubaEffectPlayer.xcframeworkfromBNBEffectPlayer/binto Banuba SDK Demo app.
- Sign the target with your provisioning profile in Signing seciton of the target.
- In
Generalremove the existing references inFrameworks, Libraries, and Embedded Contentand addBanubaEffectPlayer.xcframework.
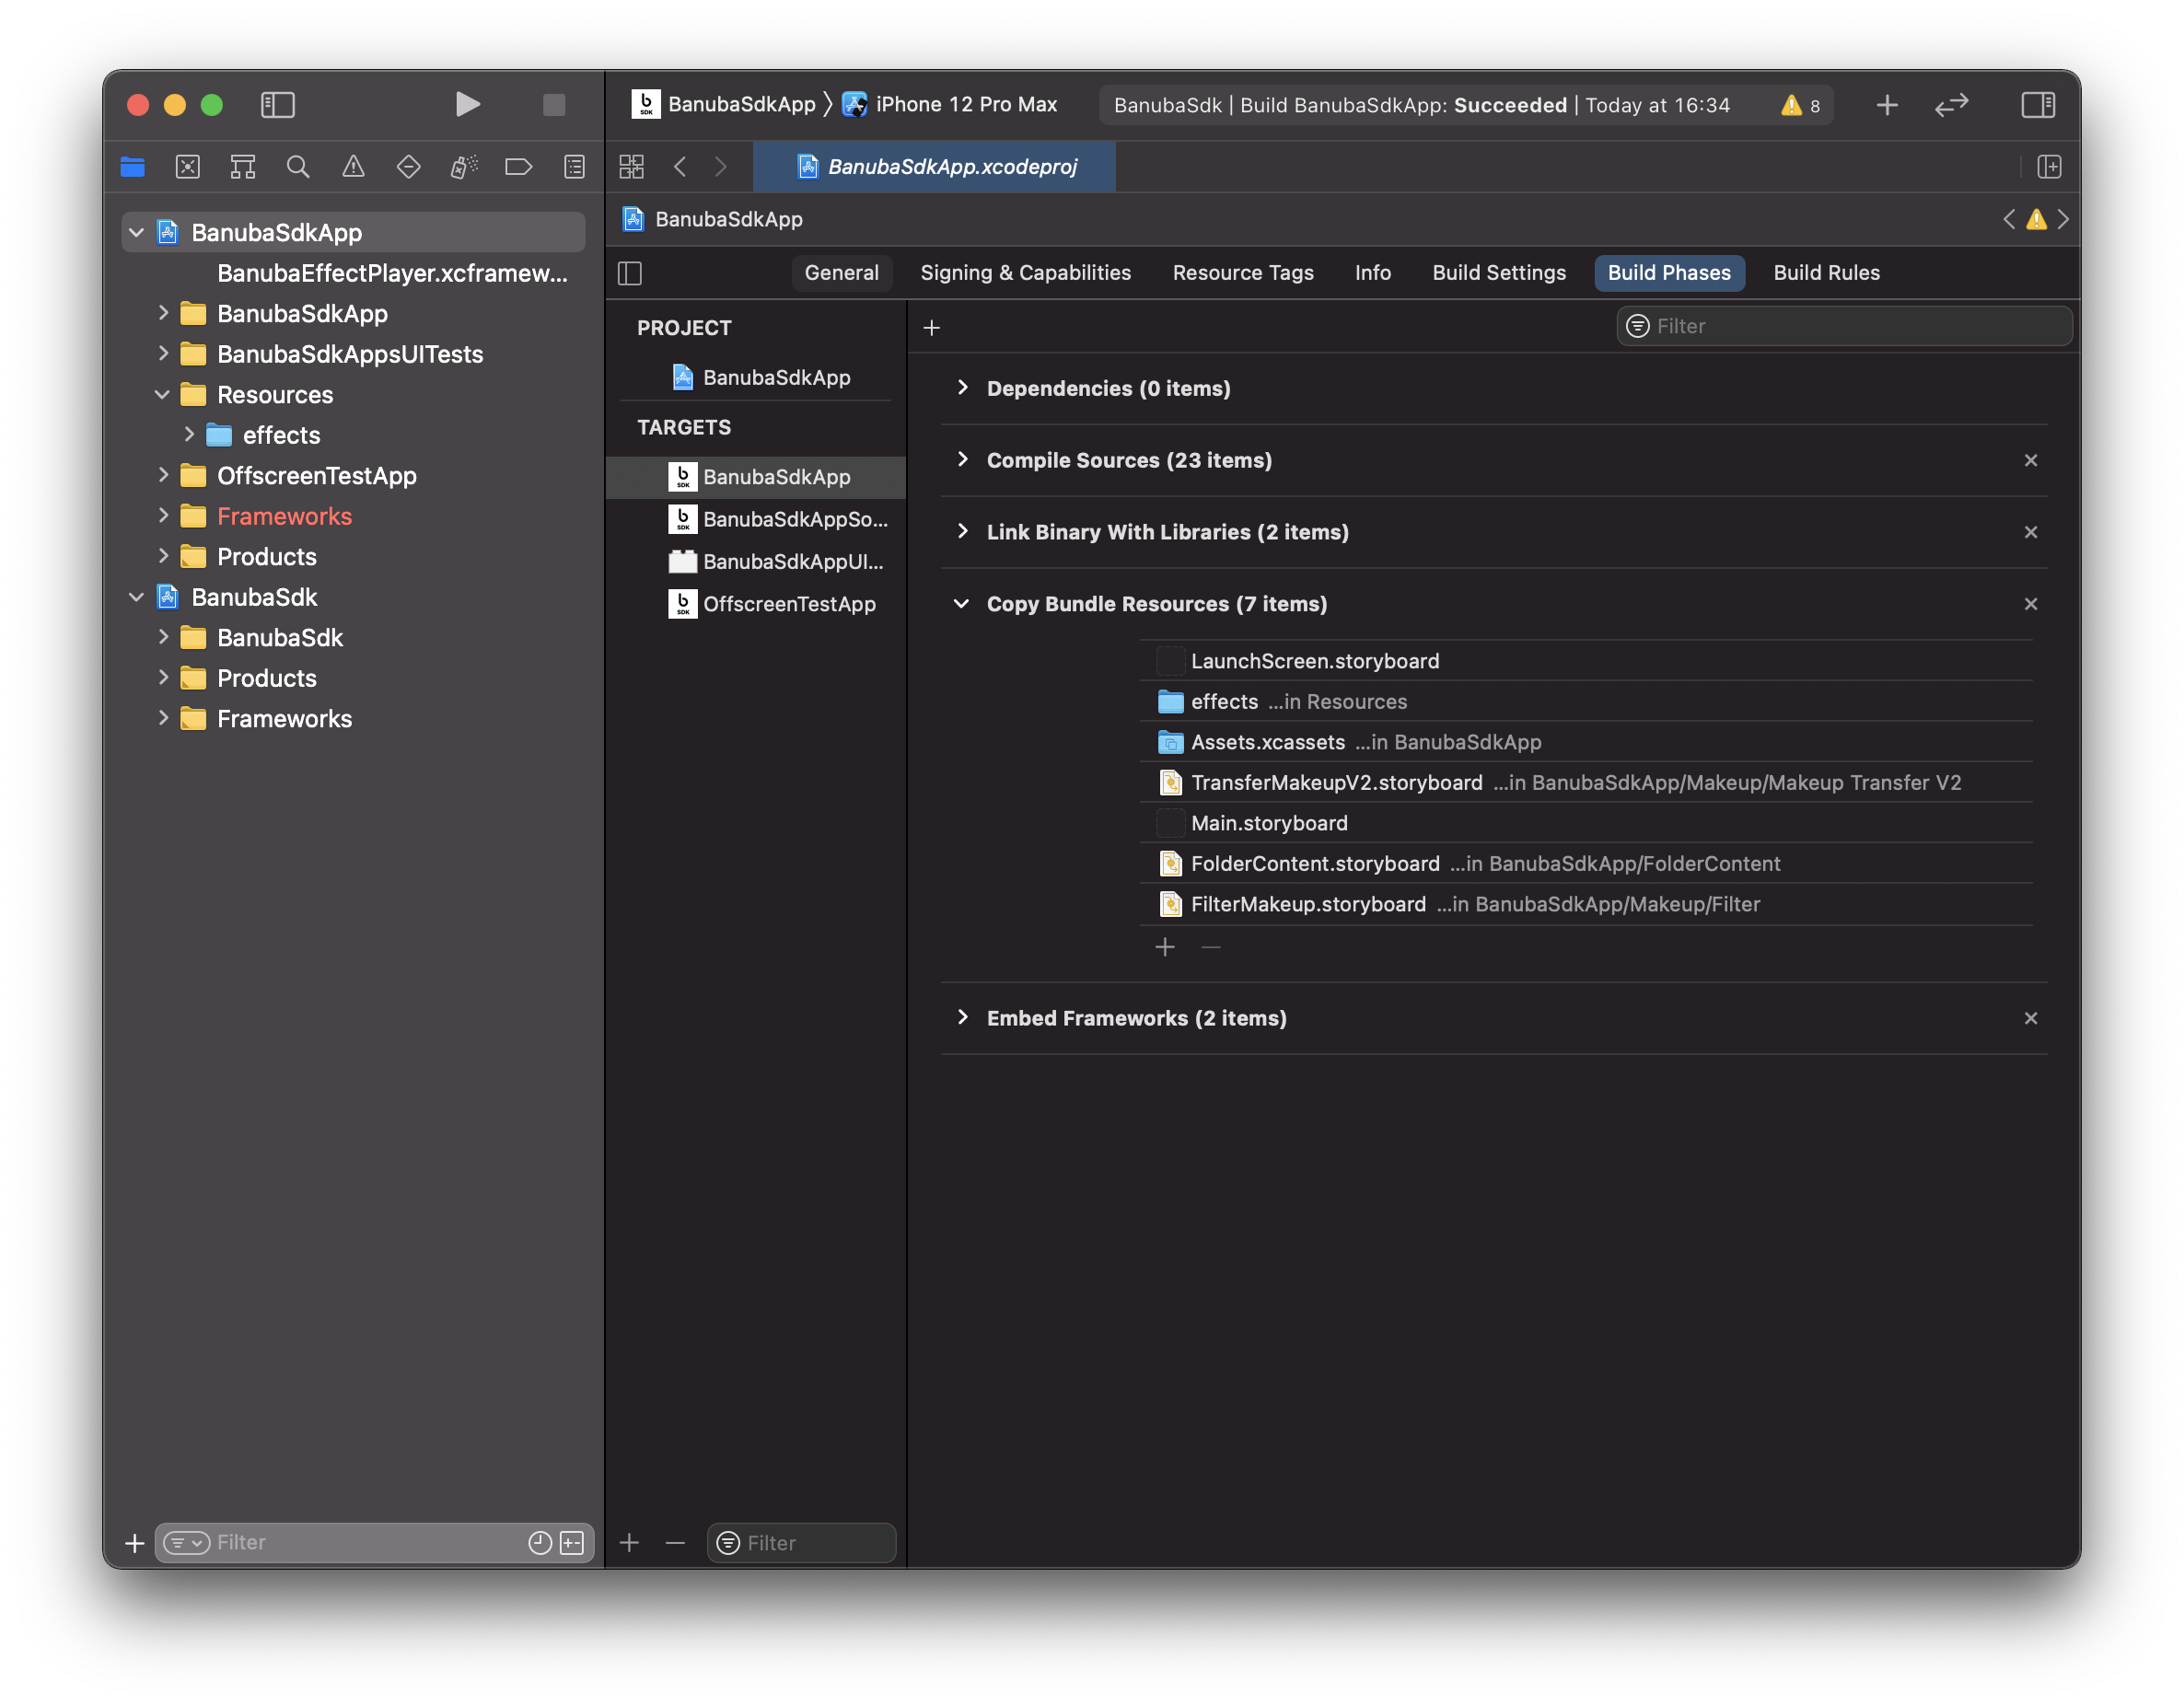
- Open the tab
Build Phases → Copy Bundle Resources. Replace the existing reference toeffectswith youreffectsfolder. Provide a path to the right folder via Xcode.
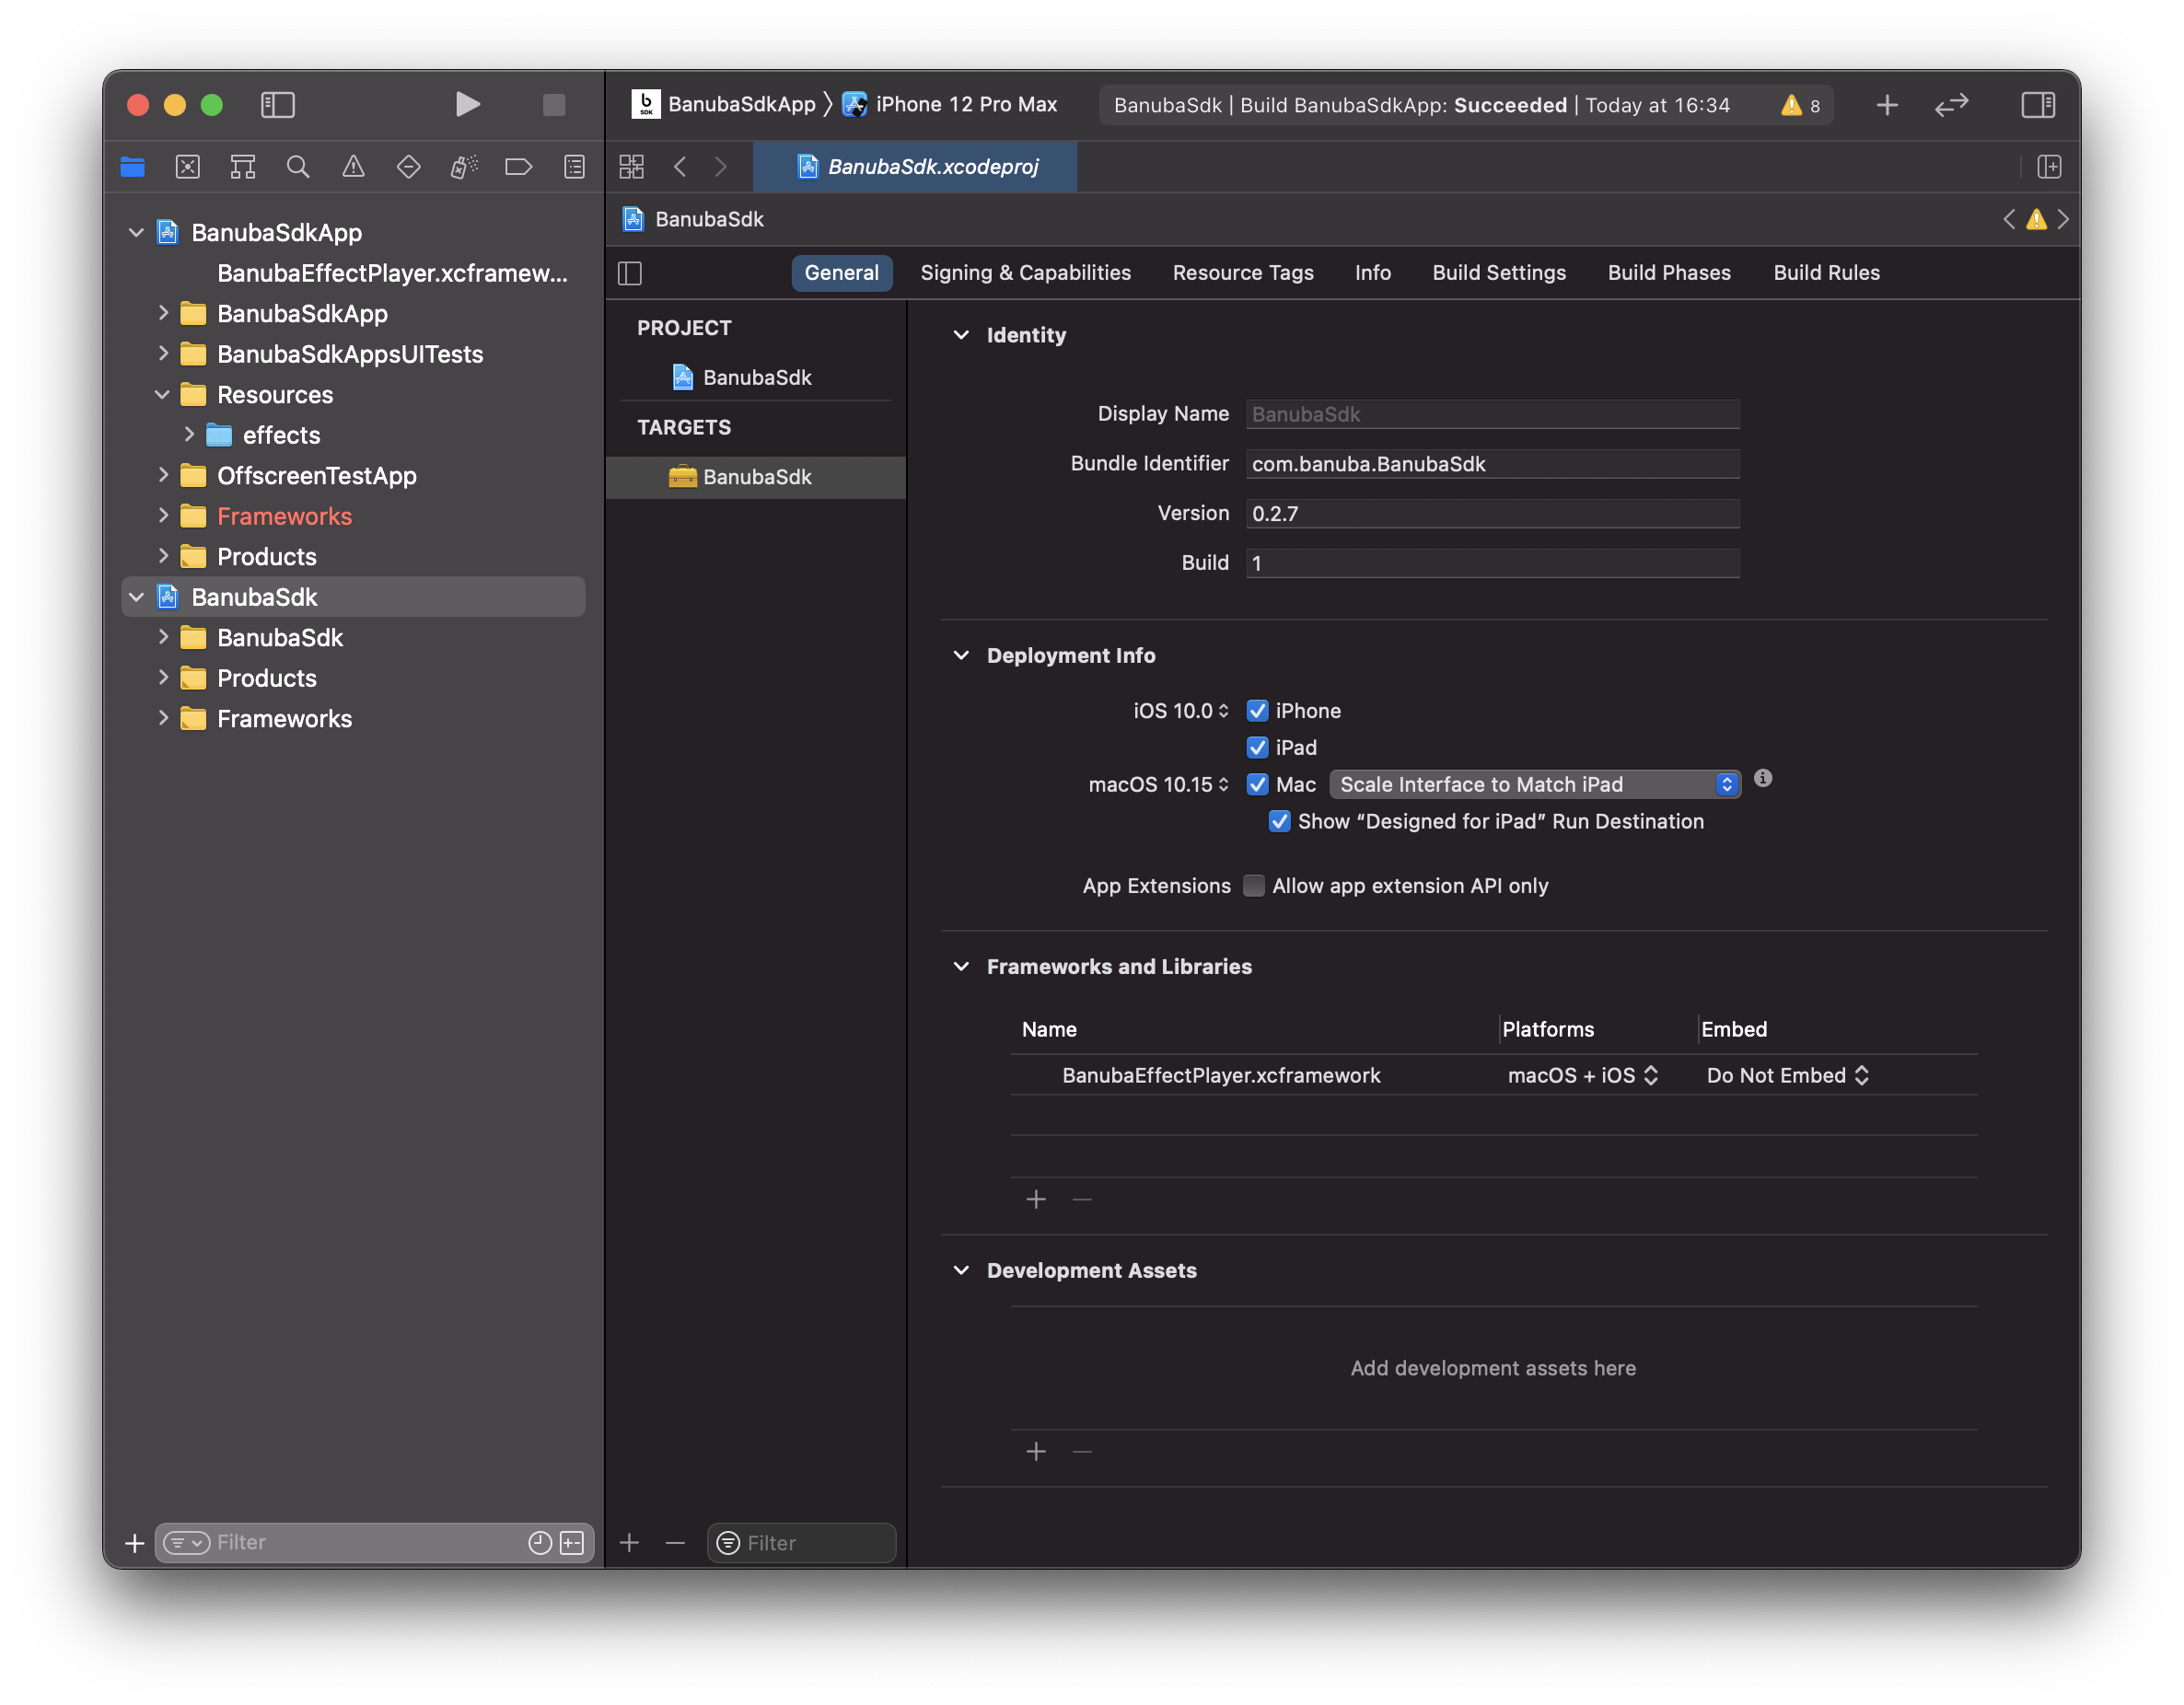
- Open the project
BanubaSdkand targetBanubaSdk, remove the existing reference inFrameworks and Librariesand addBanubaEffectPlayer.xcframework.
- Open
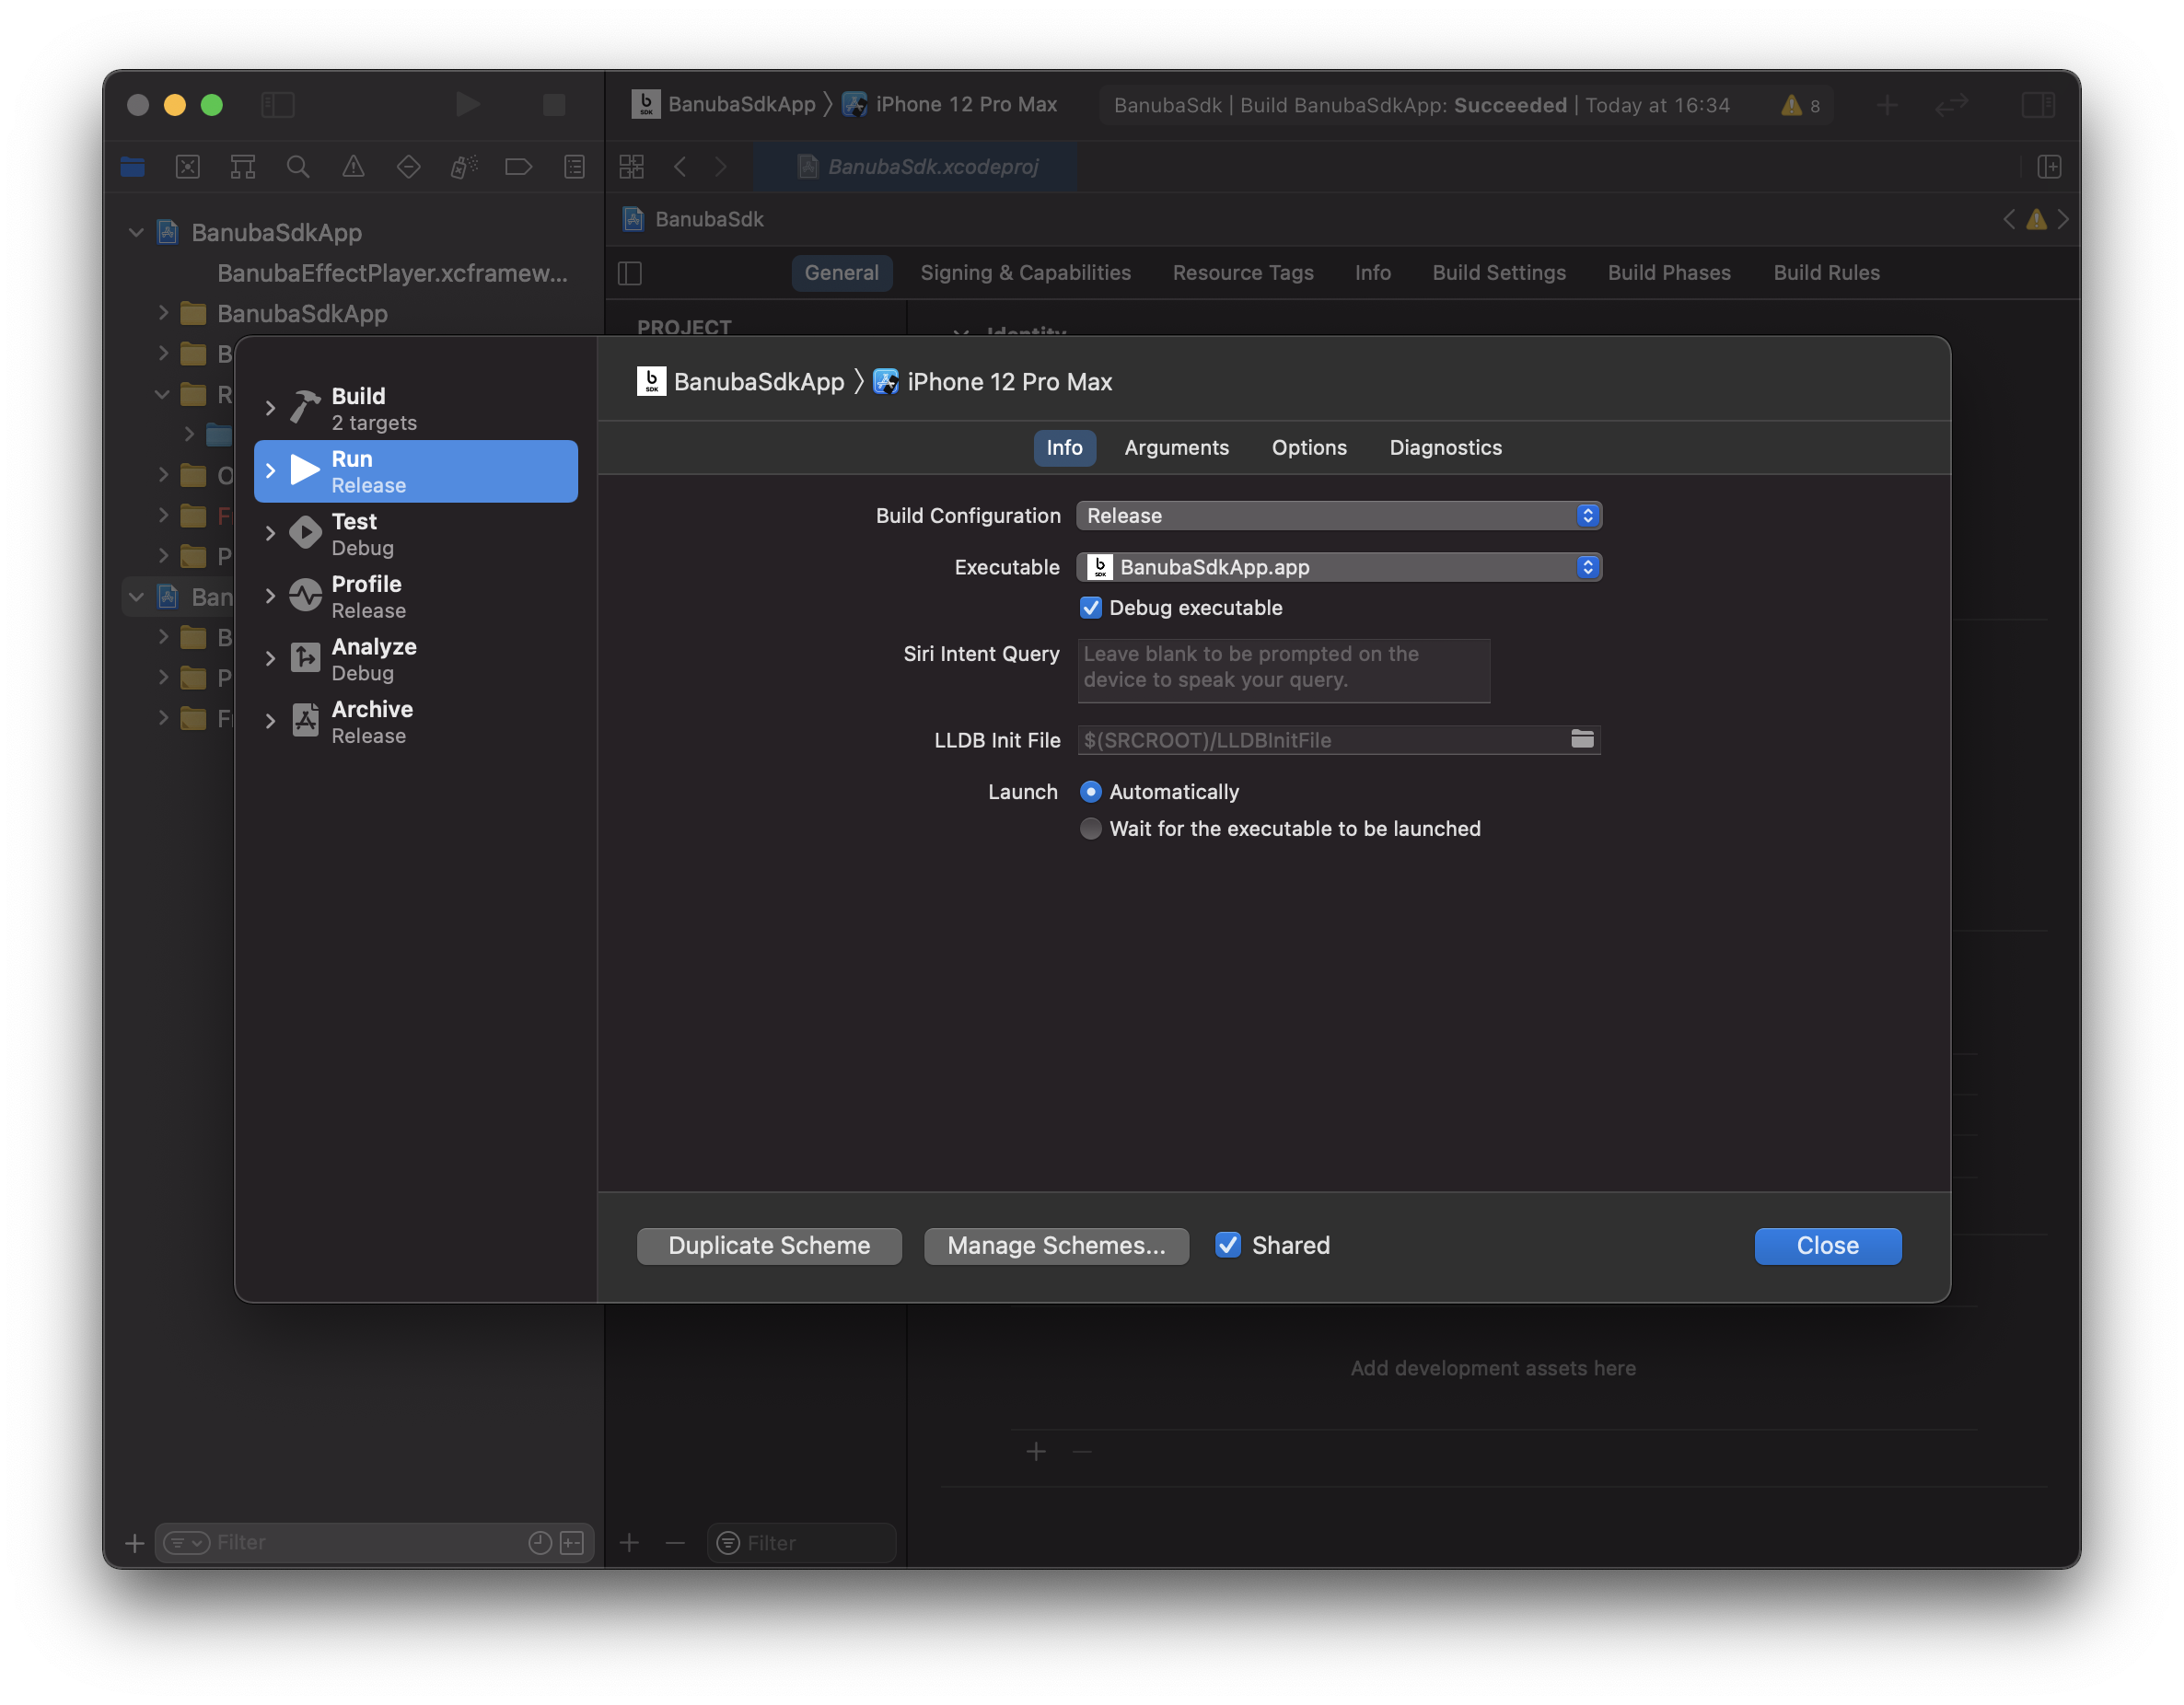
BanubaSdkApp → Scheme → Edit Scheme. On Run tab select the build configuration (debug or release):
debug- allows to debug and profile app in realtime,release- build variant allows to test the release variant of the application (faster performance).
- Now you can run the Banuba SDK Demo app example on your device
iOS Demo app UI description
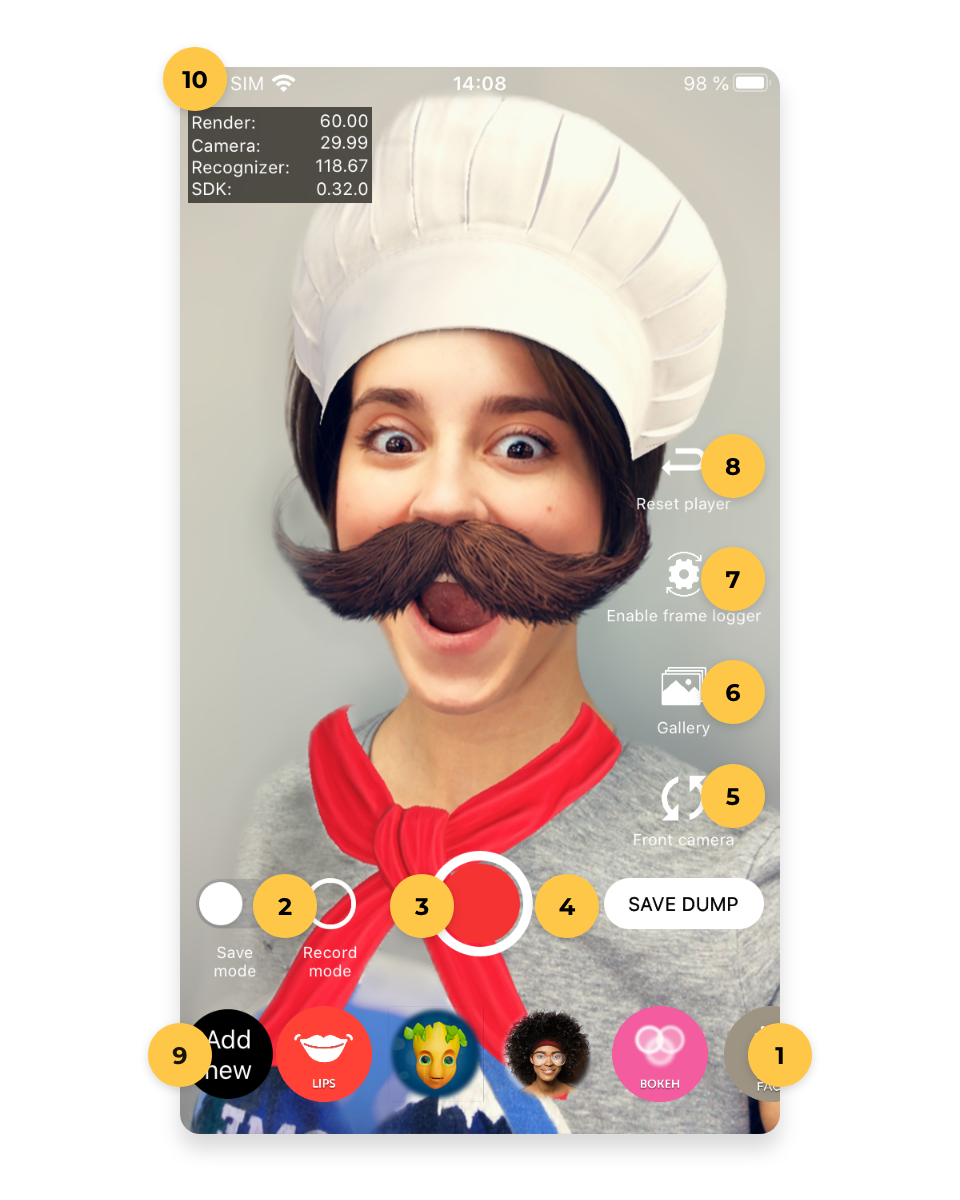
- Effects selection — the slider control that shows all effects in the app.
- Save mode/Switch mode
- Save mode - Works only in record mode. Will save two video files into your gallery when enabled. 1st video - original output from your camera, 2nd video - final result with applied face filter (when selected).
- Switch mode - switches between the Photo and Video (record) modes. When the photo mode is enabled, you'll see the white-colored control in the center of the app, by default you'll see red control which means video mode is enabled.
- HQ-photo/Record Video:
- In HQ-photo mode: takes a high-quality photo (process image).
- In Video recording mode: 1st tap starts Video recording, then two buttons appear - pause/resume recording and stop recording, tap on stop button ends the recording and shows the recorded video.
- Save Dump — 1st tap starts face recognition data recording, 2nd tap ends recording. The recorded face recognition data can be found on the device after connecting the phone to PC and navigating to SDK Demo app from iTunes.
- Switch camera — switches the camera between the front and rear views.
- Process photo — select and process photos from Camera Roll.
- Frame Logger — 1st tap starts FPS log recording, 2nd tap ends FPS log recording. FPS recording result can be found in the app log output in xCode.
- Reset Player — restart the effect player. The active effect will be dropped.
- Add Effects — feature that allows to add new effects into Demo App more quickly using Files.
- FPS Counter and active effect — shows 3 types of FPS in real-time and displays active effect.
FPS counters:
- Render
- Camera
- Face Recognition
- SDK Version
How to use Add Effects feature in Banuba SDK Demo app
Create a Folder named effects on your PC and add all effects needed to the Folder OR
Select 1 or more effects to download them one by one
After that Folder with effects or effects can be imported to the device:
a. If device is of iOS 13+:
- Compress the Folder or each of the effects to .zip files
- Send .zip files with AirDrop to the device
- Save it into iPhone/Files
- Launch Demo app and tap 'Ádd New' button
- Select .zip files created -> .zip imported
- Find Project folder in Files, open it and tap .zip files imported -> files become unzipped
- Make sure that the Folder with effects called 'effects', because the name is hardcoded OR if there is no 'effects' folder, you can create it on your device's files and move your unzipped effects into the effects folder
- Go back to Demo App -> effects have appeared
b. If device of iOS <13:
- Send effects folder with AirDrop to the device (not .zip file)
- Save it into Project Folder in Files
- Launch Demo app and tap 'Ádd New' button
- Make sure that the folder called effects in order system can find it (all the other Folders with the same name should be deleted)
- Go back to Demo App -> effects have appeared
NOTE: 'effects' folder can be also imported from your PC to the Project folder via iTunes.
- Then effects can be re-named OR deleted from Files. All the changes made and effects' catalogue updated can be seen after collapsing or re-launching the Demo App.
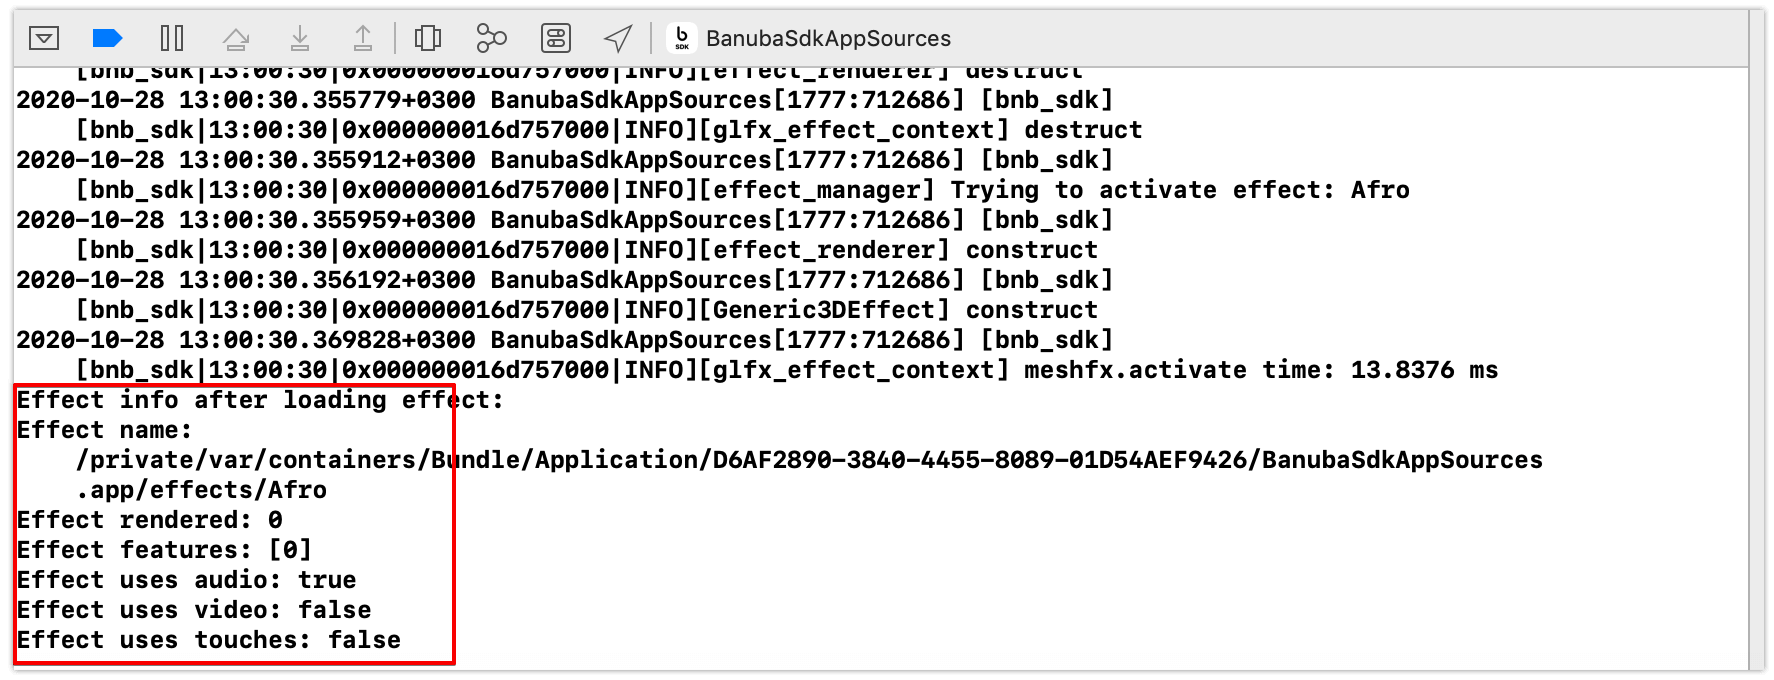
Effect Info
If you want to know more details about the effect applied, you can find Effect info in Xcode logs. It contains the information about audio, video, touches usage and render type of the effect.