How to create Glasses try on effect
This tutorial will guide you on how to construct the virtual glasses try on effect in the Banuba Filter Editor. You can also watch the getting started video with the effect construction.
Resource preparation#
Glasses and Head models#
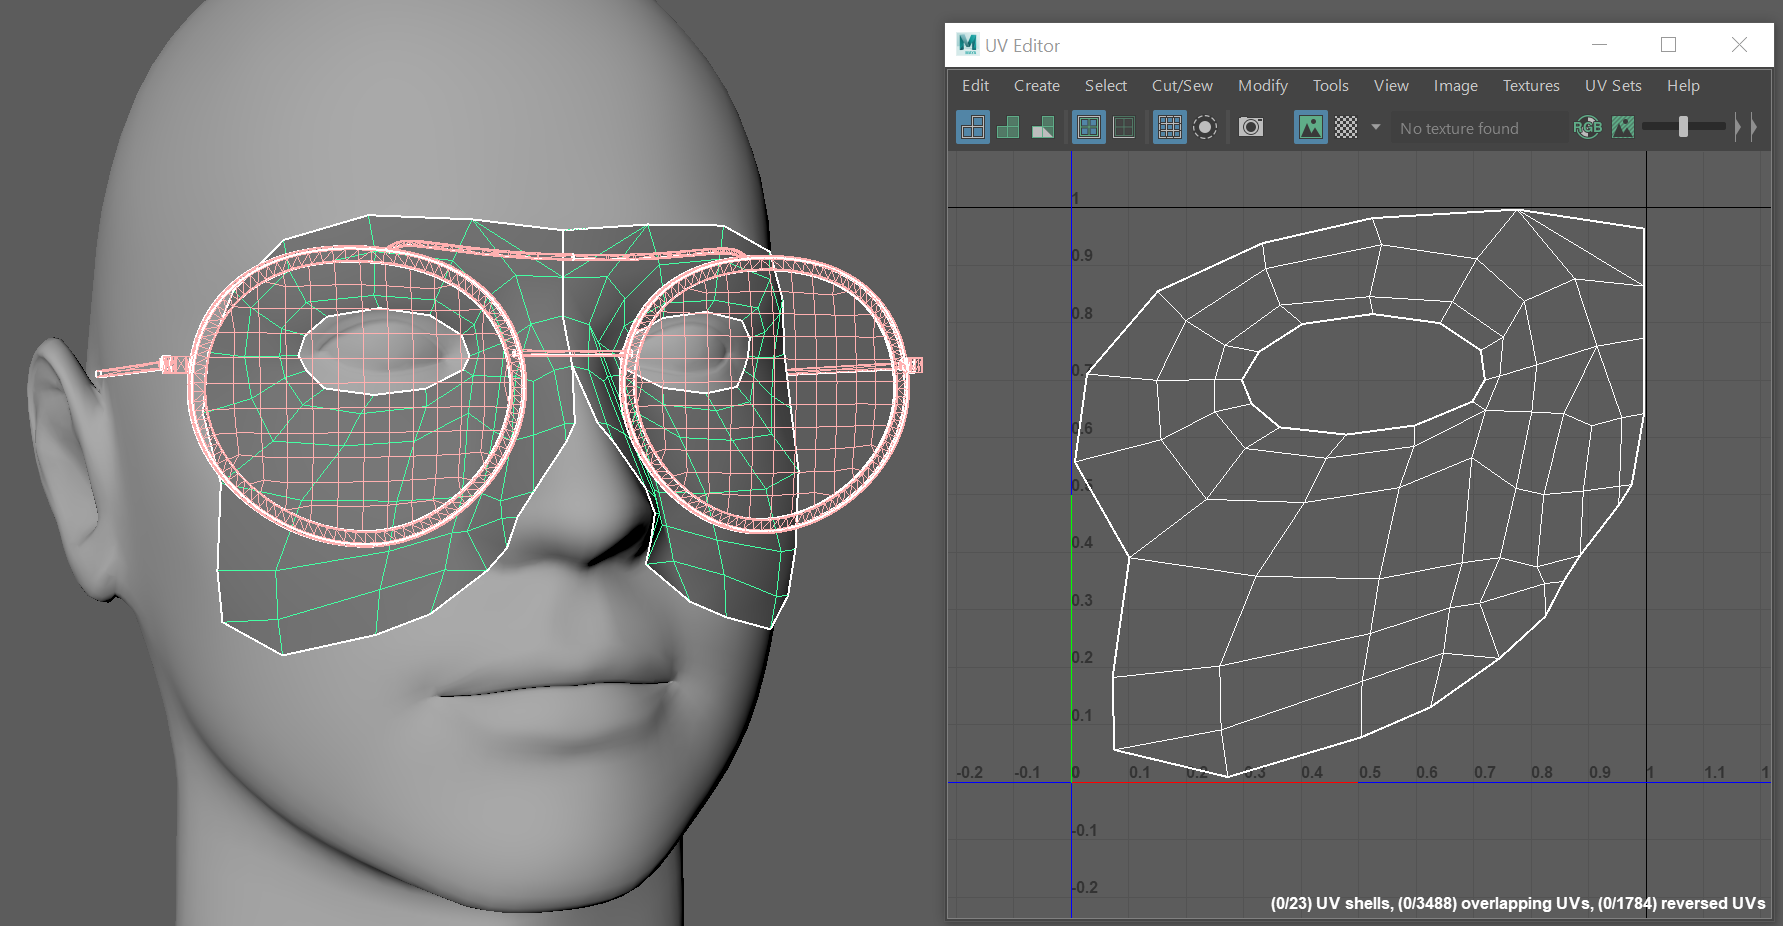
Design your model of glasses in any 3D editor. Here we import the model created in the MAYA 3D editor.
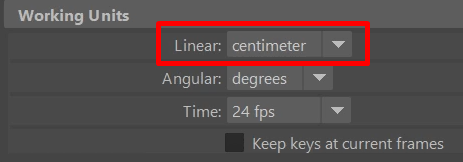
To make sure the glasses will position correctly on the face, we need to configure the working units of the 3D package in centimeters. We also need a head model which you can download here.
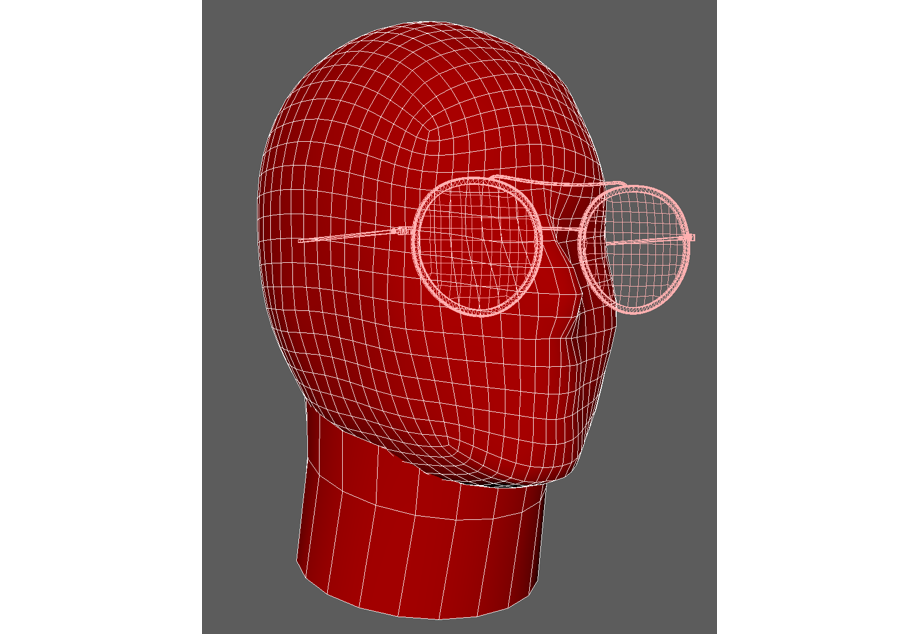
 Import the head model and scale the glasses.
Before exporting a model, make sure to reset its transformations. If you design in Maya you can use a utility Freez transformations. If you use 3D max, use the ‘reset transform’ utility.
Example. We positioned the model on the head and it has a scale not equal to 1. We apply the Freez transformations command and the scale of the model becomes 1, which prevents the artifacts on the surface of the model.
Shadow geometry#
The shadow geometry makes virtual glasses more realistic. You can make it symmetrical with one part mirroring another to optimize UV coordinates.
Cut-off geometry#
The cut-off geometry cuts the part of the glasses that goes behind when the user turns the head. It copies the model of the head but has fewer polygons.
Materials#
- mat_cut for cutting off geometry
- mat_lens for lenses. We can later assign a separate shader to this geometry.
- mat_frame for the frame
- mat_shadow for the shadow
Textures#
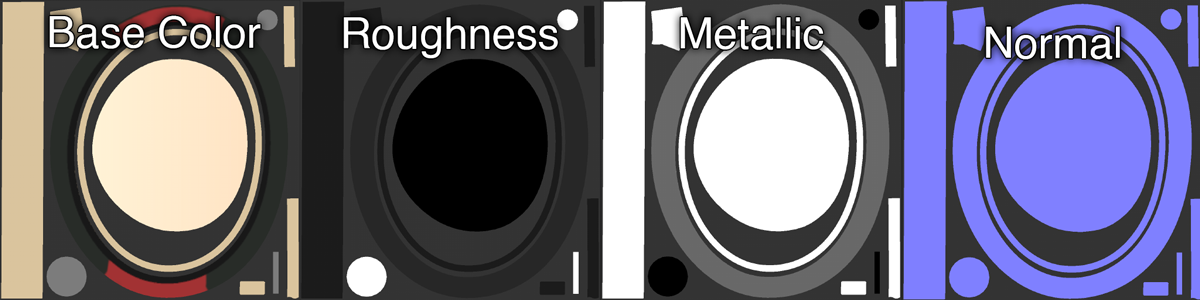
We need BaseColor, Roughness, Metallic, Normal textures. We made them in the Substance painter.
This is what transparency looks like. The shadow from the glasses on the face for the mat-shadow material is saved as transparency.
The optimal resolution is
- 256x256 pixels for glasses
- 128x128 pixels for the shadow
Export effect files#
- Create Effect Folder and name it.
- Create the src folder inside Effect Folder where we place the source files.
- Export the geometry of glasses and shadows to the glasses.fbx file in the scr folder. You can use the default settings for export. Turn off the animation if your effect does not have it.
- Export the cutting off geometry to the cut.fbx file in the scr folder.
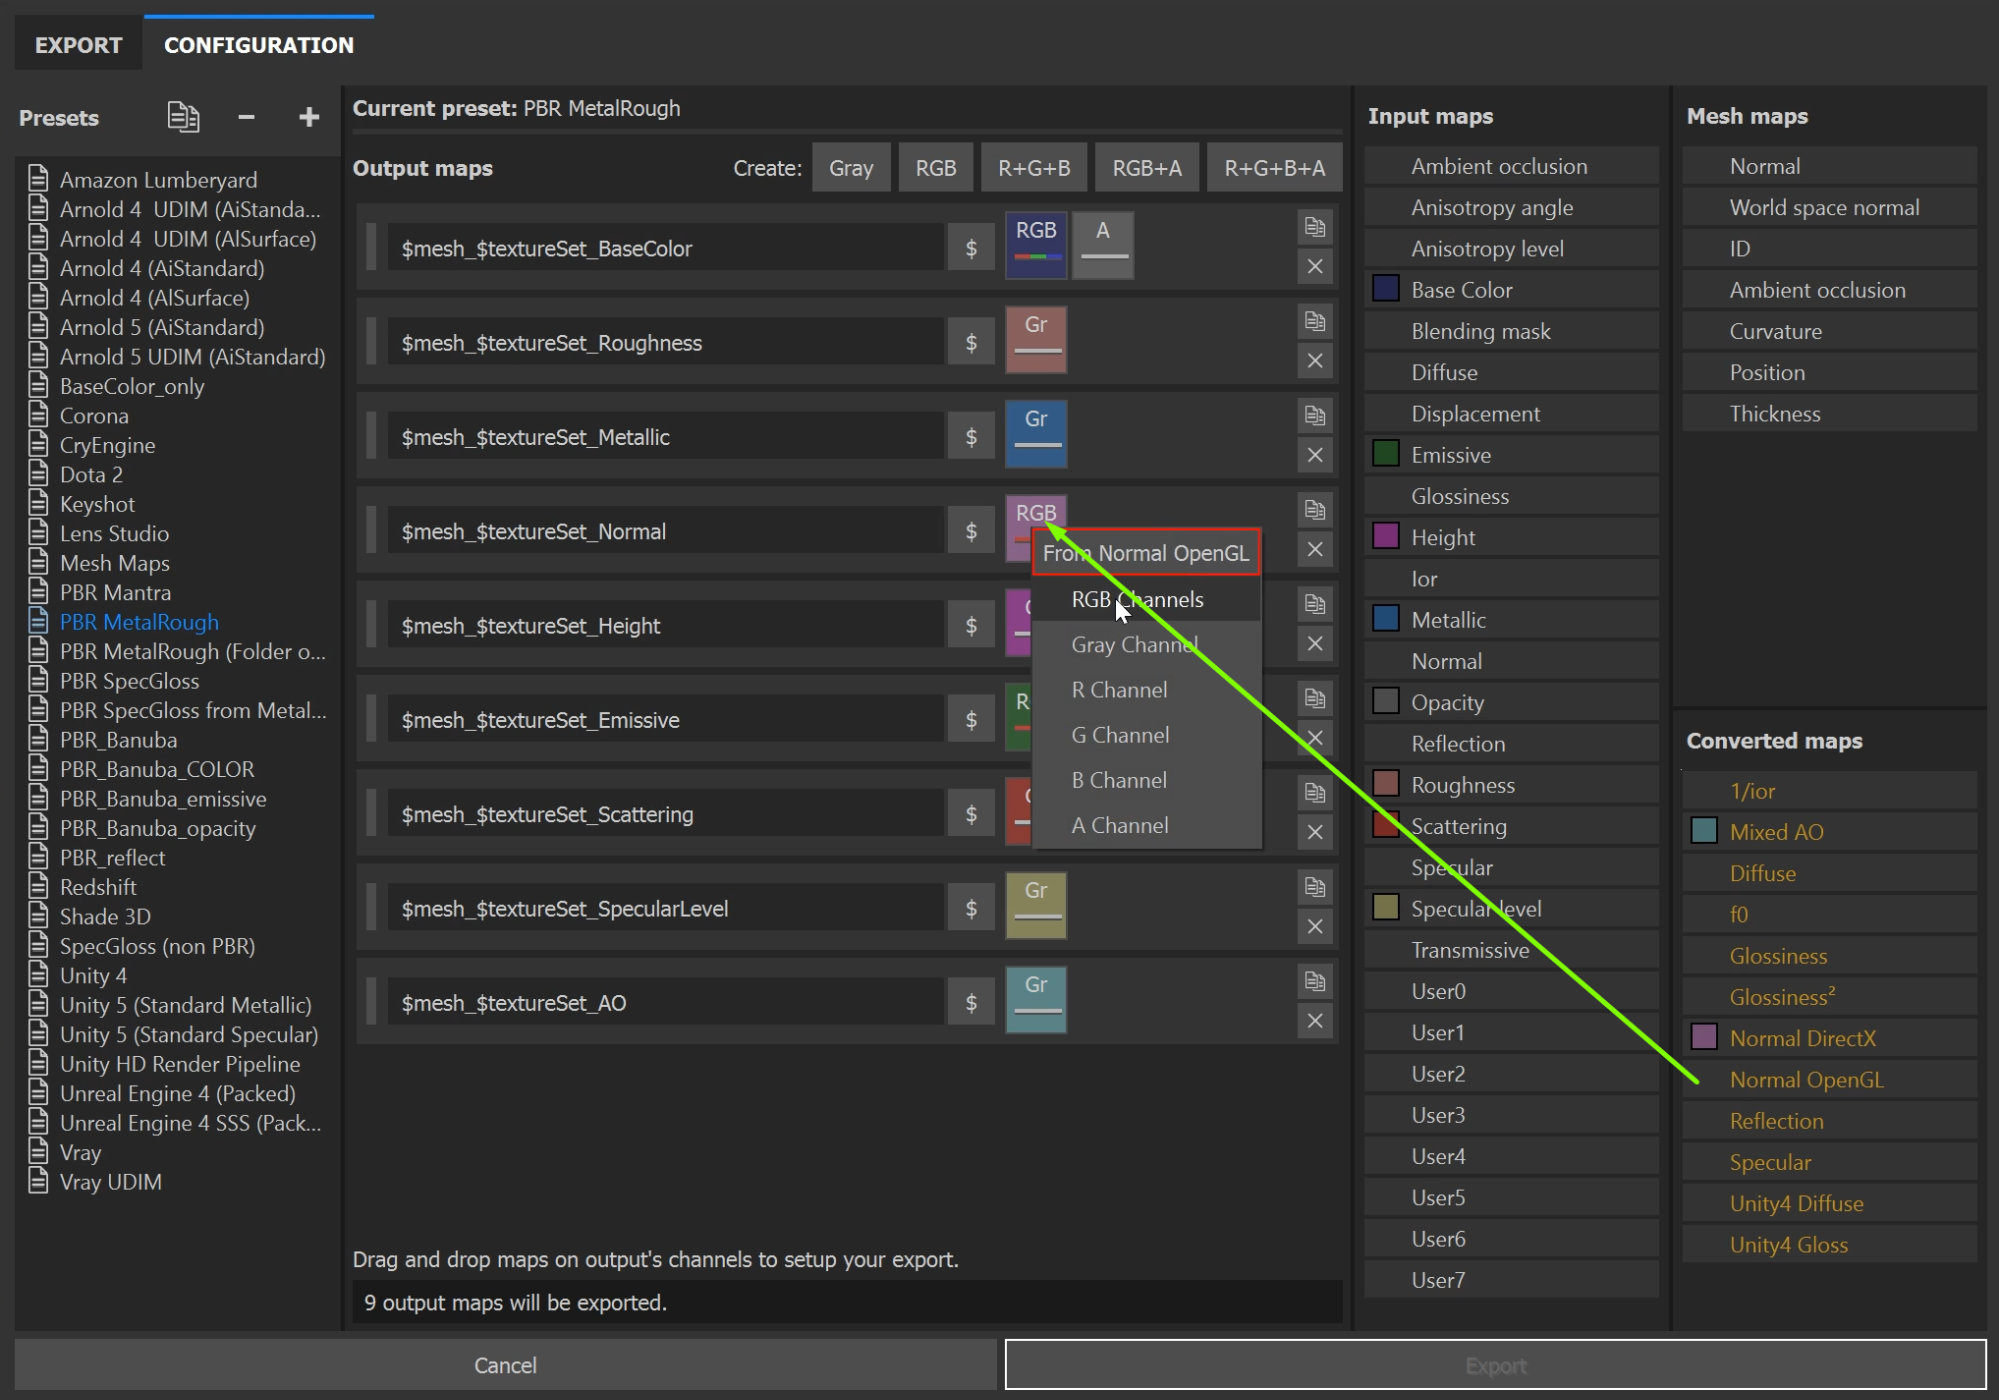
- Export textures. We use configuration created on the basis of the built-in PBR MetalRough configuration. We deleted all unused textures except for BaseColor, Roughness, Metallic, Normal, and Emissive texture which we need in some effects.
Here you also need to change the Normal texture setting. From the Converted maps section you need to drag Normal OpenGL instead of the Normal DirectX. When exporting textures, the Filter Editor converts them to KTX format.
Effect construction#
- Open your effect in the Filter Editor. We see it picked up all the textures in the src folder.
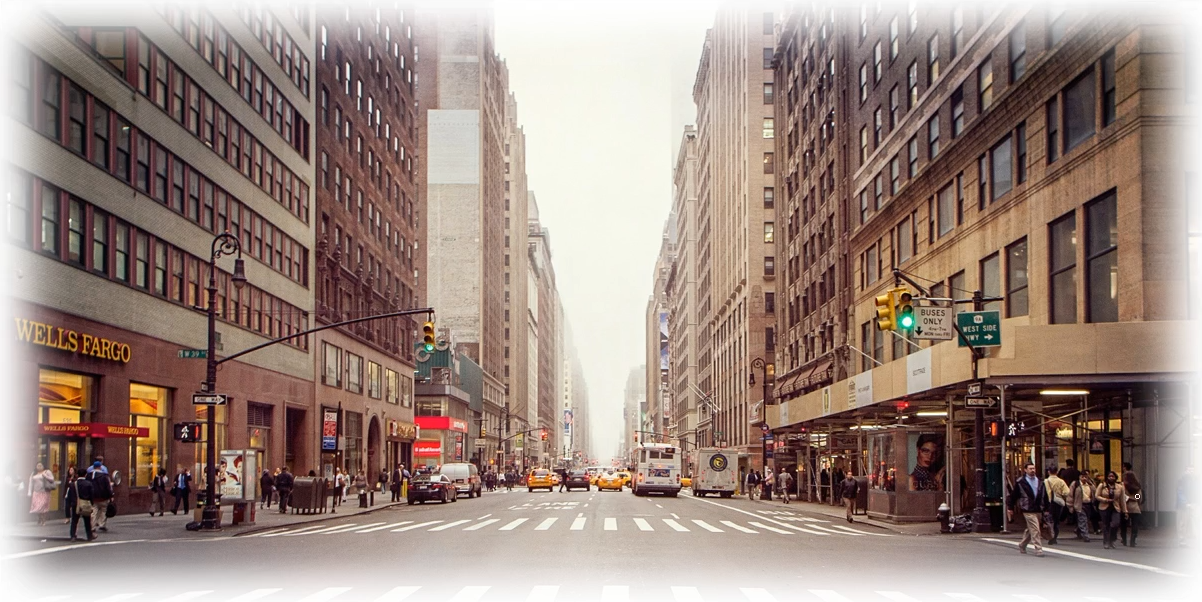
- Add HDRI texture for realistic rendering of the objects in the scene. We’ll use it for IBL (image-based lighting).
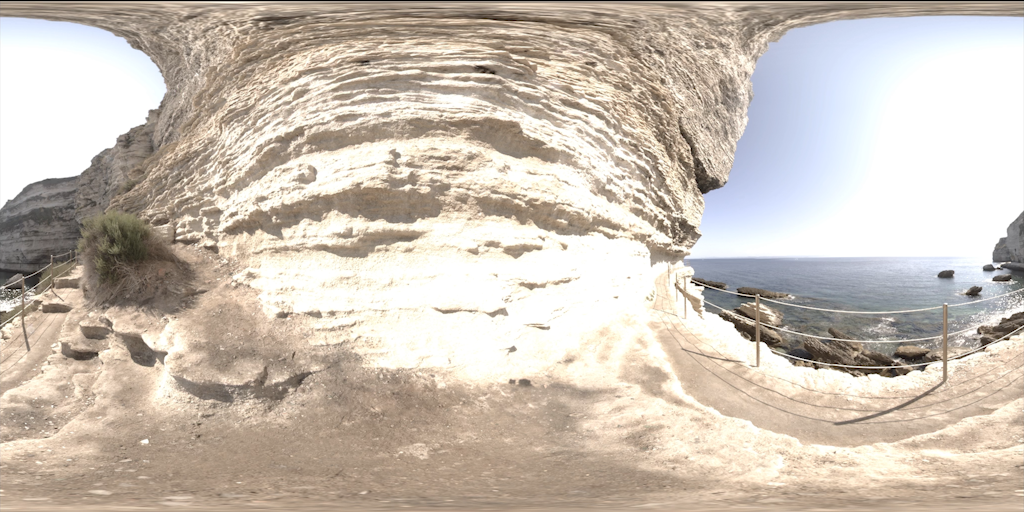
- Refresh the Effects Constructor, and the HDRI texture appears in the TEXTURES tab.
- Click ‘Construct’ and the textures in KTX format appear in the effect folder.
- Set up the Draw Order of the materials in the Rendering tab. The effect works best if we place the mat_lens material at the very bottom, then comes mat_shadow, then mat_frame and the cutt-off material on top.

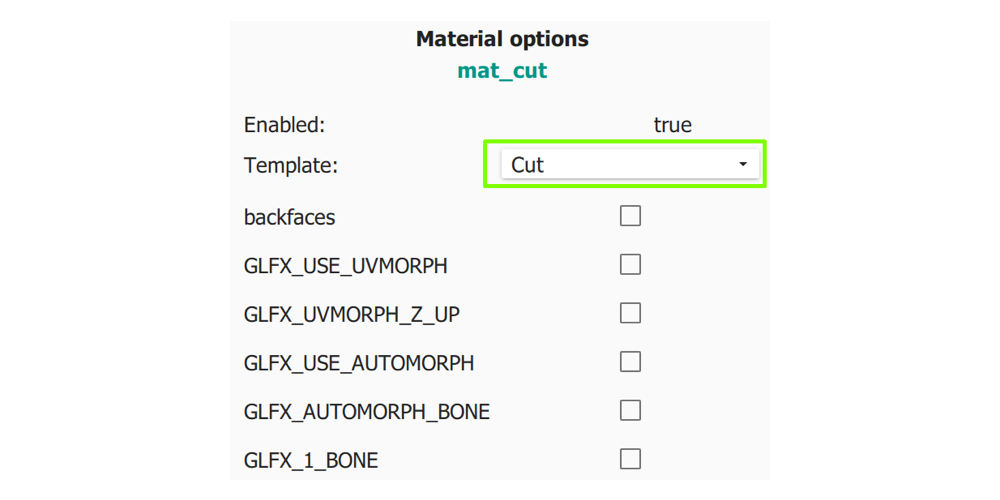
- Set up the mat_cut material. Select it and specify the CUT setting.
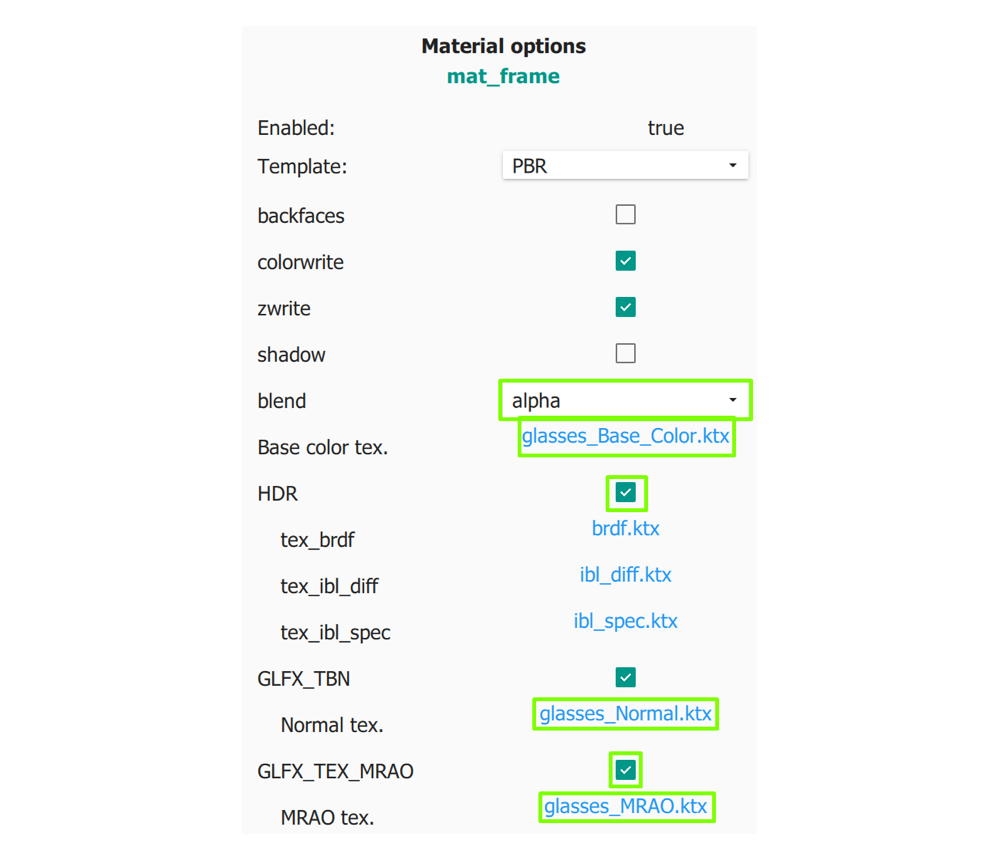
- Set up the mat_frame material. In the blend option choose Alpha, because the frames use transparency.
For Base Color, we select the corresponding KTX texture. We select the HDR option since we use image based lighting. Then we select the Normal texture. Metallic and Roughness textures were combined by the Filter Editor into one MRAO texture, so select this option and use the corresponding texture.
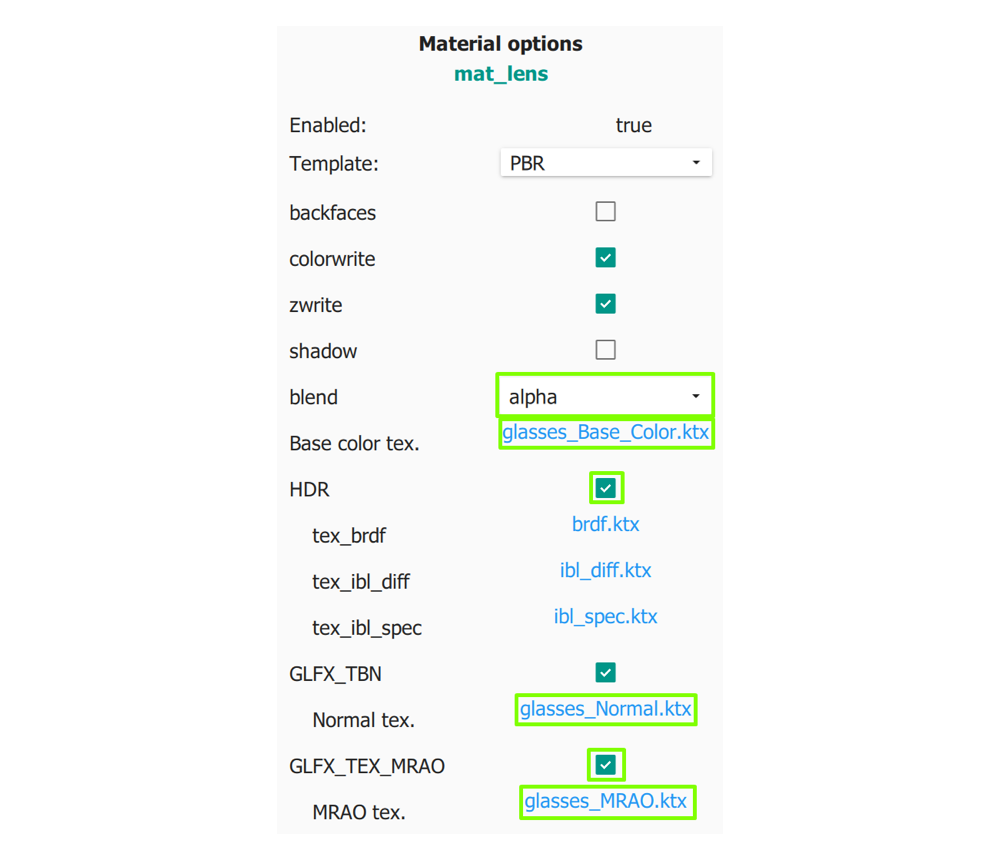
- Set up the mat_lens material. It has the same settings as frames, so we repeat previous steps - Transparency, Base Color, HDR, Normal and MRAO.
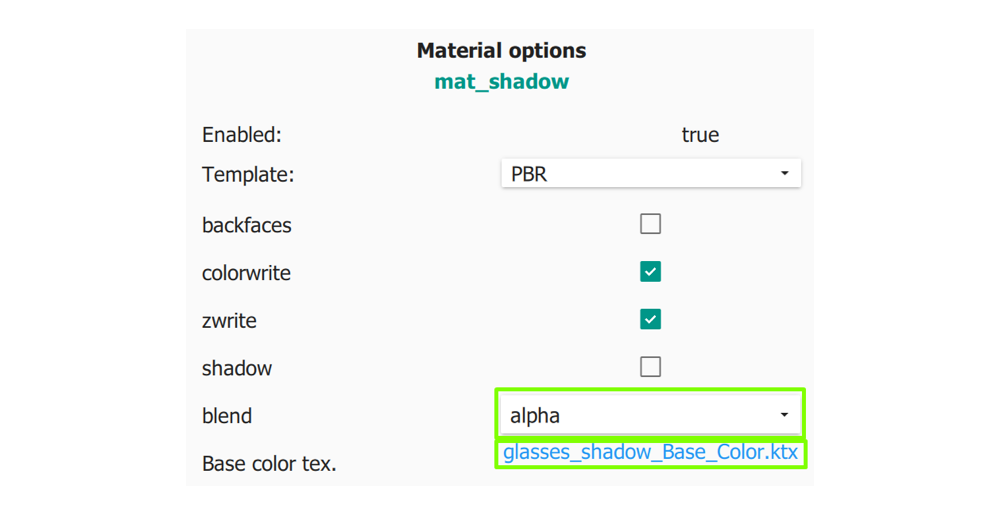
- Set up mat_shadow. Select alpha in the Blend value and point to the Bace Color texture.
Level up: Adding shaders#
You can use the shader and achieve better reflections in glasses. For this you’ll need the PNG texture.
- Copy your PNG texture to the effect folder.
- Add the prepared shaders for shadows and lenses to the same folder.
To enable our shaders, we need to edit the cfg.toml file which contains the material settings.
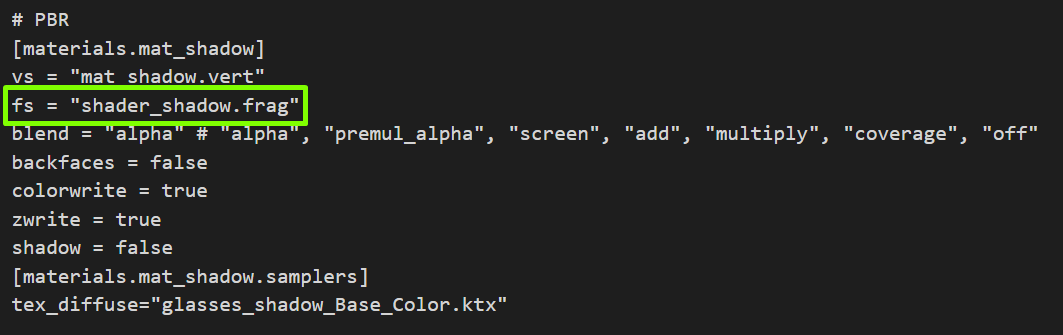
- In the mat_shadow block, remove the textures that the new shader will not use.
- Edit the line where we write the name of the new fragment shader.
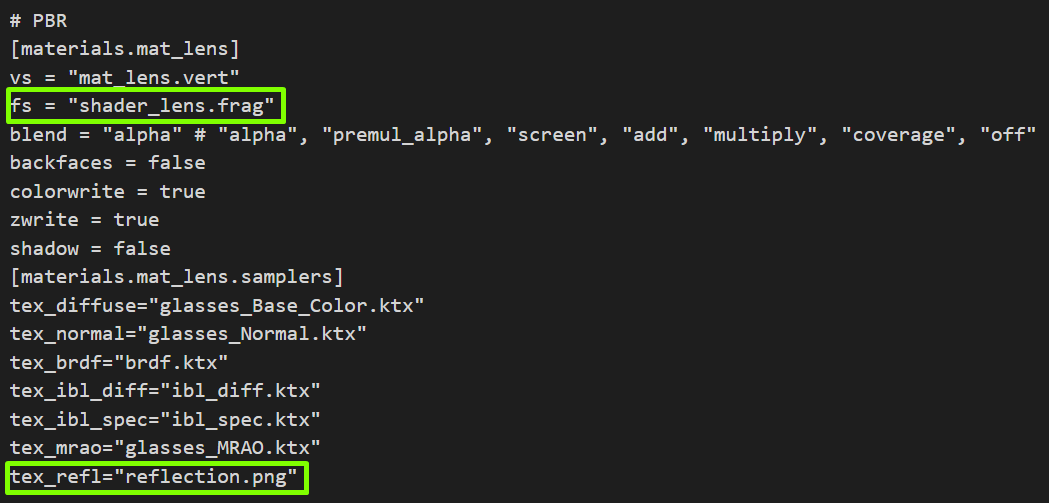
- In the same way, we replace the name of the shader in the mat_lens block with the one we saved in the effect folder. In the mat_lens material setup, we need to create the tex_refl parameter that uses the new shader and point to the texture to reflect reflection.png.
 Save the changes and drag the effect folder into the viewer window. You can see how the reflections improved.
 - Clean the effect folder. Delete unused files like the default textures, old shaders, the cubemap env.ktx file created by the Constructor, and also the KTX glasses_shadow texture files that are not needed.
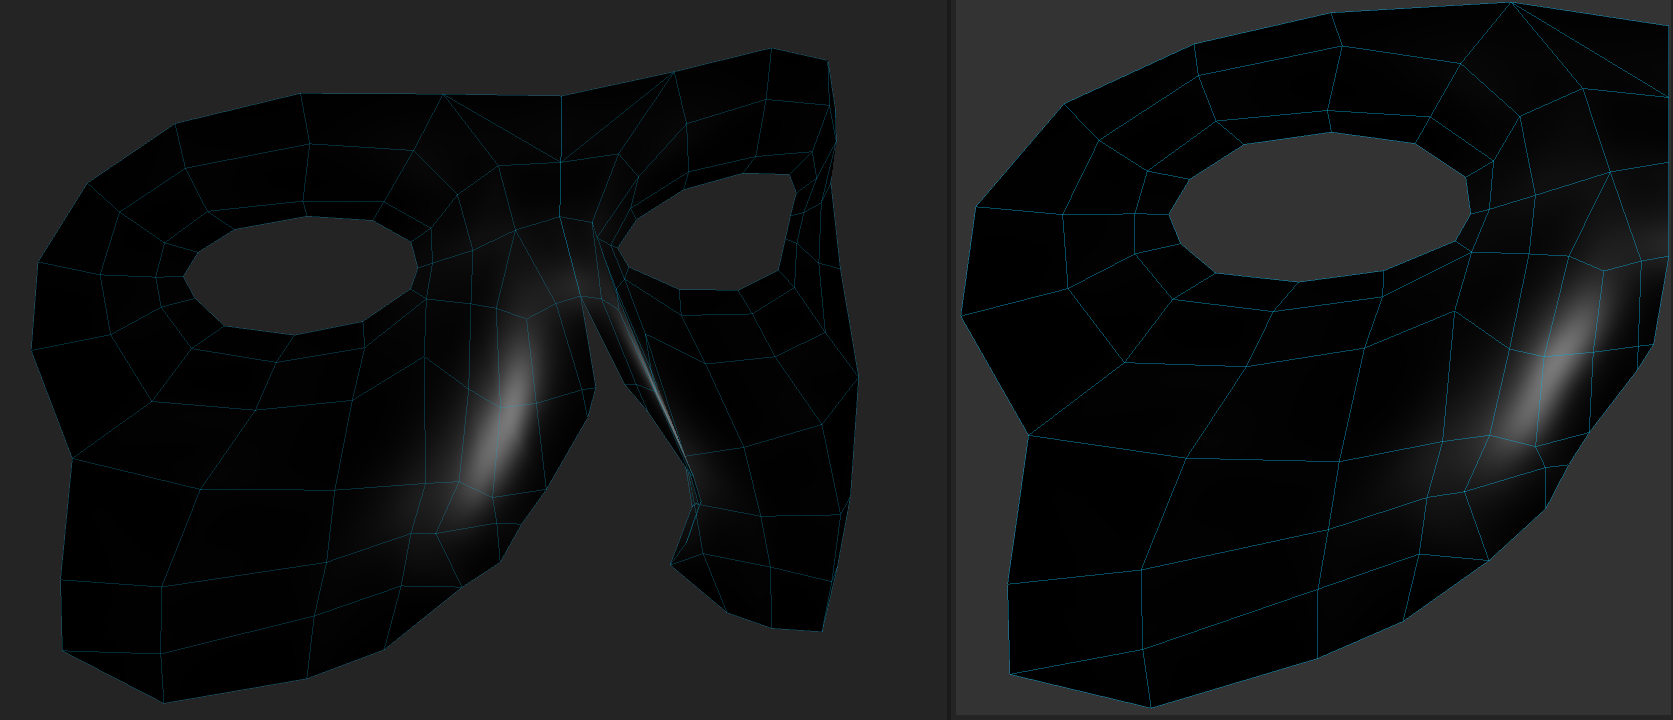
Lifehack. For lenses to have beautiful reflections, its geometry must have the correct normals, like a convex surface. We create such normals in the houdini package by transferring the normals from a compressed sphere to the lens geometry. You can make it in any other package by compressing the sphere by one of the axes and cutting out the lens geometry from it, or use transfer attributes.
Create amazing effects and have fun.
Download glasses try on effect with sources